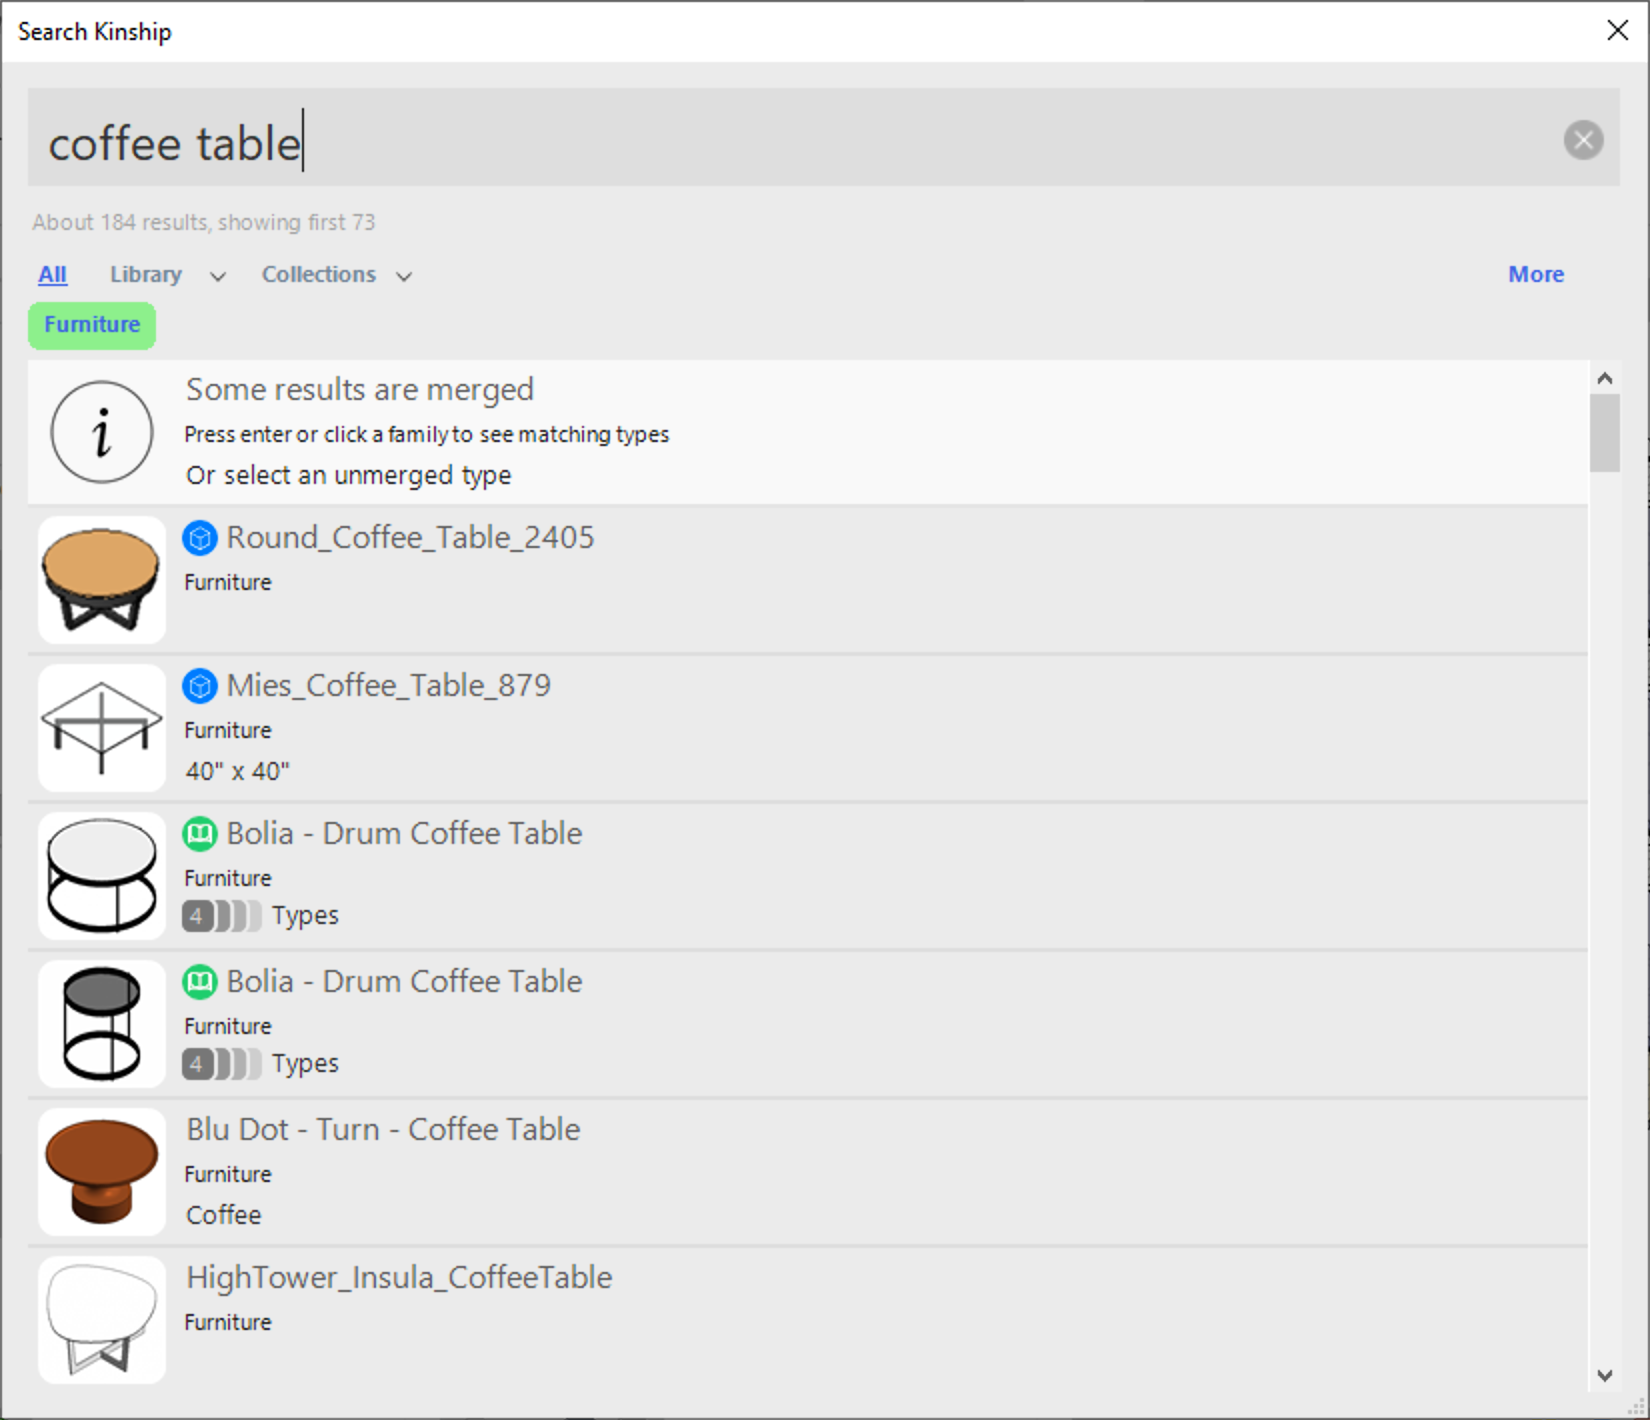
Secrets of Revit Content Management: Project-Specific Libraries

Every BIM Manager wants to have a great Revit content library – that one place where all your users can go to find the standard content they should be using.
But inevitably, there will be certain projects that need to use different content. Maybe a client has their own library that they insist on using. Maybe a project needs to meet local standards or requirements that usually don't apply. Maybe you use unique coding for each project and simply need to tailor your family names to match.
So how can you make such content available in an efficient manner for the projects that need it?
The Problem with "Traditional" Approaches
Putting project-specific content in your main library is probably not a good solution. It will be difficult to identify and manage separately from your standard content. And it will likely end up in other projects where it shouldn't be used.
One approach we've seen is to make it the job of a project manager or BIM coordinator to pre-populate models with the specific content that's needed. This can work if you have ample resources, but it's very time consuming and can lead to bloated models.
Another method is to have a project folder somewhere (on the network, in BIM360, etc.) and save all of the project-specific content there. This works if everyone remembers to put the necessary content in the folder and to go there for the content they need. The reality is usually fuzzier.
In all of the above approaches, there's also no easy way to tell if the content gets modified, or if content ends up coming in from elsewhere. It's either a bit of "cross your fingers and hope for the best", or a lot of tedious review work.
There is a Better Way – the Kinship Way!
If you're looking for a more efficient and effective way to manage and distribute project-specific content to your team, then you've come to the right place. Collections in Kinship make it easy to create project-specific libraries that users can quickly access when working on relevant projects.
All it takes is a few quick steps:
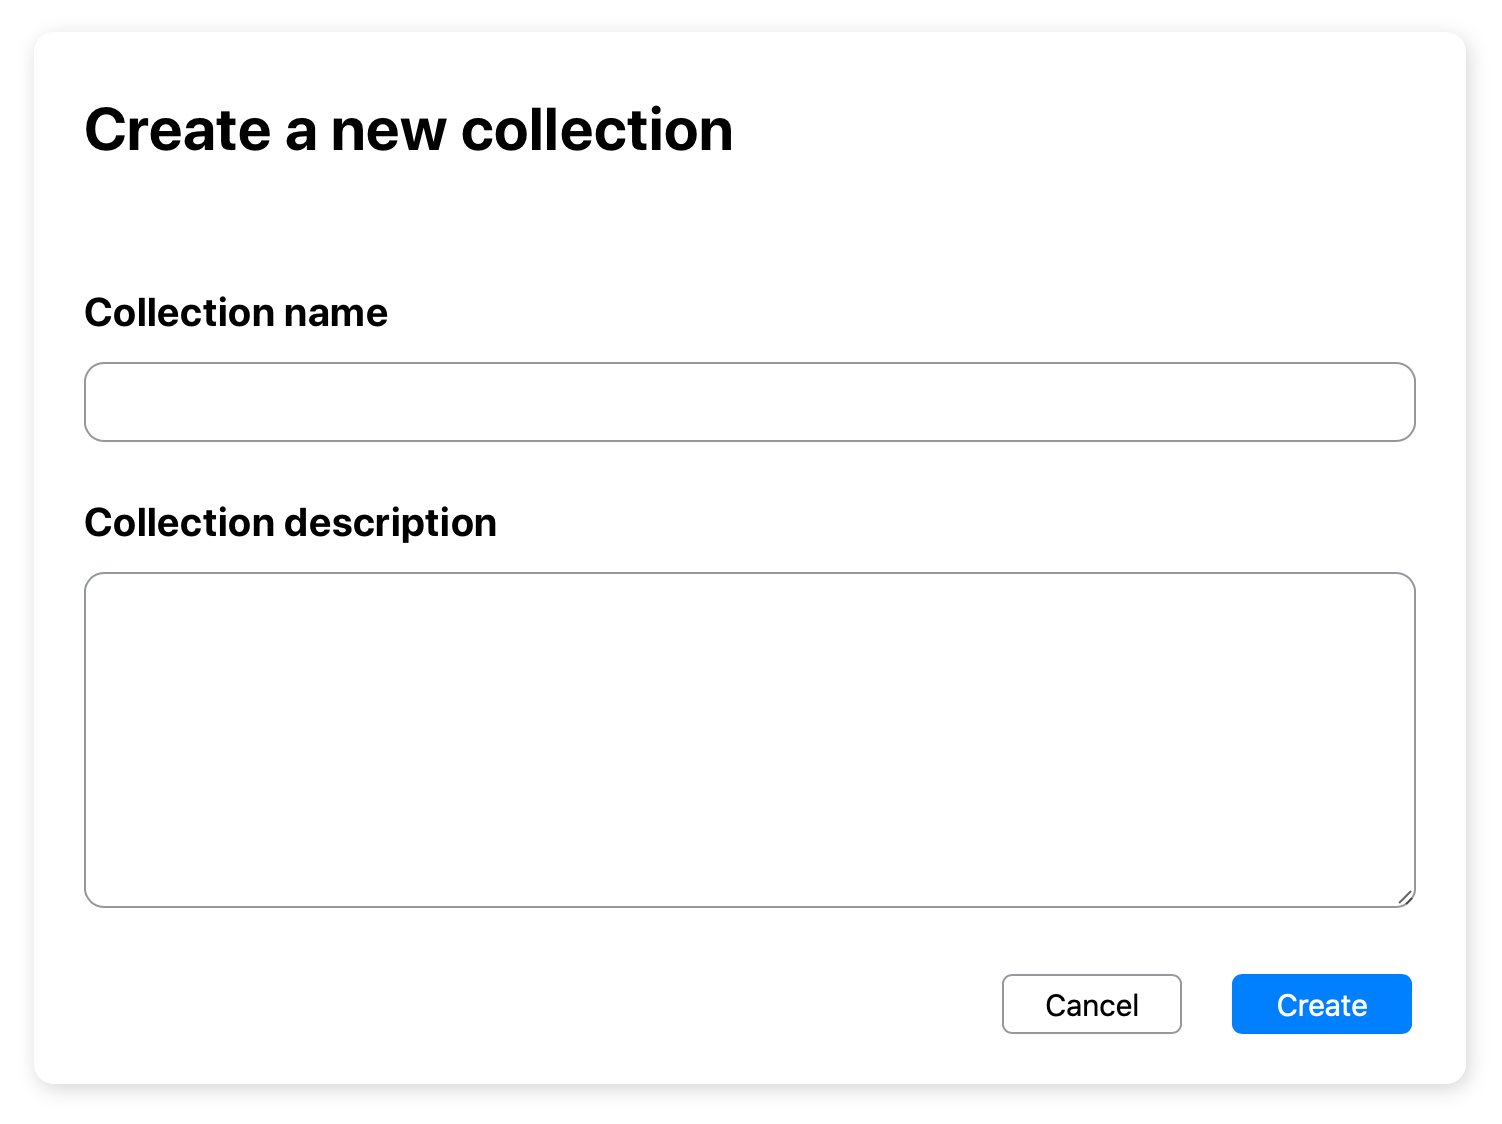
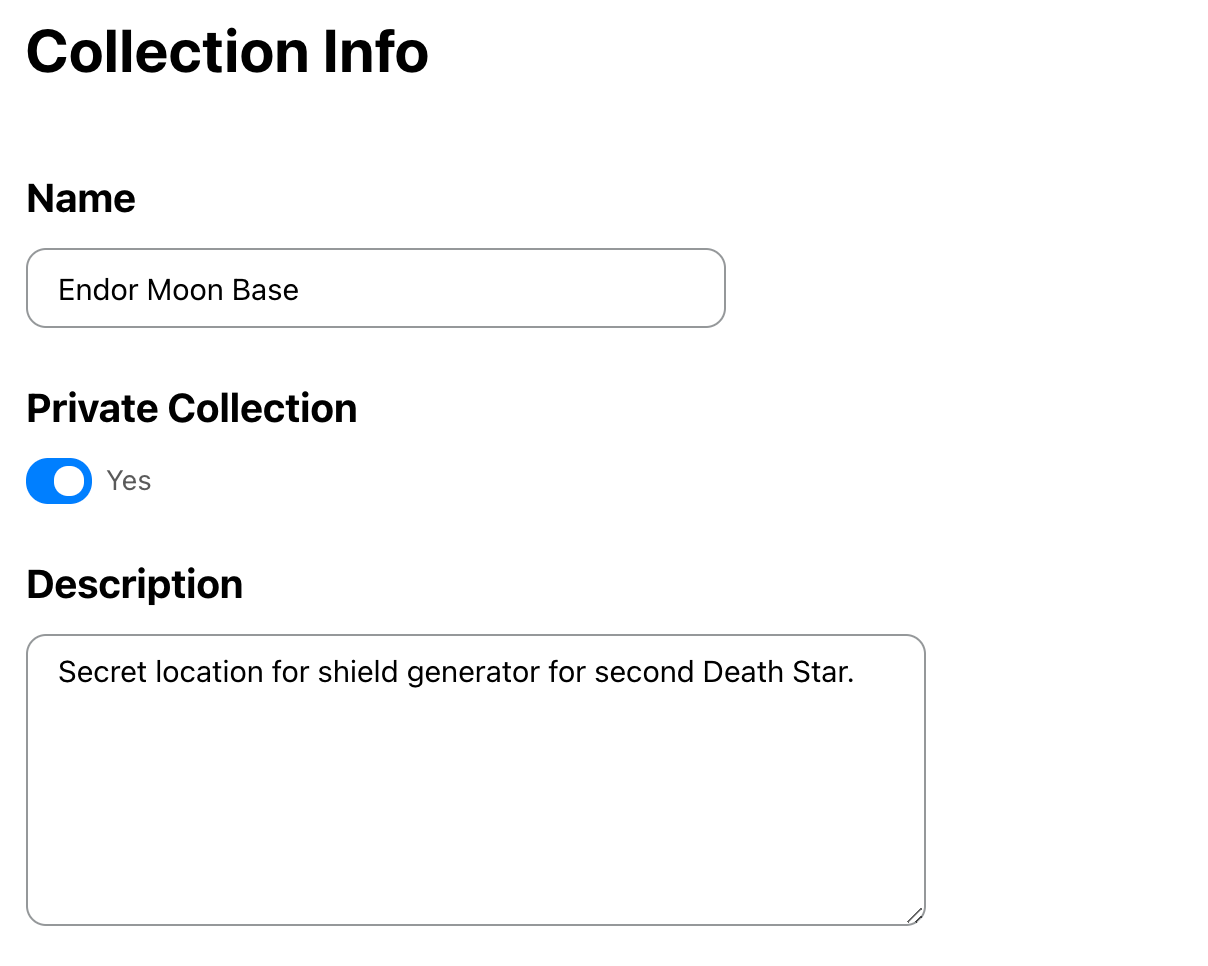
1. Create Your Collection
Go to your Collections landing page and click on "+ New Team Collection". From there, give your collection a recognizable name, like "Endor Moon Base". Optionally, you can add a description to give more context, such as "Secret location for shield generator for second Death Star."
2. Add Your Content
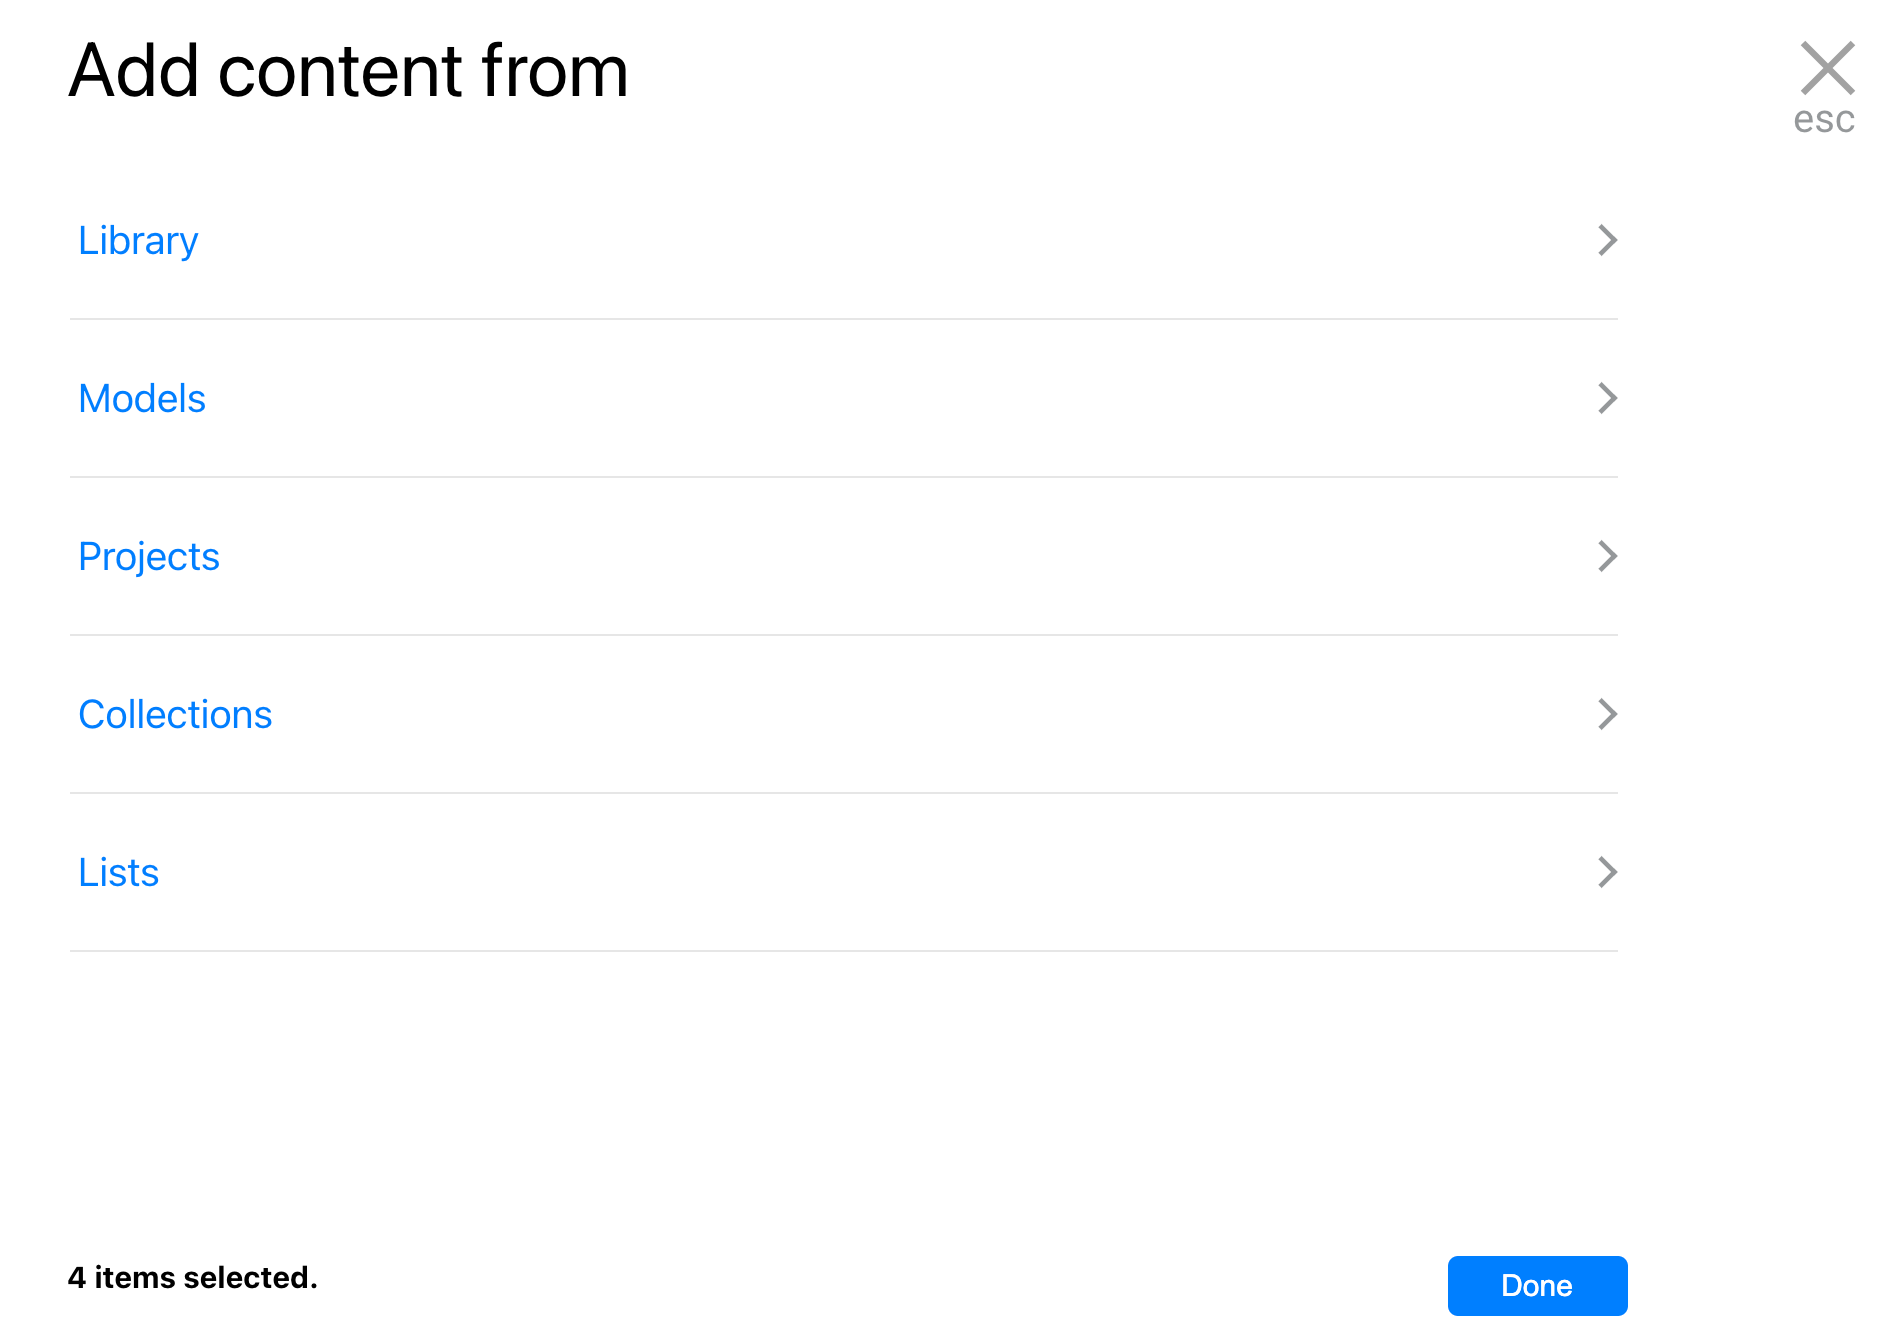
Add content to the collection either from your existing sources in Kinship (your library, projects, or other collections) or by uploading directly from Revit (from a local folder, network folder, or a model). To add content already in your Kinship account, click the "+ Add Content" button inside of the collection. To add content from Revit, click the "Add to Collection" button in the Kinship add-in panel.
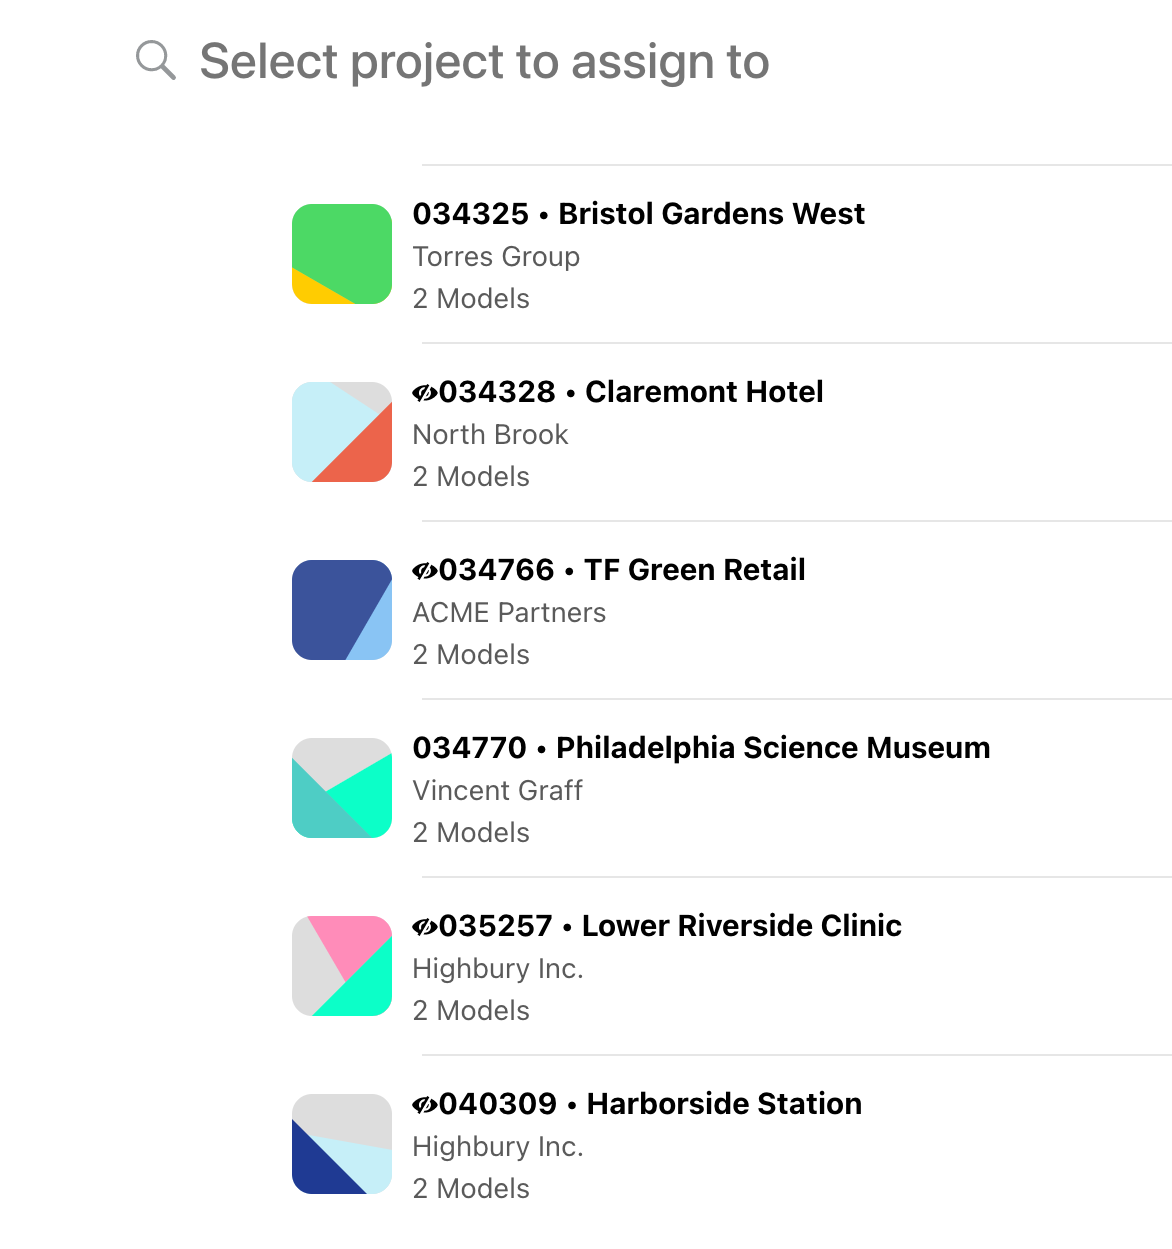
3. Assign the Collection to Projects
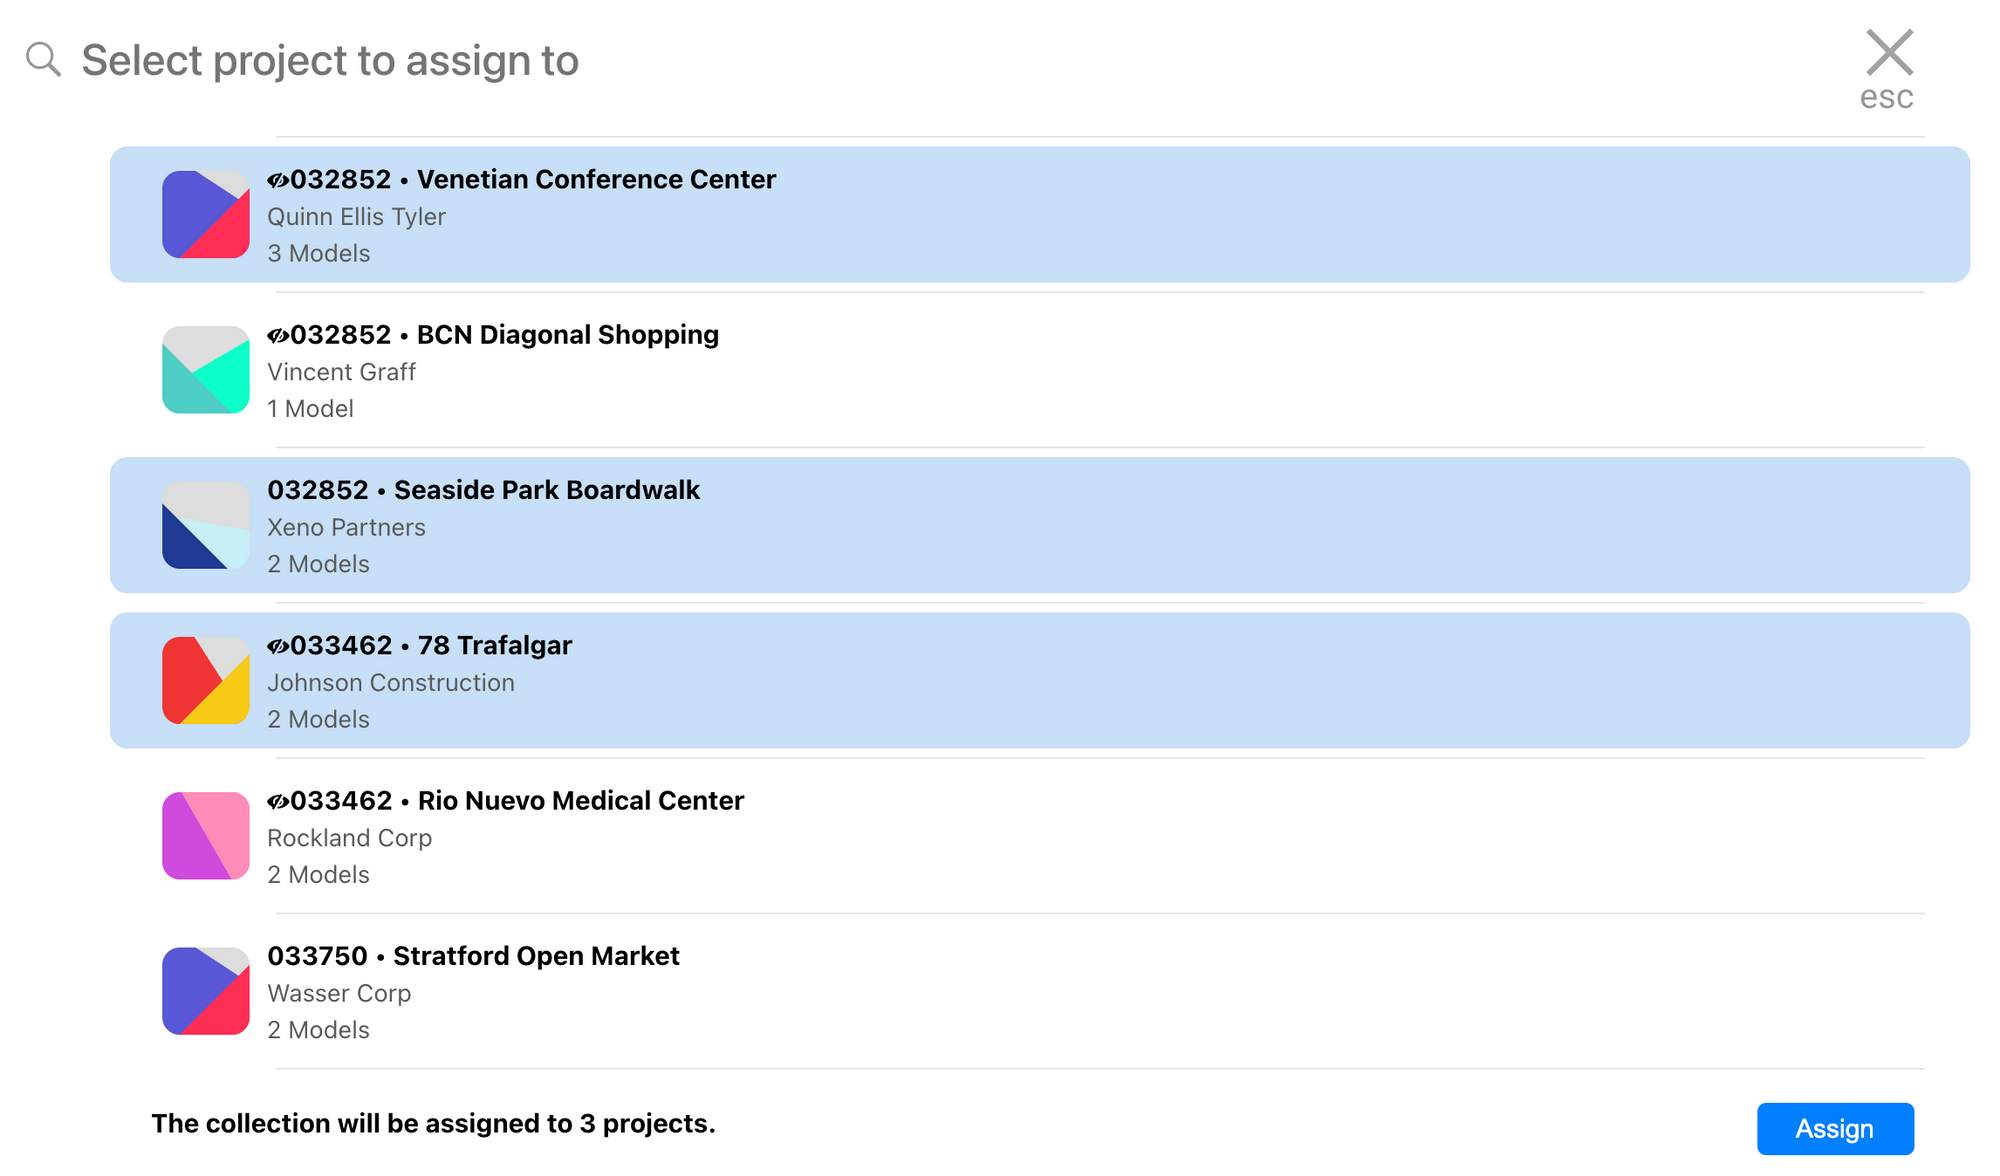
Once you've populated your collection with the right content, you're ready to assign it to the projects that need to use it. Click the More button in the top right of the collection page and choose "Assign to project..." From there, click on the projects in the list that you want to use the collection. You can also search for a project name to find it in the list. When you've selected the relevant projects, click the "Assign" button in the bottom right to finish.
Your Project-Specific Collection is Ready!
Once you assign a collection to a project, the content in the collection will appear as the top recommended content to users on that project.
When a user is working on a model in the project and uses Kinship to search for content, families in the assigned collection will appear at the top of their search results. Collection content will be highlighted with an icon indicating that the content is part of their project.
4. (Optional) Make the Collection Private
In the example of our "Endor Moon Base" collection, you might want to make sure that nobody working on non-Death Star projects accidentally uses that same content, or that it doesn't fall into the hands of a rebel spy in your ranks.
In such cases, you can set the collection to Private. This will limit access to only those users working on assigned projects and to your Kinship administrators.
Ready for More?
We'll be publishing more posts on the different ways that Collections in Kinship can help you manage special purpose content for your Revit team. Follow our blog or sign up for our email newsletter to stay up to date.
If you'd like to give Collections a try with your own Revit projects, contact us to request a free trial.