New Support for Filled Regions
Revit Filled Regions and Fill Patterns are now supported in Kinship. Learn how to quickly and easily manage them in your library and collections.
New Support for Filled Regions
Revit Filled Regions and Fill Patterns are now supported in Kinship. Learn how to quickly and easily manage them in your library and collections.

We draw Filled Regions in Revit to denote areas in project views or as part of detailing in a component or annotation family. Within the Filled Region's type settings, we can find what patterns and colors the type uses, and whether its background is transparent or opaque.
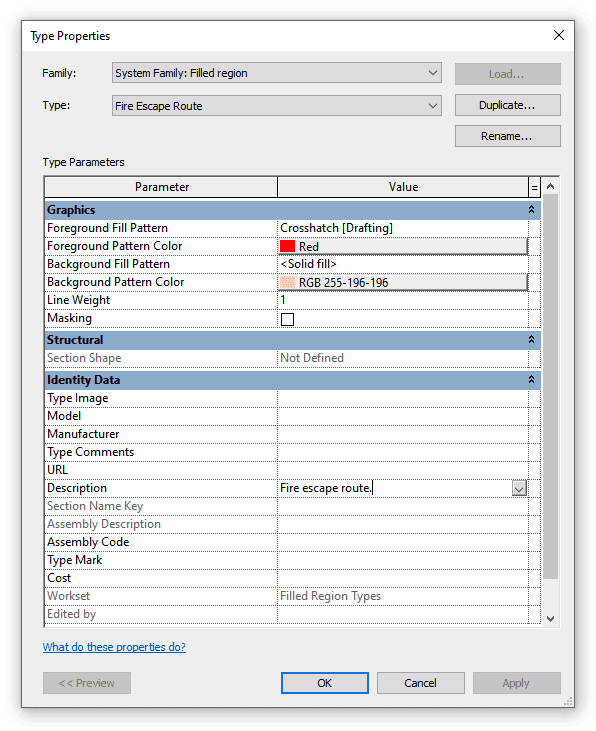
Fill Patterns in Revit are hatching patterns that can be applied to surfaces or materials, or that can be used in Filled Regions as background and foreground patterns.
There are two types of patterns:
Model - Scale is independent of the view scale and refers to real-world dimensions. Example: "Brick Course" is a pattern that represents bricks, the dimensions of which don't change depending on the drawing scale. Bricks are proportional to building elements across all drawings.
Drafting - Scale is dependent on the view scale and is used to represent annotative elements. Example: "Diagonal Hatch" is a pattern that represents an area on the drawing and should scale based on drawing scale. Hatch lines are identically spaced across all drawings.
While the use of Fill Regions within Revit families is often quite basic – an occasional solid fill or a crosshatch – they are used extensively in projects. It is often the case that, despite our best efforts, a Revit project ends up with the following nightmare set of Fill Regions:
Filled Region 1
Filled Region 1 (1)
Filled Region 2
Old do not use
What a mess!
If the above sounds all too familiar, then we have some great news. Filled Regions and Fill Patterns are now supported in Kinship!
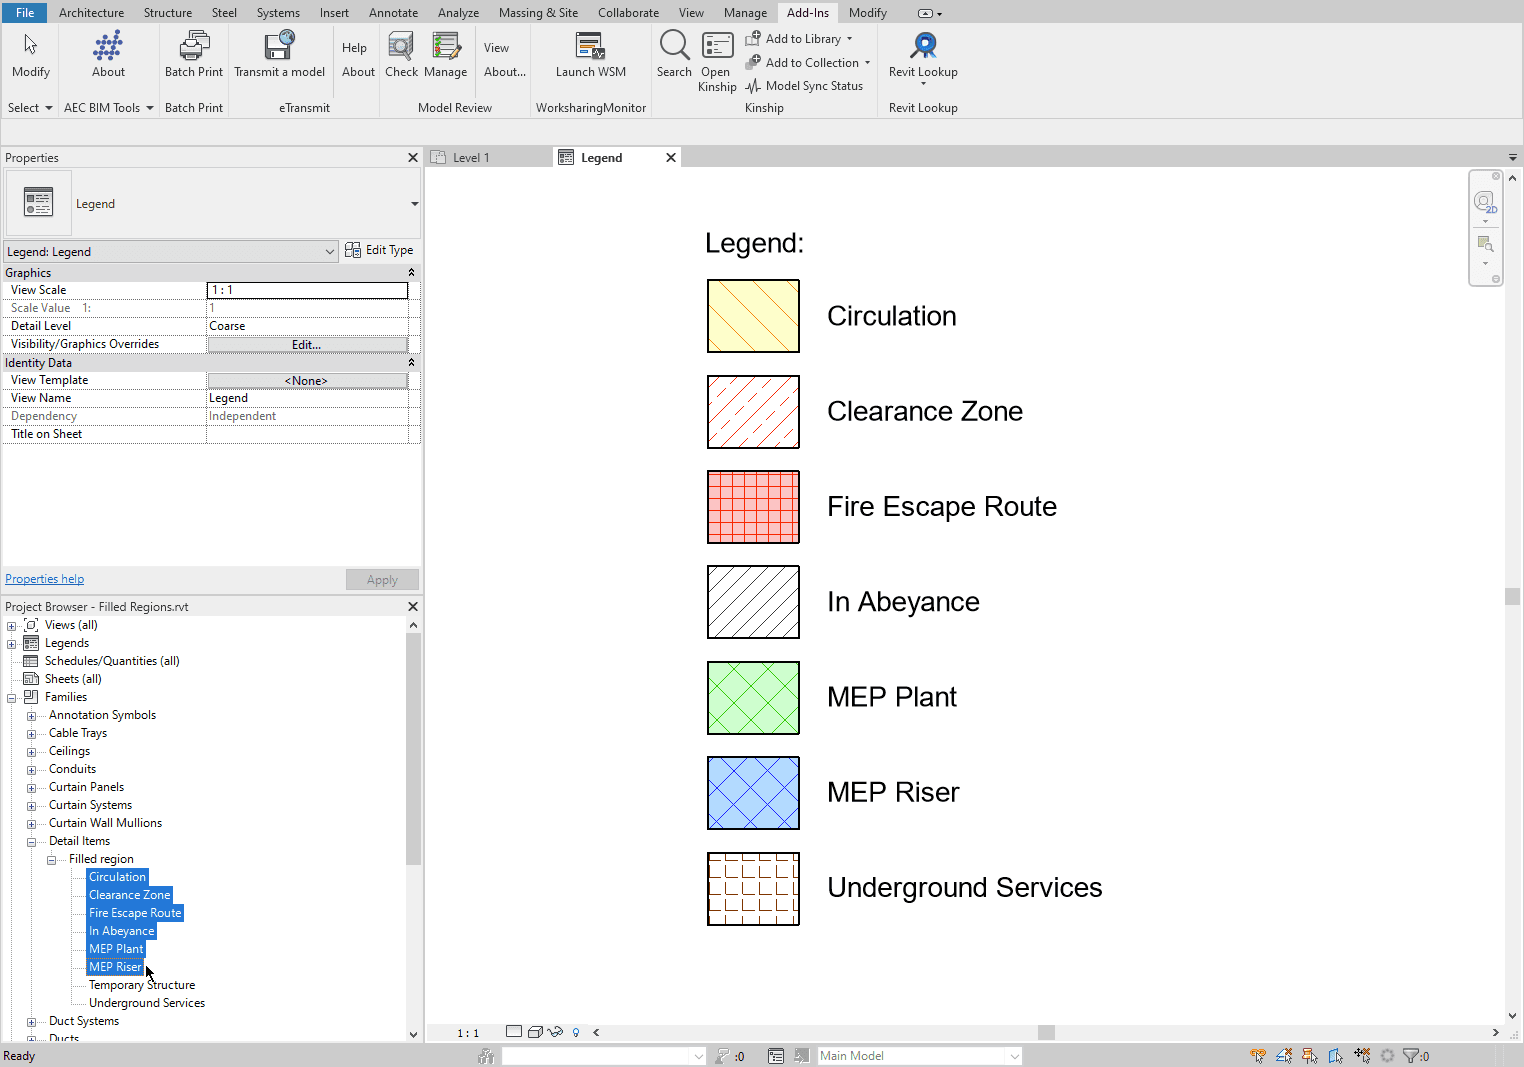
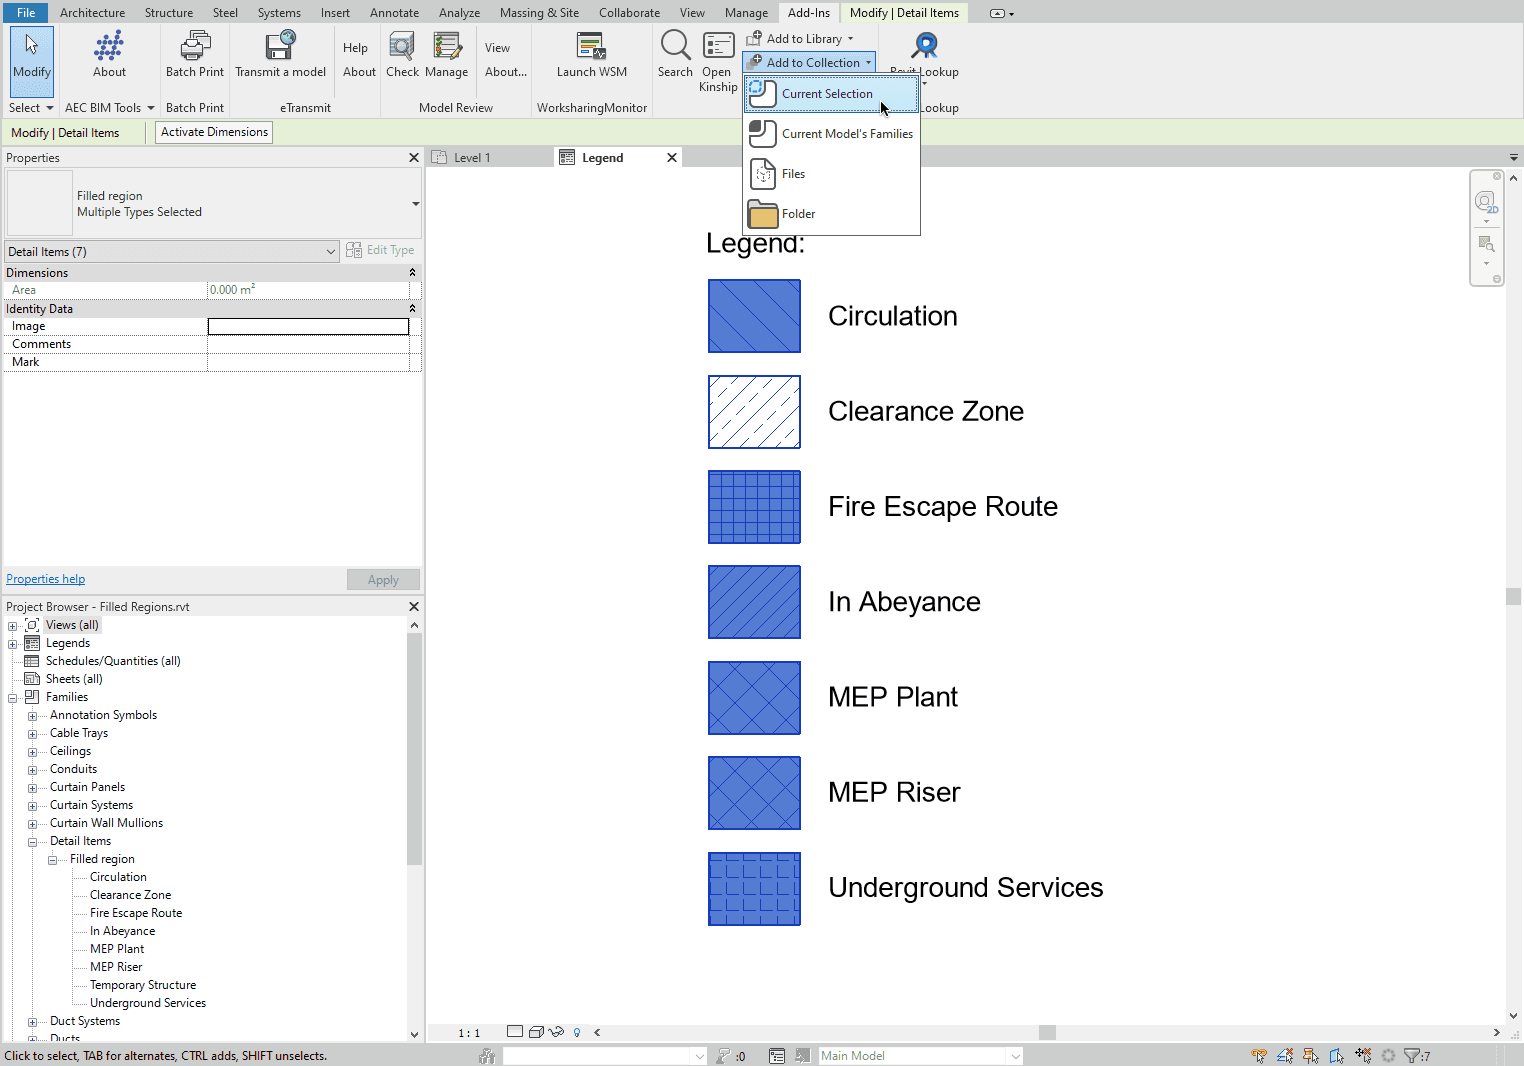
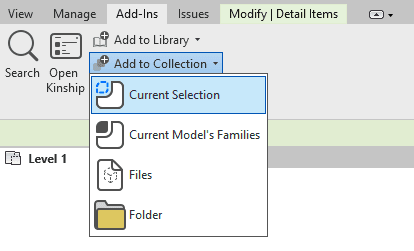
As always, we've made them super easy to use. First, select Filled Region types in the Revit Project Browser, or select their instances in a view. Then add them to your library or collection using the Kinship add-in in the Revit ribbon. All selected region types will be added to Kinship, ready to be used in other projects.
If you use the option to upload "Current Model's Families", you will also find Filled Regions and Fill Patterns included in the content that gets added to your Kinship library or collection.
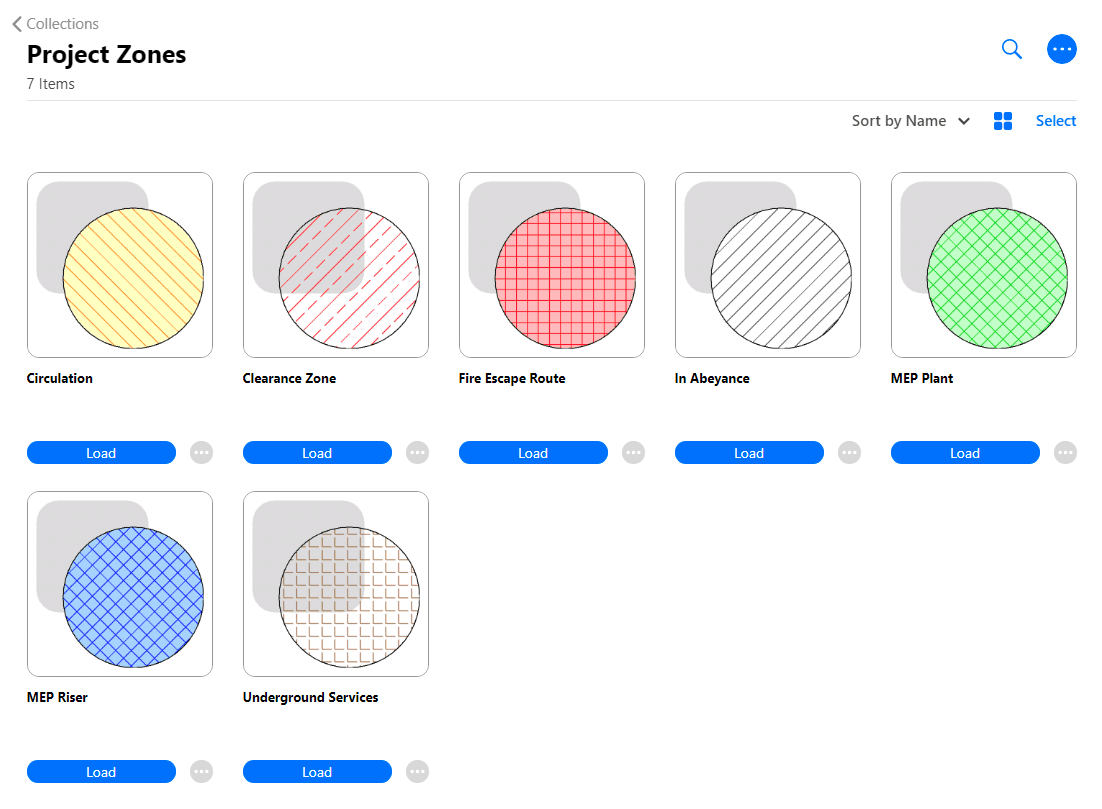
Best of all, we automatically generate a thumbnail image to show exactly how the fill pattern will look in a Revit model. Different foreground and background colors and patterns? Transparent or masking in view? We've got you covered.
Fill Patterns and Filled Regions also get picked up during Model Sync. Check your most recent model's families! You can now curate your office Revit standards from the website by selecting the Fill Patterns and Filled Regions in an exemplary model that's synced with Kinship and adding them to your library.
If you are currently using a container model to store your standards, and that model is not synced with Kinship, you can try the following workflow:
Add "Current Model's Families" to a temporary collection (just to keep them separate).
Select desired regions and patterns and add them to your library (or any other collection where you want to keep them).
Finally, delete the temporary collection.

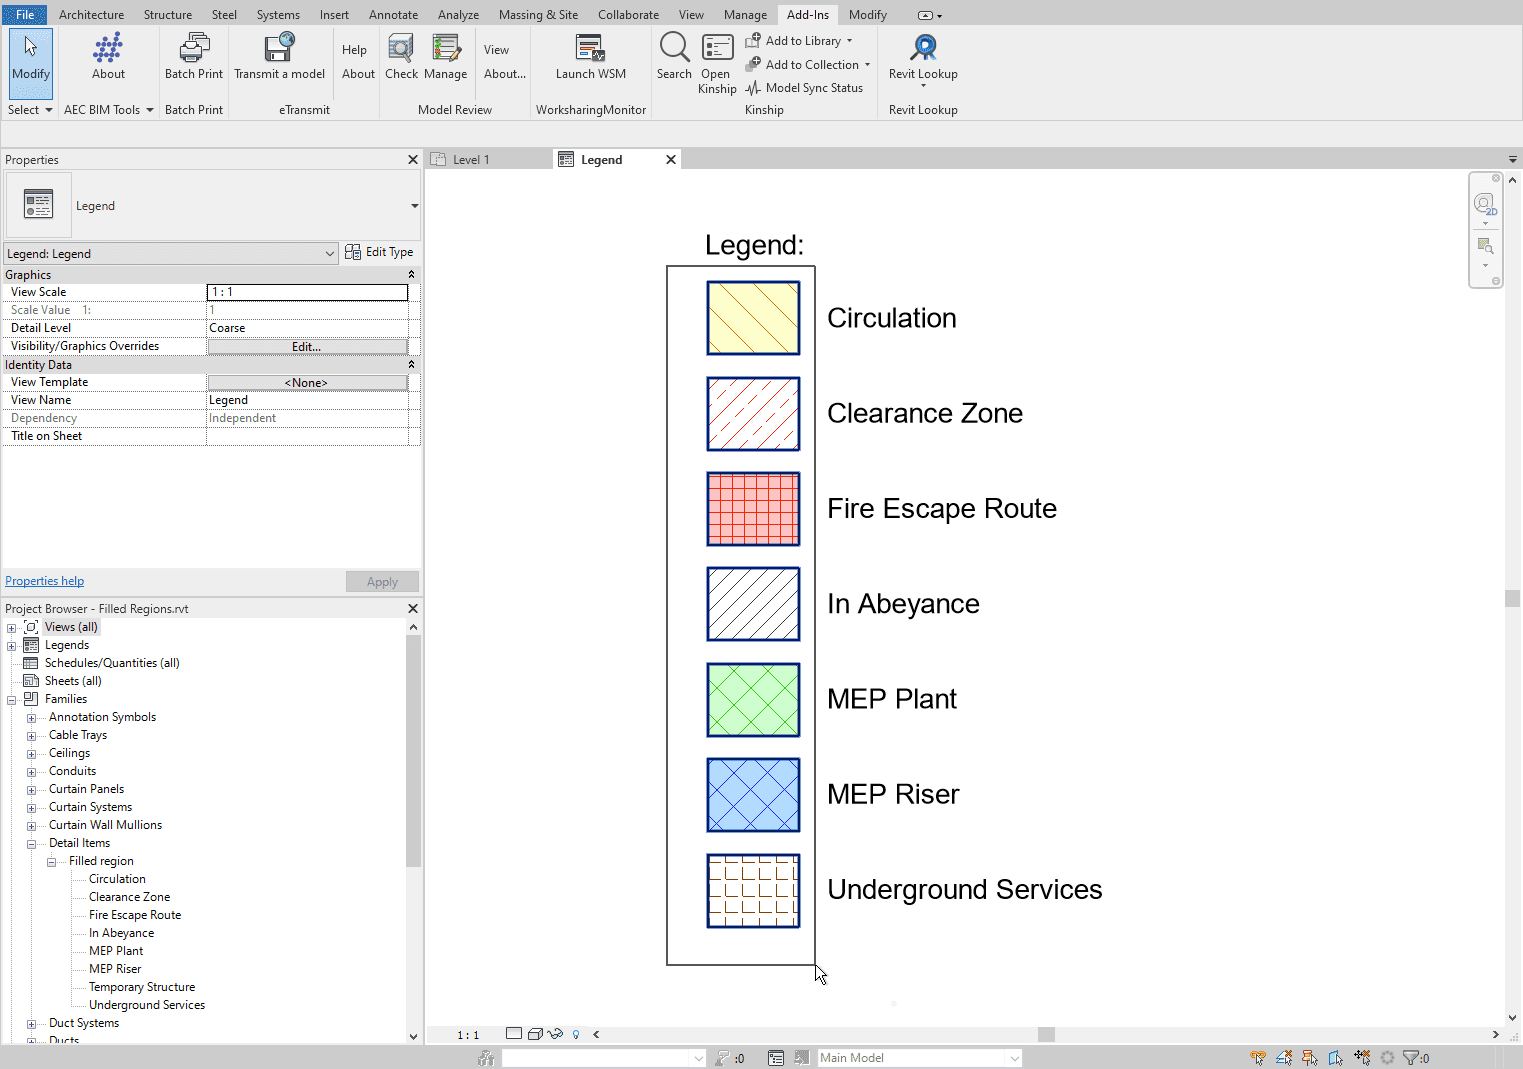
If your container model has views with legends or swatches showing Filled Regions, you can select those instances of filled regions and upload them to the library or collection directly - use the "Current Selection" option in the add-in panel controls.
That's it! No need to upload related Fill Patterns separately to make regions work.
In a follow-up post, we'll look at the naming for Fill Patterns and how to avoid potential issues with Revit's default functionality for system families.
We draw Filled Regions in Revit to denote areas in project views or as part of detailing in a component or annotation family. Within the Filled Region's type settings, we can find what patterns and colors the type uses, and whether its background is transparent or opaque.
Fill Patterns in Revit are hatching patterns that can be applied to surfaces or materials, or that can be used in Filled Regions as background and foreground patterns.
There are two types of patterns:
Model - Scale is independent of the view scale and refers to real-world dimensions. Example: "Brick Course" is a pattern that represents bricks, the dimensions of which don't change depending on the drawing scale. Bricks are proportional to building elements across all drawings.
Drafting - Scale is dependent on the view scale and is used to represent annotative elements. Example: "Diagonal Hatch" is a pattern that represents an area on the drawing and should scale based on drawing scale. Hatch lines are identically spaced across all drawings.
While the use of Fill Regions within Revit families is often quite basic – an occasional solid fill or a crosshatch – they are used extensively in projects. It is often the case that, despite our best efforts, a Revit project ends up with the following nightmare set of Fill Regions:
Filled Region 1
Filled Region 1 (1)
Filled Region 2
Old do not use
What a mess!
If the above sounds all too familiar, then we have some great news. Filled Regions and Fill Patterns are now supported in Kinship!
As always, we've made them super easy to use. First, select Filled Region types in the Revit Project Browser, or select their instances in a view. Then add them to your library or collection using the Kinship add-in in the Revit ribbon. All selected region types will be added to Kinship, ready to be used in other projects.
If you use the option to upload "Current Model's Families", you will also find Filled Regions and Fill Patterns included in the content that gets added to your Kinship library or collection.
Best of all, we automatically generate a thumbnail image to show exactly how the fill pattern will look in a Revit model. Different foreground and background colors and patterns? Transparent or masking in view? We've got you covered.
Fill Patterns and Filled Regions also get picked up during Model Sync. Check your most recent model's families! You can now curate your office Revit standards from the website by selecting the Fill Patterns and Filled Regions in an exemplary model that's synced with Kinship and adding them to your library.
If you are currently using a container model to store your standards, and that model is not synced with Kinship, you can try the following workflow:
Add "Current Model's Families" to a temporary collection (just to keep them separate).
Select desired regions and patterns and add them to your library (or any other collection where you want to keep them).
Finally, delete the temporary collection.
If your container model has views with legends or swatches showing Filled Regions, you can select those instances of filled regions and upload them to the library or collection directly - use the "Current Selection" option in the add-in panel controls.
That's it! No need to upload related Fill Patterns separately to make regions work.
In a follow-up post, we'll look at the naming for Fill Patterns and how to avoid potential issues with Revit's default functionality for system families.


Kinship
The best way to manage Revit content
Kinship
The best way to manage Revit content
Kinship
The best way to manage Revit content
Similar Articles


Never miss an update with our monthly newsletter
Get the latest company news, product updates, blog posts and free Revit content from Kinship. Delivered directly to your inbox no more than once a month.
By submitting your email, you agree to receive newsletter emails.
Support
Never miss an update with our monthly newsletter
Get the latest company news, product updates, blog posts and free Revit content from Kinship. Delivered directly to your inbox no more than once a month.
By submitting your email, you agree to receive newsletter emails.
Support
Never miss an update with our monthly newsletter
Get the latest company news, product updates, blog posts and free Revit content from Kinship. Delivered directly to your inbox no more than once a month.
By submitting your email, you agree to receive newsletter emails.
Support