Mastering Revit Materials
Learn how to get the most from Revit’s material system — from understanding Autodesk’s out-of-the-box assets and avoiding naming pitfalls to creating seamless custom textures and realistic finishes for your families.
Mastering Revit Materials
Learn how to get the most from Revit’s material system — from understanding Autodesk’s out-of-the-box assets and avoiding naming pitfalls to creating seamless custom textures and realistic finishes for your families.

Materials in Revit are not for the faint of heart. This post will help you understand how they work, common issues to avoid, and different approaches to achieving your desired results.
Revit materials have always proven to be a somewhat tiresome affair. In the past, it would often be the one thing that crashed Revit, leaving you with a “that’ll do” attitude. Even with that issue now fixed, the out-of-the-box material library is still limited by the texture images.
While Revit may be more focused on BIM and the coordination of a project across multiple disciplines, good materials are essential for quality visualization as well as accurate project data for things like energy and sustainability analytics.
Since it doesn’t seem like Autodesk is likely to improve its material library anytime soon, there’s only one thing left to do – drop some knowledge in this blog that can help you to master Revit materials.
About Revit’s Out-of-the-Box (OOTB) Materials
Revit’s OOTB materials have their appearance assets driven by local texture images located on your C drive under C:\Program Files (x86)\Common Files\Autodesk Shared\Materials\Textures\3\Mats.
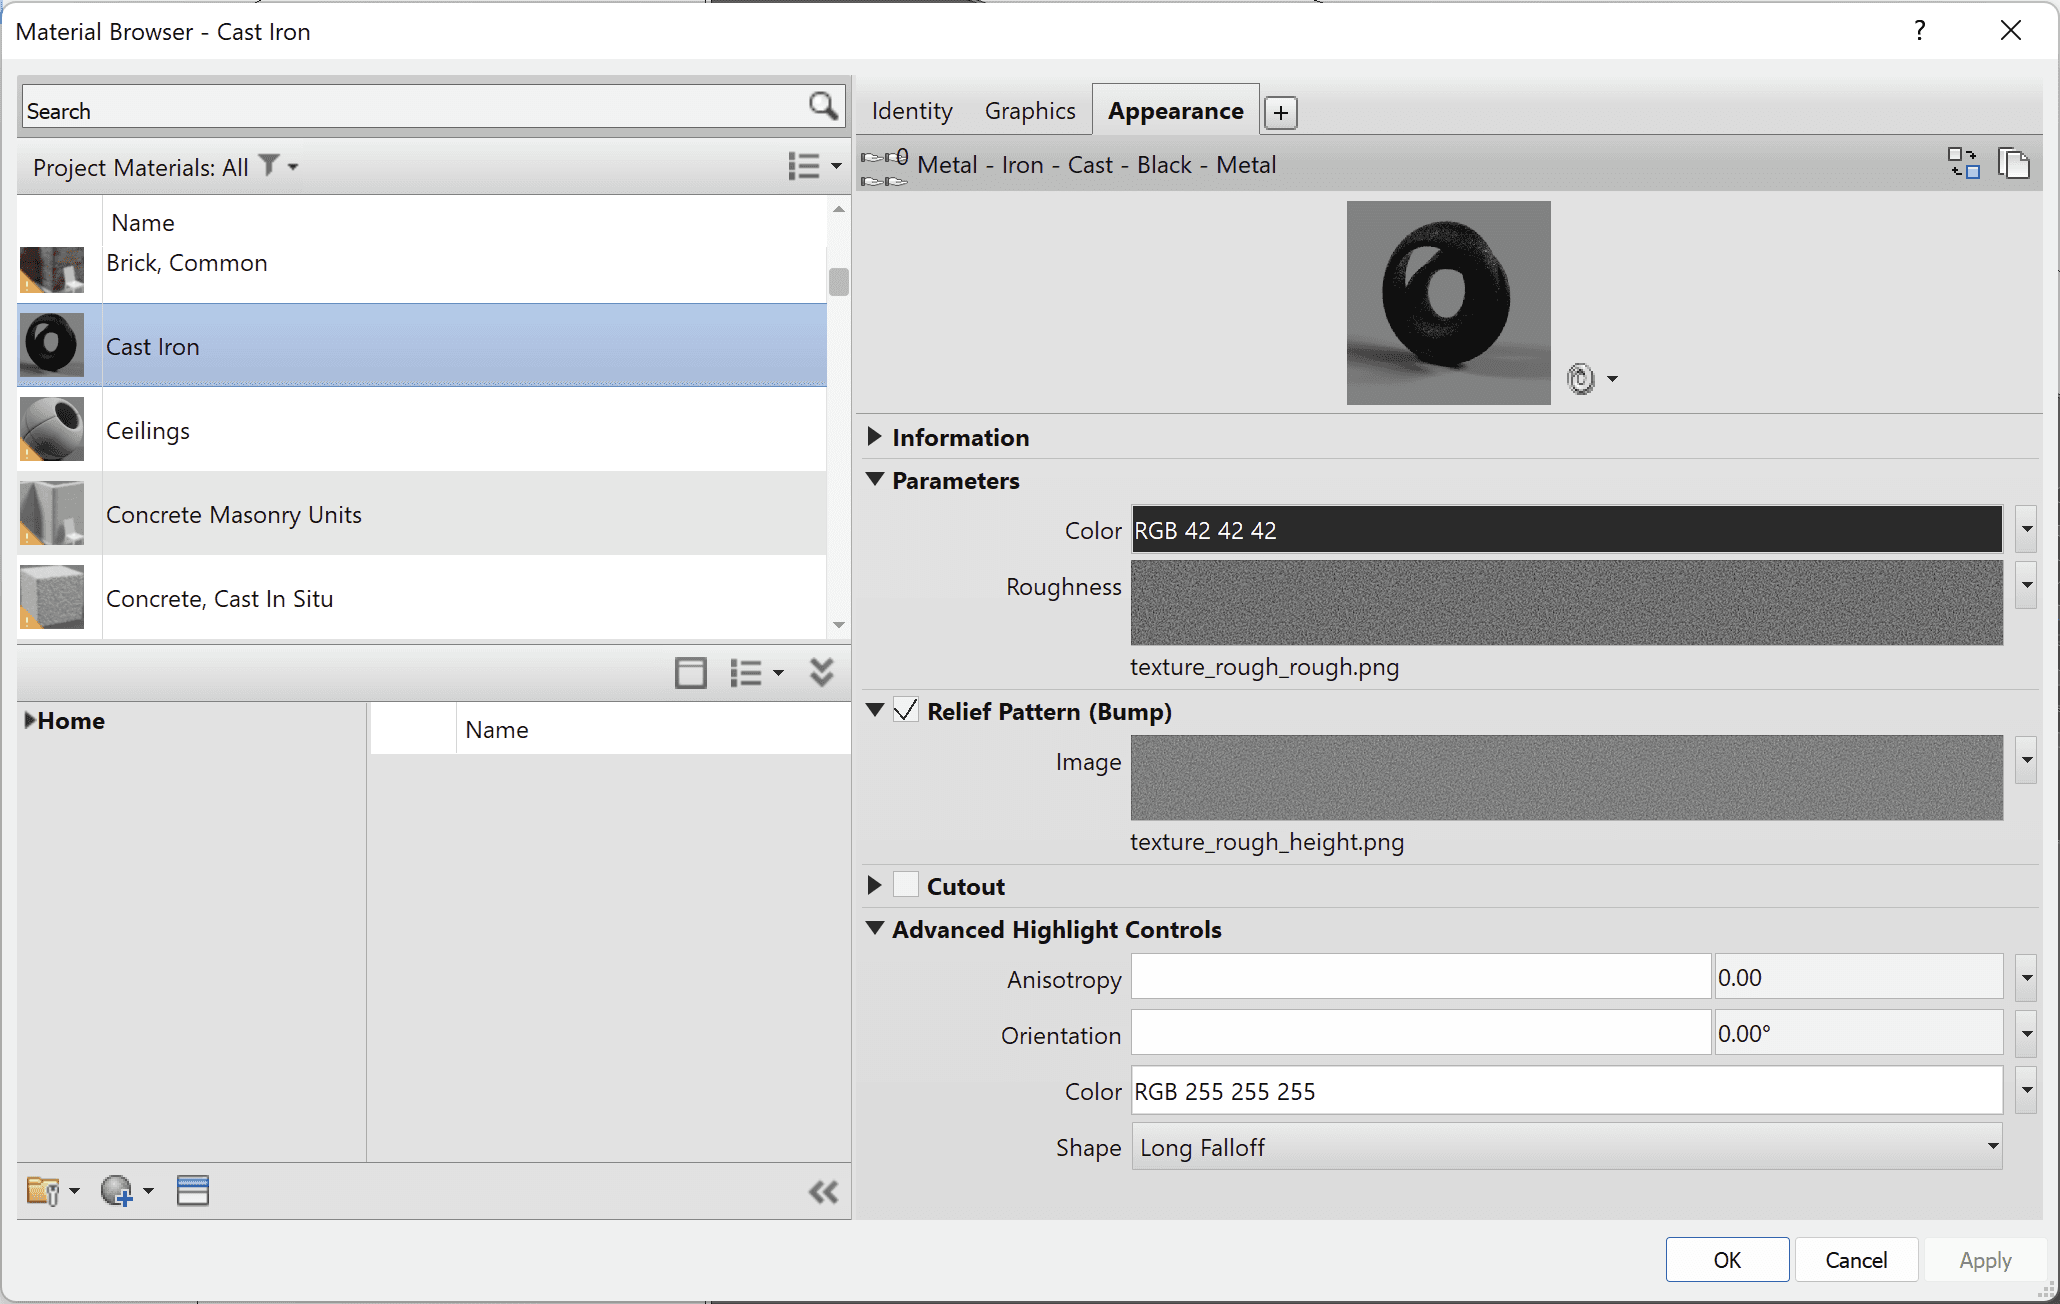
In the example below, we’re looking at the OOTB Cast Iron material. The roughness and relief patterns are pathed to images from the Mats folder.
One of the problems with OOTB materials is their limited number and, more importantly, the limited number of texture images available, especially for the bump/relief patterns. While Revit’s material appearance asset is flexible with separate color, roughness, relief, cutout and highlight selections, there aren’t many texture images.
When Autodesk added the new norm images, they only created one for fabric-wire fabric. Add to this the existing relief bump images for tweed, burlap, linens and leather, and we are still quite limited in terms of possible fabric materials. For any content creator or manufacturer working with upholstered furniture, such as Wilkhahn who has 15 different material textures, this is an uphill battle.
Tessellation
Another problem facing most Revit materials is tessellation, or rather a lack thereof. Tessellation is the seamless repetition of a pattern covering a surface or plane.
Revit can tile an image horizontally and vertically. Seamless tiling, however, can only be achieved if you’re using OOTB images or have created an image using some kind of tessellation software.
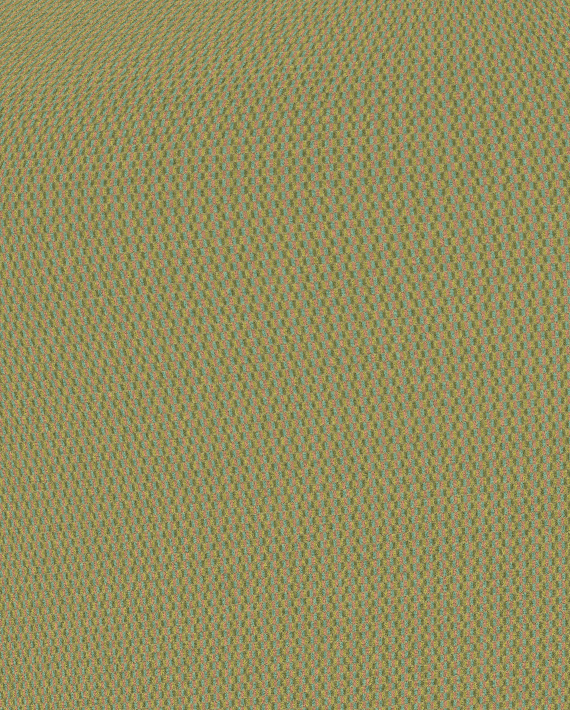
Creating custom images for the material appearance, relief/bump or highlight is simple and can be very accurate, as these images are often supplied by the manufacturer. But after tiling the image, you’re likely to see seams.
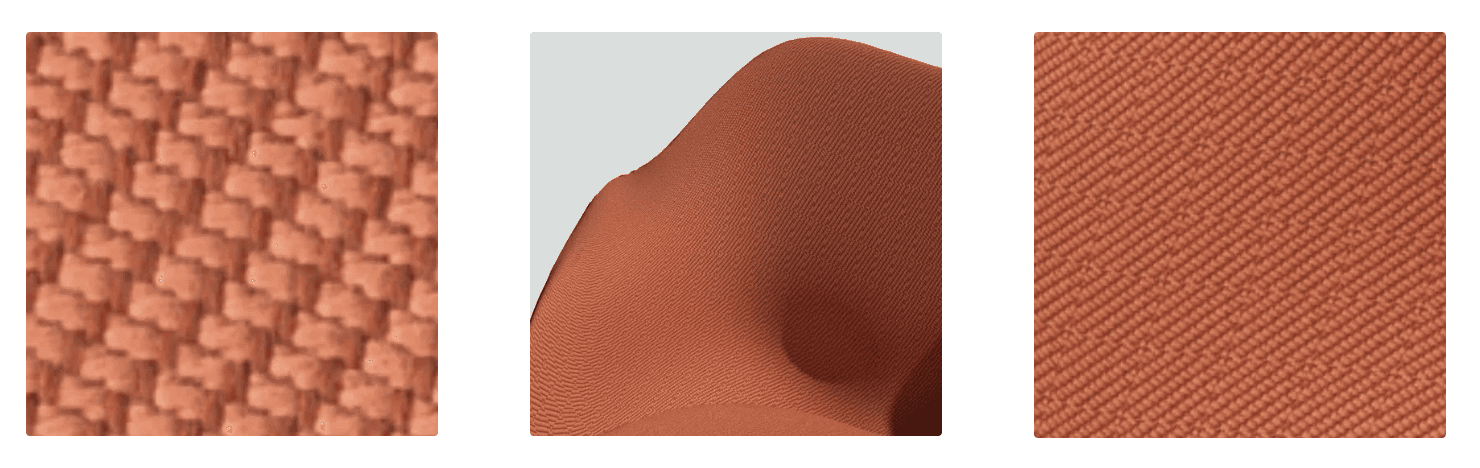
Below is an early prototype we created when working on Wilkhahn’s chairs, using their material sample card to create a custom material. While the initial image was great, the actual end result was patchy with visible seams.
Naming
When it comes to manufacturer materials, the material’s name should, at the very least, include the manufacturer's name. How else can you be sure that a family is using the correct material? This might seem obvious, but it’s often missed or treated as an afterthought by content creators.
In the example below, a window from another content creator uses a material named “Aluminium, dark grey”. This is an incredibly vague name that is not future-proof and will not work in a large project.

There must be hundreds of families out there that would use a “dark grey aluminum material” – all with various roughness or relief patterns. If these hundreds of families all used the same rudimentary material name, they would compete with each other and ultimately “there can be only one” in a project.

The same issue applies to the appearance assets that underlie materials in Revit. Even if you have a distinct material name, if its asset is called “Generic”, then this too will compete with any other materials using an asset called “Generic”. The existing “Generic” asset in a project will override any new “Generic” assets loaded in. See below for an example of how this plays out for a plastic material with an appearance asset named “Default (1)”.
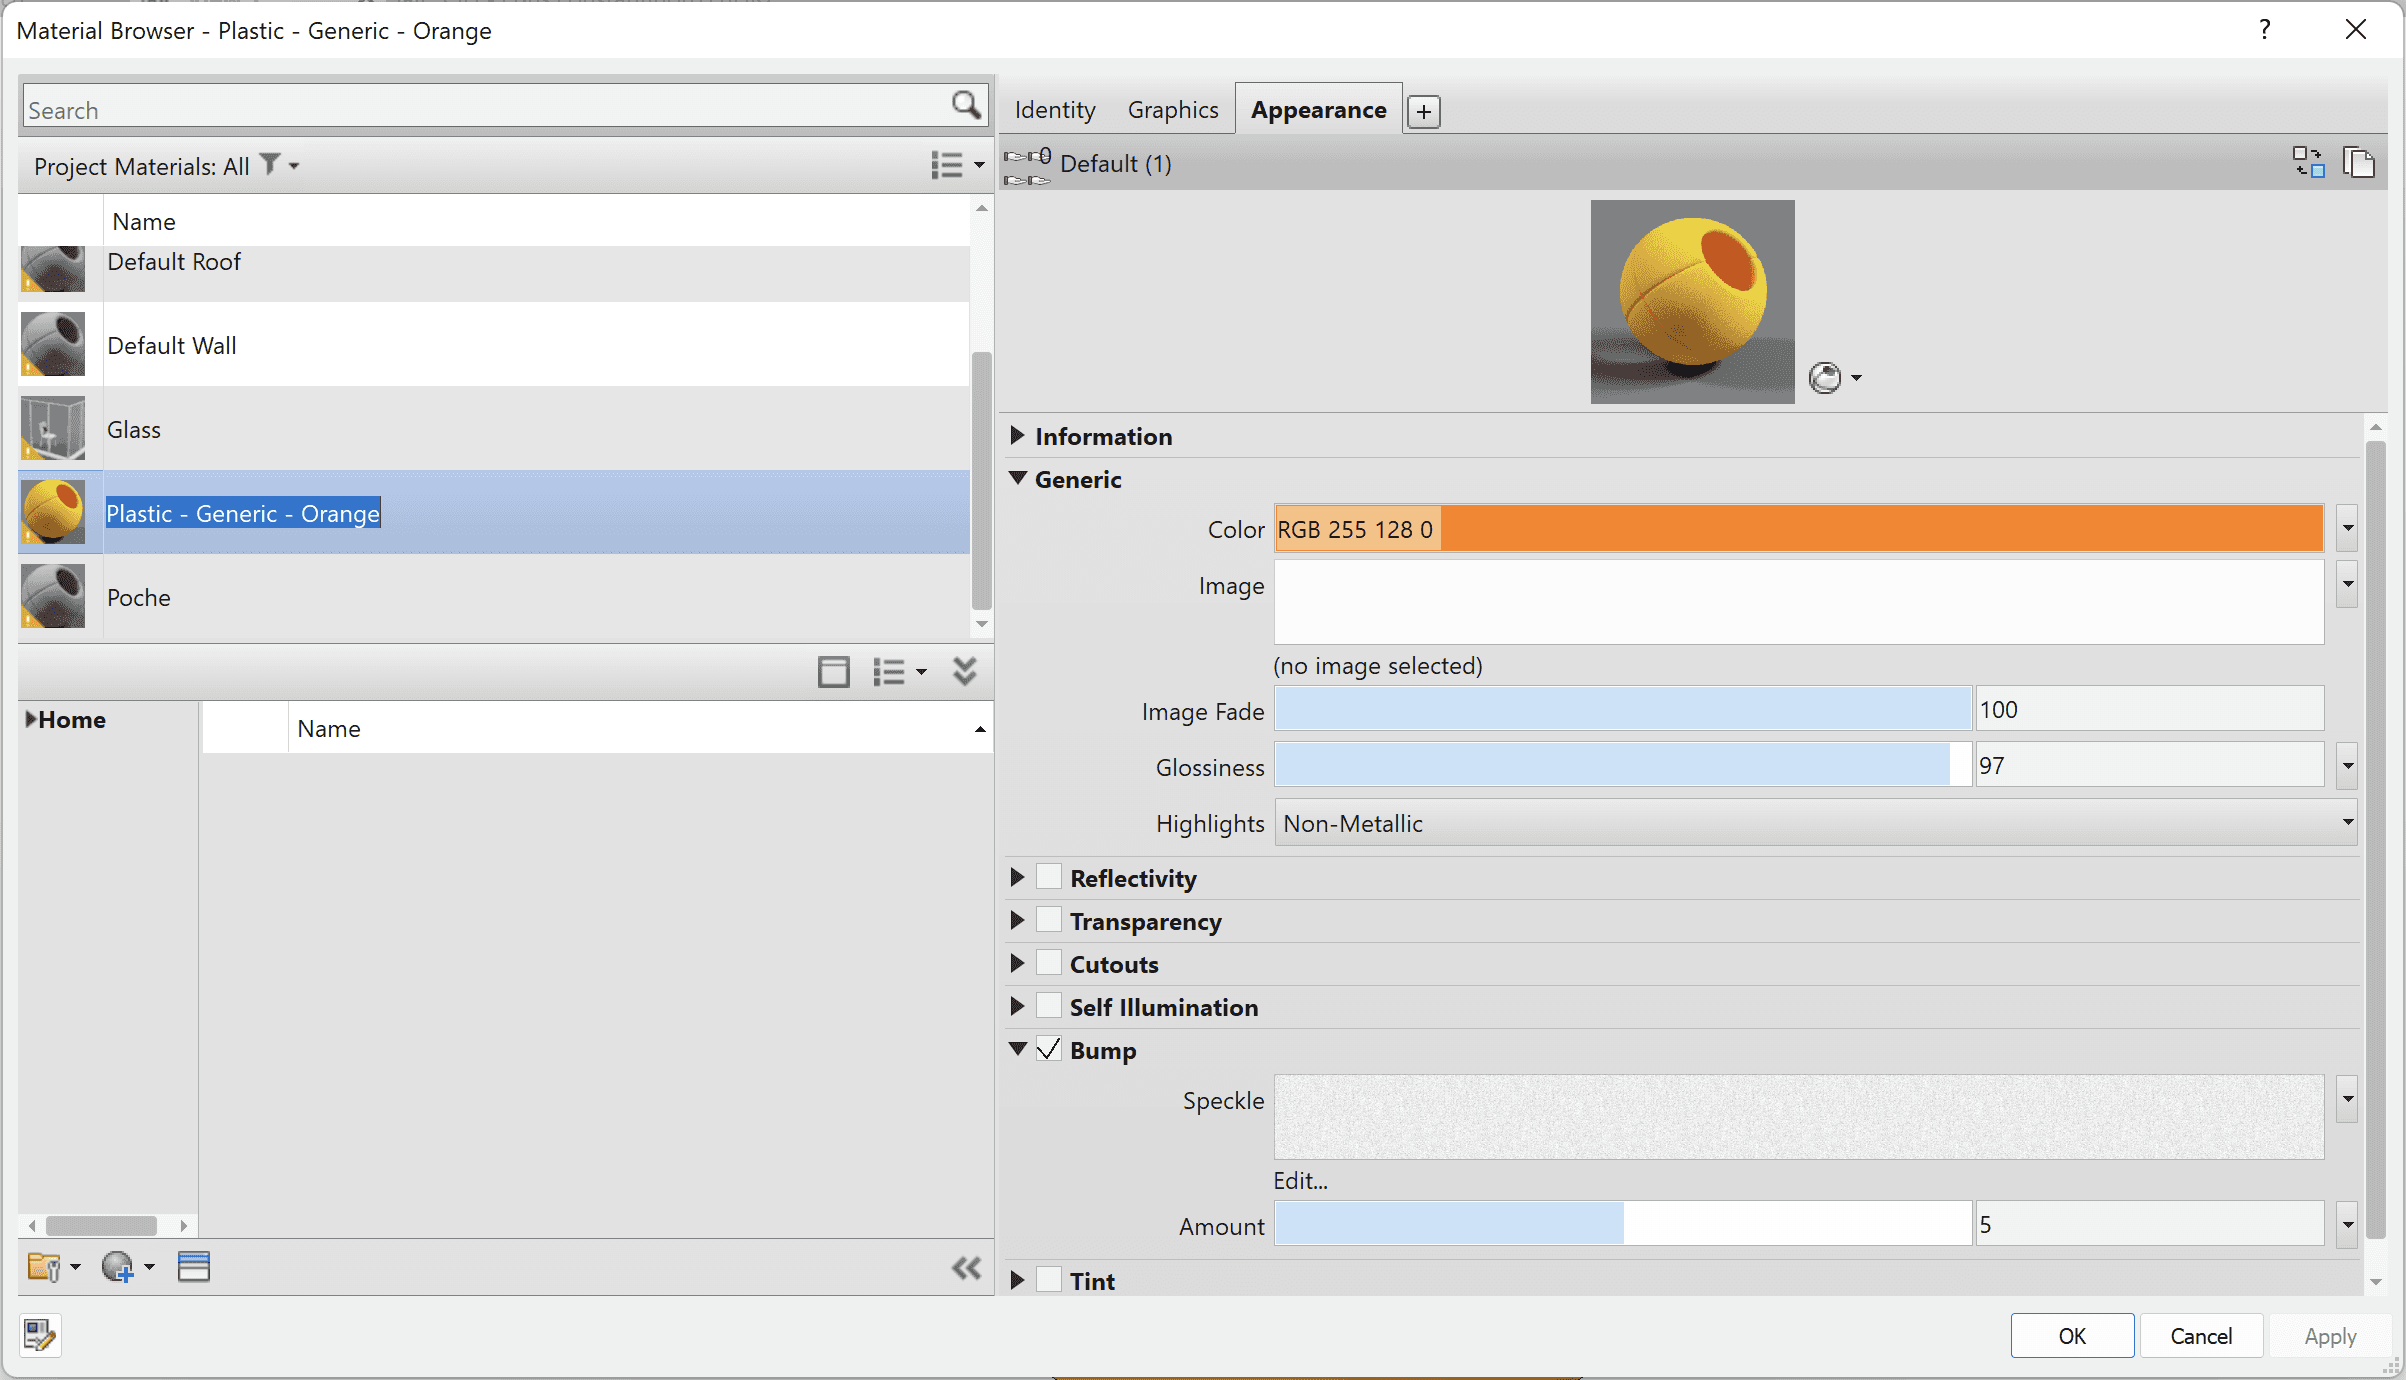

When both families are loaded into the same project, only the Default (1) appearance asset from the first Cylinder family will exist.
To avoid such naming issues in the Revit families that we create, we have developed our own naming conventions for materials and material assets. Feel free to use them in your own office or content creation work for easier management.
Material naming convention
Material Category - Manufacturer - Description 1 - Description 2
For example:
Paint - Carrier - Gray - Gloss
Appearance asset naming convention
Material Category - Description 1 - Description 2 - Manufacturer - Asset Type
For example:
Paint - Gray - Gloss - Carrier - Opaque
Here at Kinship, asset naming has a fifth part for the “asset type”. In the image below we see OOTB metals are made from different assets types – Metal, Generic and Opaque.
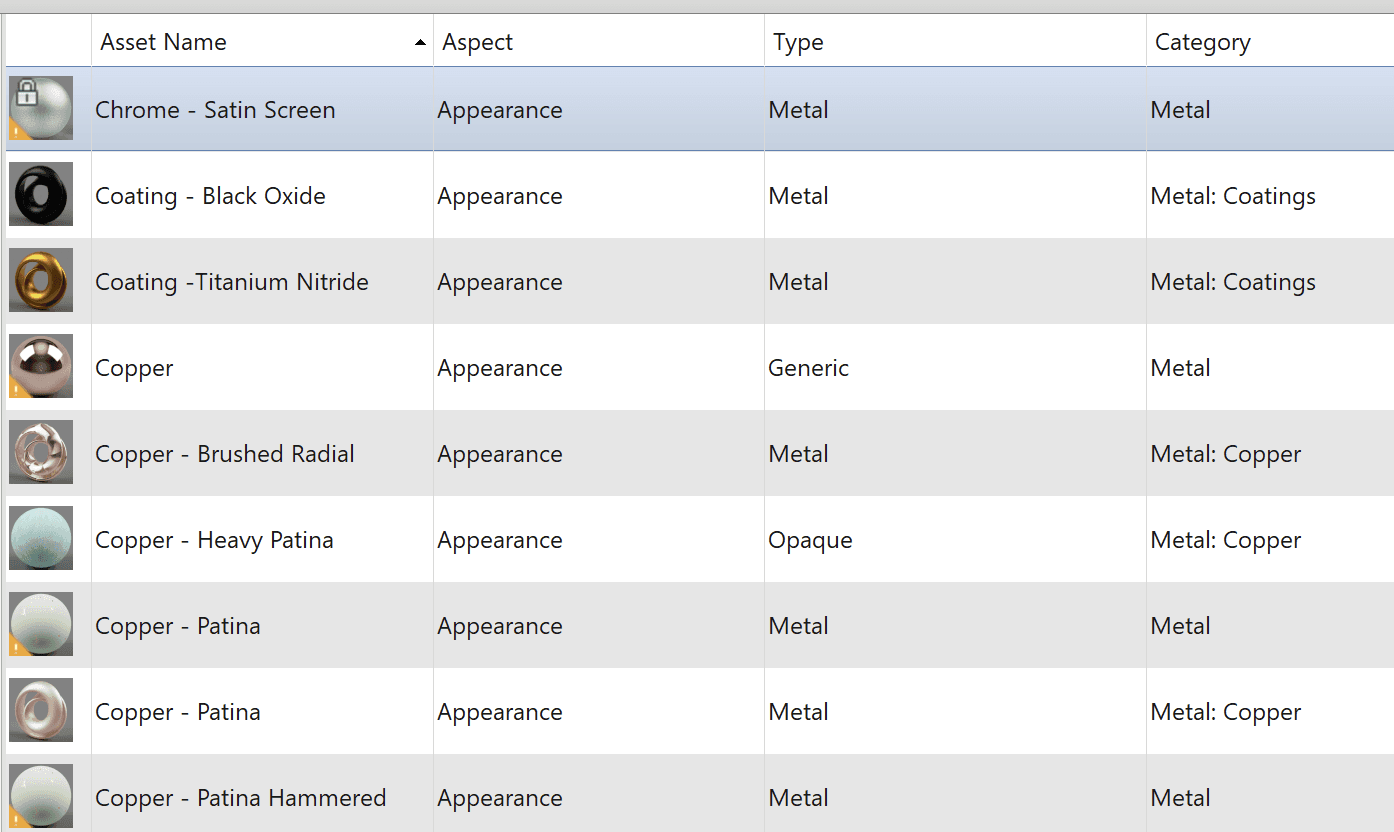
Each asset type has different features. For instance, the Generic type doesn’t have a roughness setting, but it does have a tint and self-illumination. The OOTB copper materials, for example, are created from appearance assets of different types as shown below:
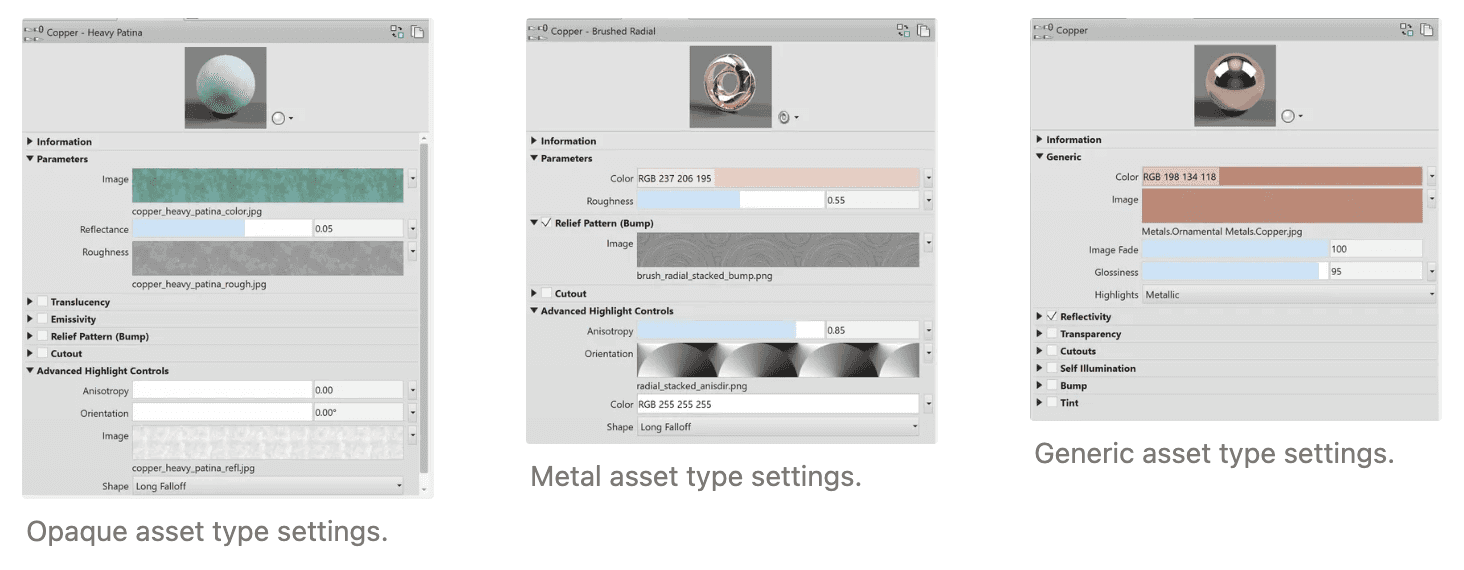
Including the asset type in our naming convention for appearance assets helps us manage old and new materials, identify which assets could be improved and maintain overall consistency for each manufacturer we work with.
Creating custom materials
Custom materials can be created in two ways. Both approaches have pros and cons.
1) Use Out-of-the-Box texture images.
Pros
They have better tiling functionality and tessellate well.
They transfer well between companies and projects because they use default Autodesk texture images.
Always feasible – sometimes it may be hard to obtain the custom image required for the second approach.
Cons
They can be time-consuming because you need to tweak the settings and test in a rendering each time.
Difficult to achieve 100% accuracy. The OOTB textures and assets are not always accurate, and there is only so much creative tweaking you can do. For instance, Autodesk has a number of wooden images including Maple, Cherry, Mahogany, Pine, Red Beech, Red Oak, Teak, White Ash, White Oak and Walnut. But it’s hard to turn any of those into a new wood such as Acacia or Yew.
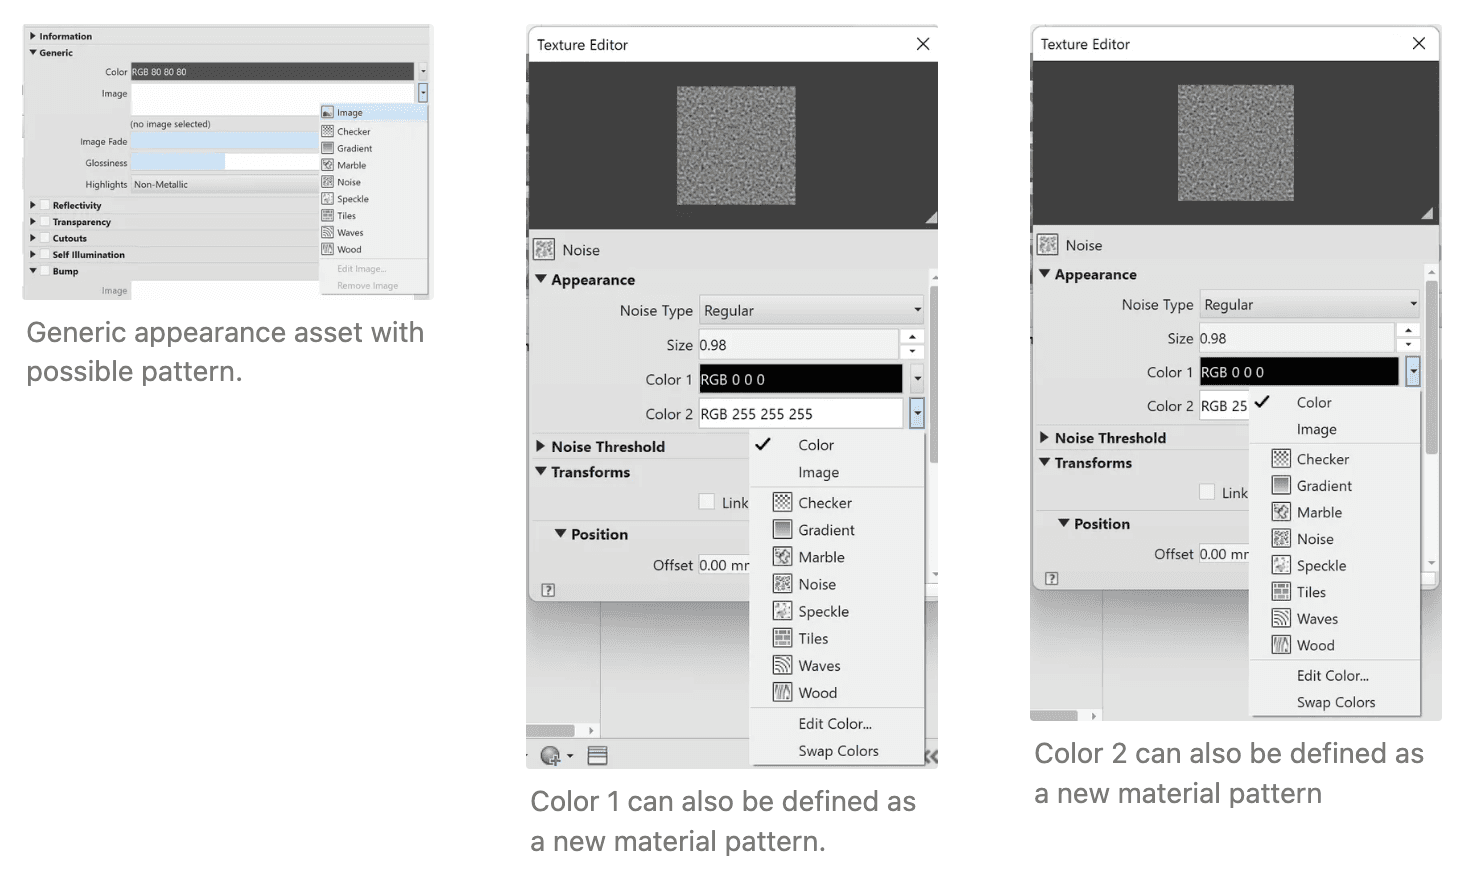
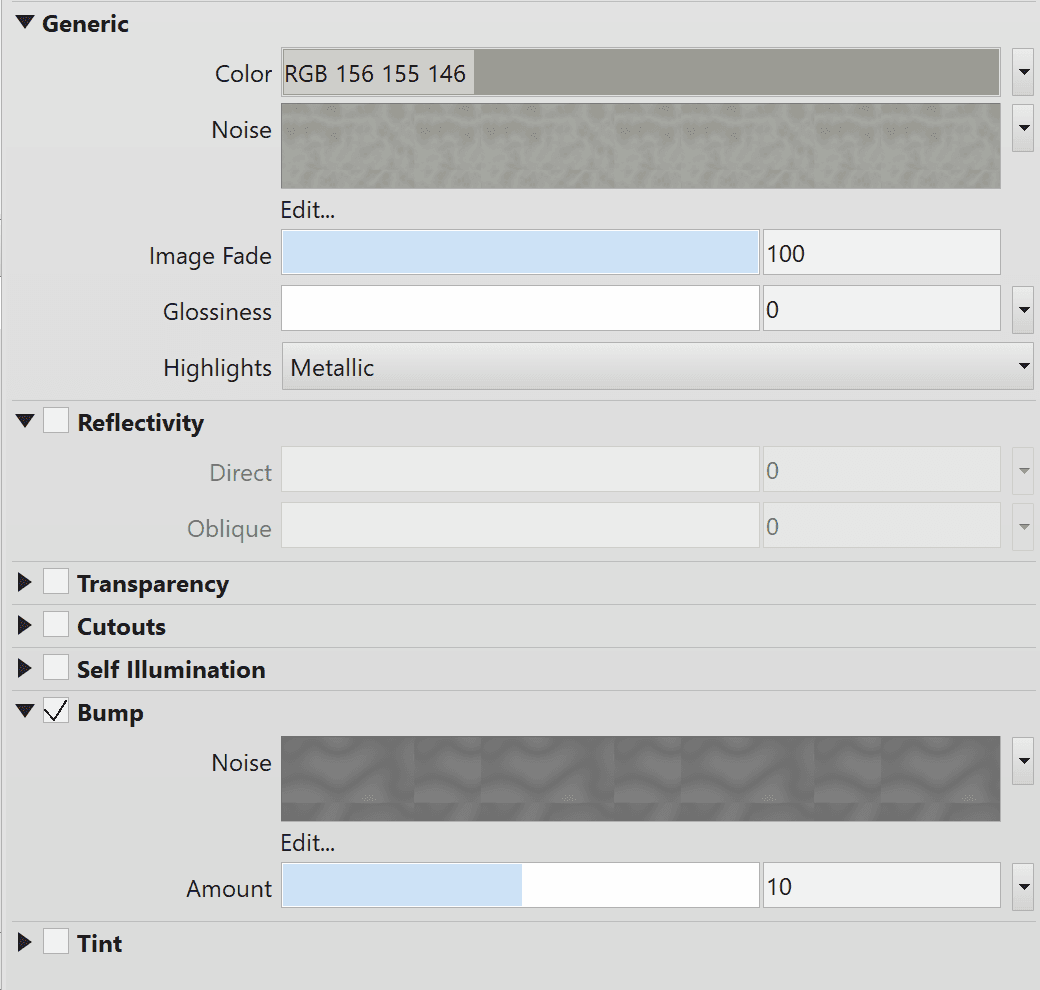
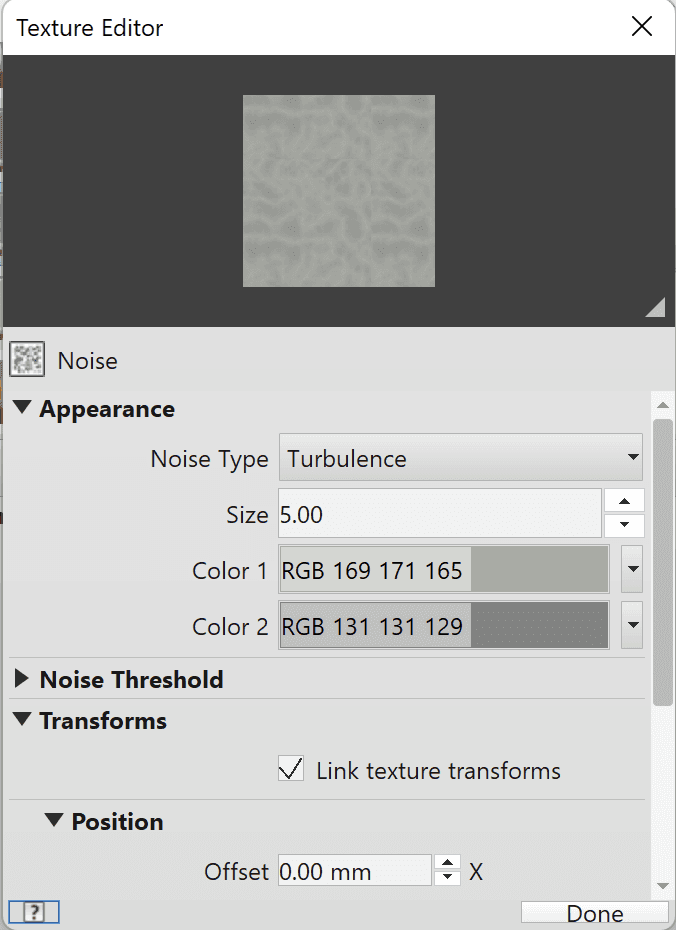
TIP - The Generic appearance asset is a powerful tool and worth exploring. The Checker and Noise patterns both have two sublayers (Color 1 & 2) where the user can again select from the range of patterns.
2) Create your own texture images outside of Revit.
Pros
Very realistic.
Can be super quick to create.
Cons
They require management from the end user to locate and path the file location in Revit’s render settings.
They do not tessellate or tile well. As a result, sometimes multiple variations can be needed if the Revit family has many types with different sizes.
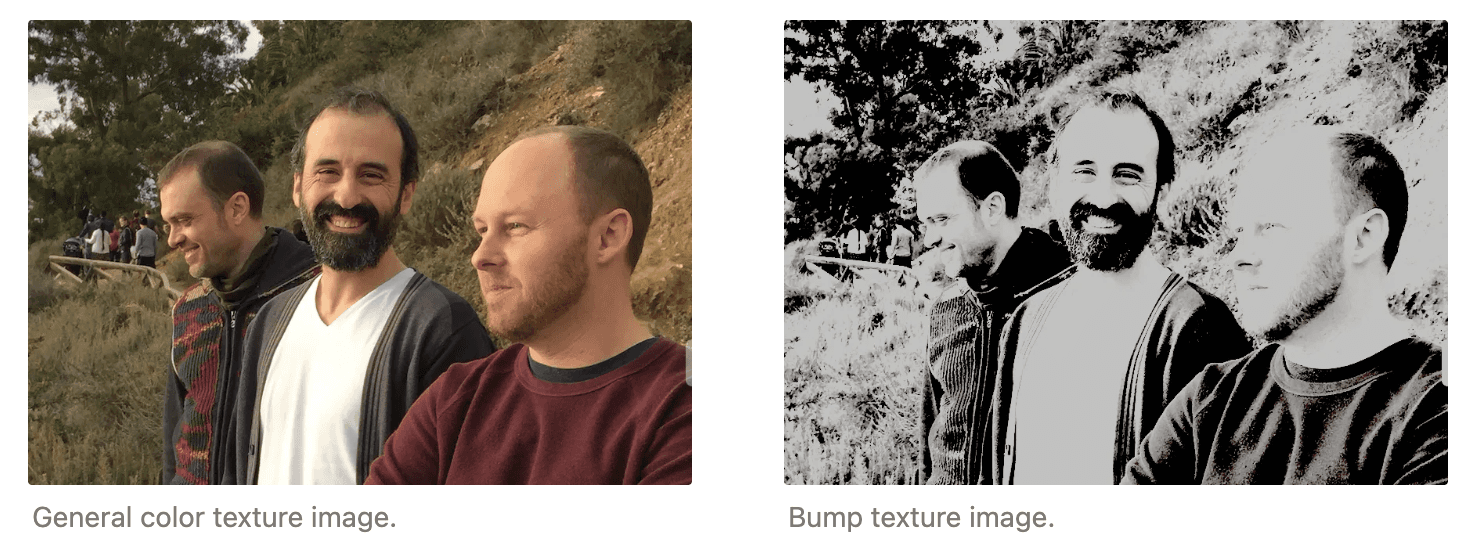
TIP - To create bump/relief texture images, just change the contrast and hue settings from the original image.

Kinship’s very own triumvirate on an early morning road trip after an Autodesk University, now with texture. You can almost touch the hangovers!
How to path custom images
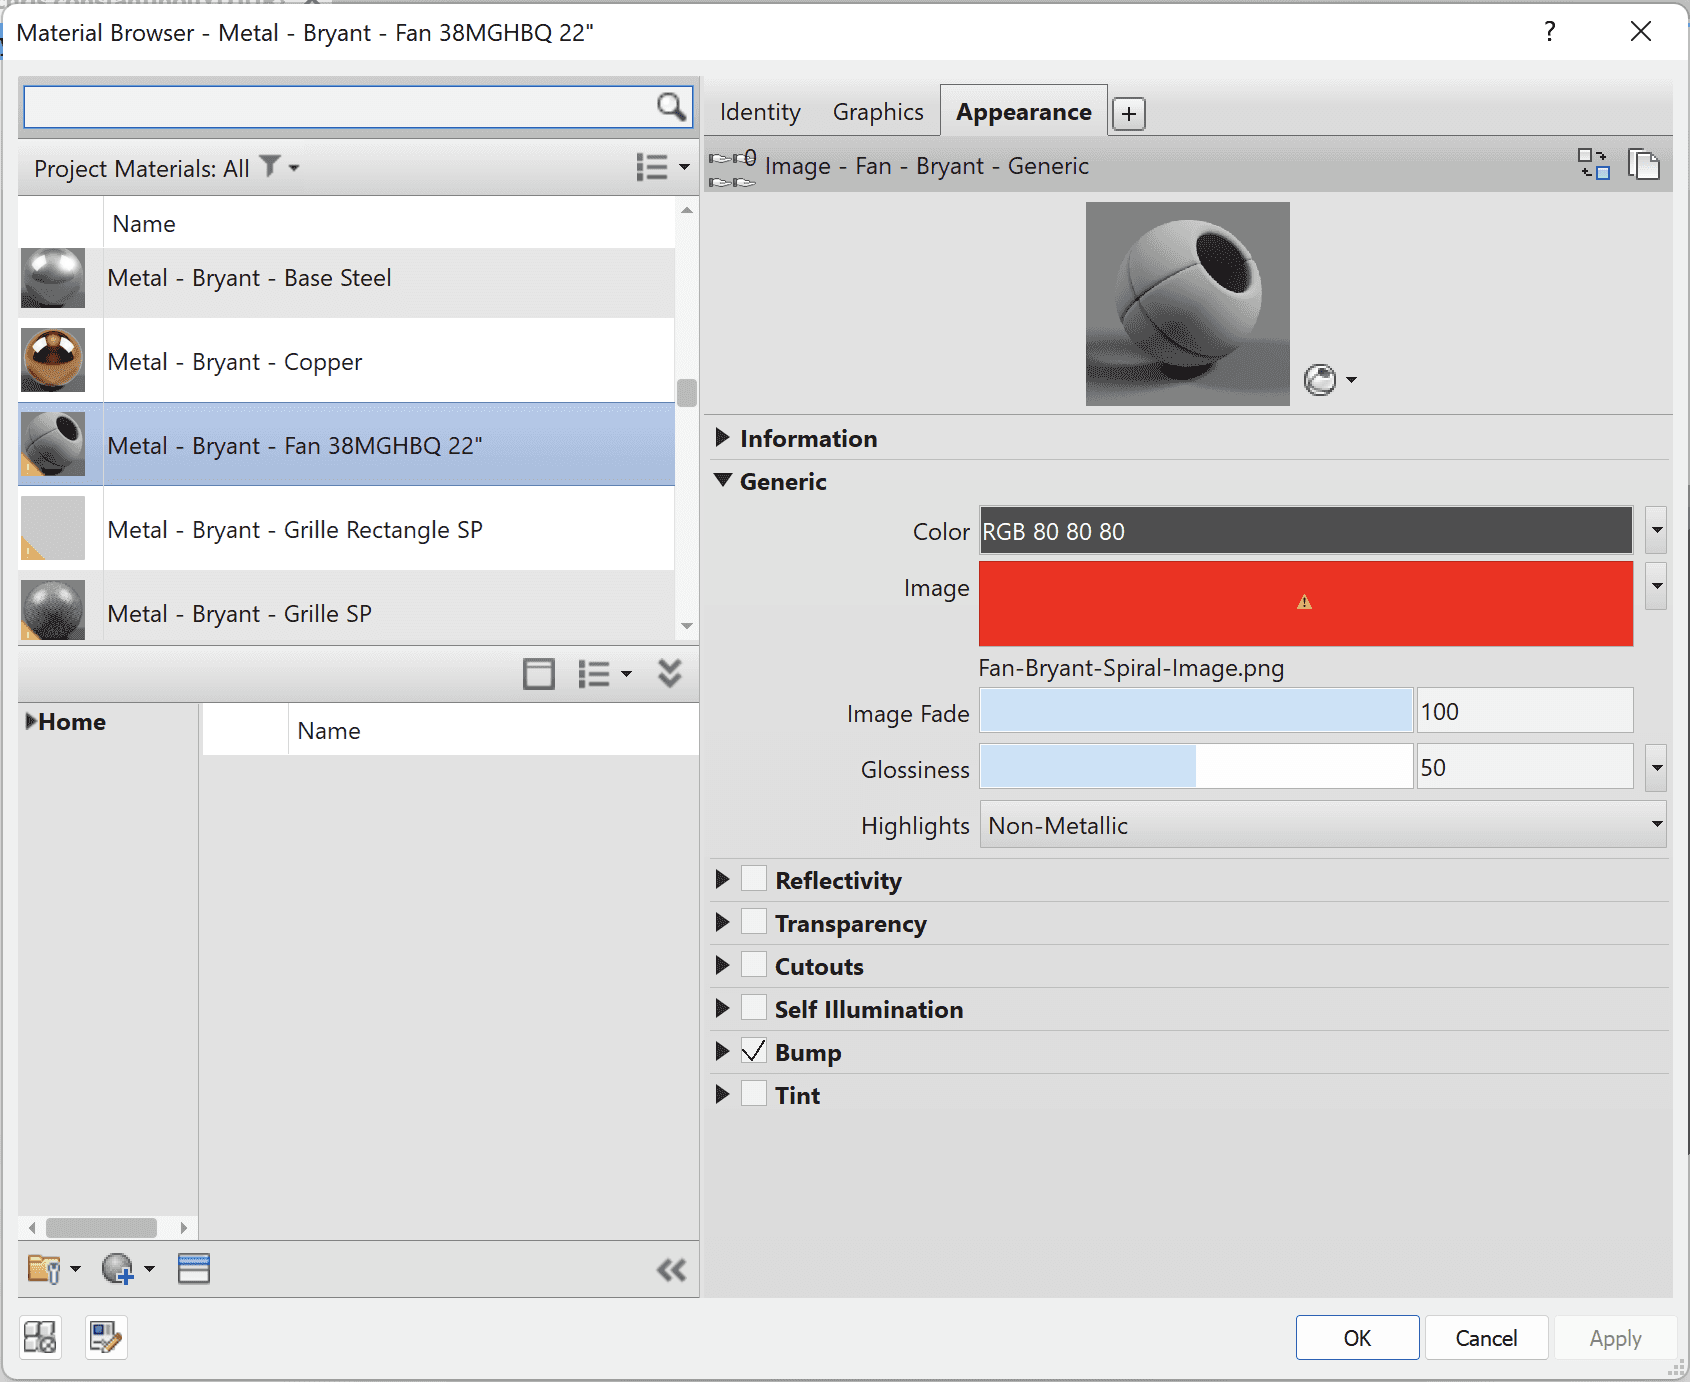
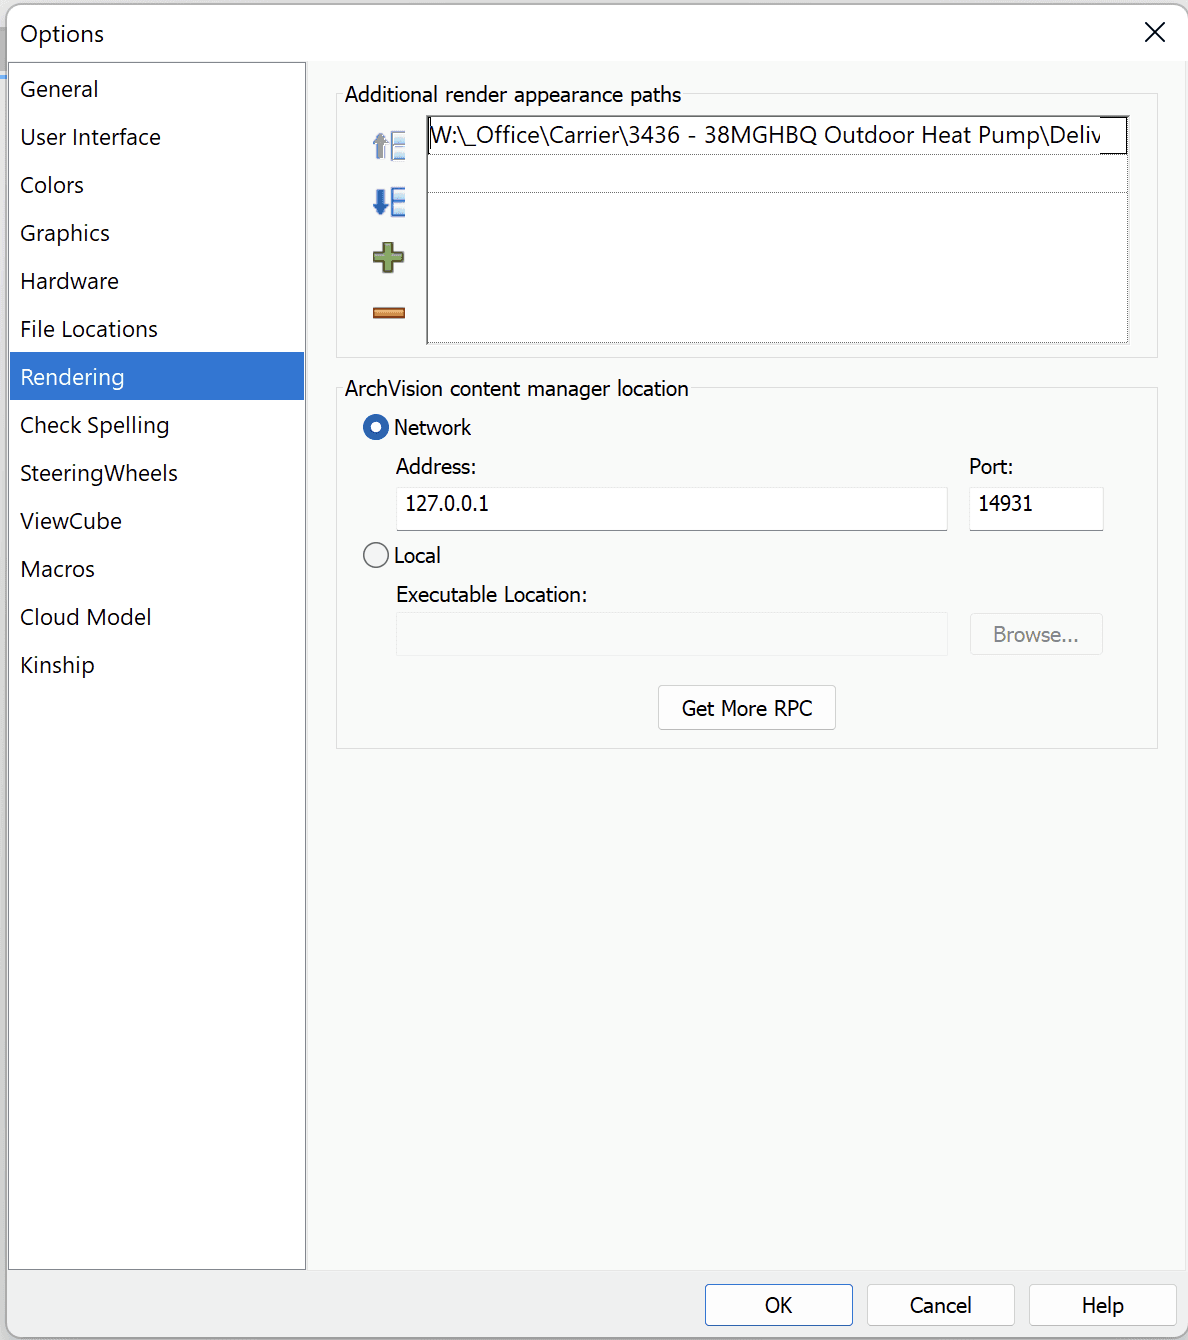
You may have a material with a warning sign indicating that the material’s image cannot be found. To fix this, simply go to the Revit options, then into Render settings and add the folder with the image to the directory. Lastly, restart Revit.
Case Studies
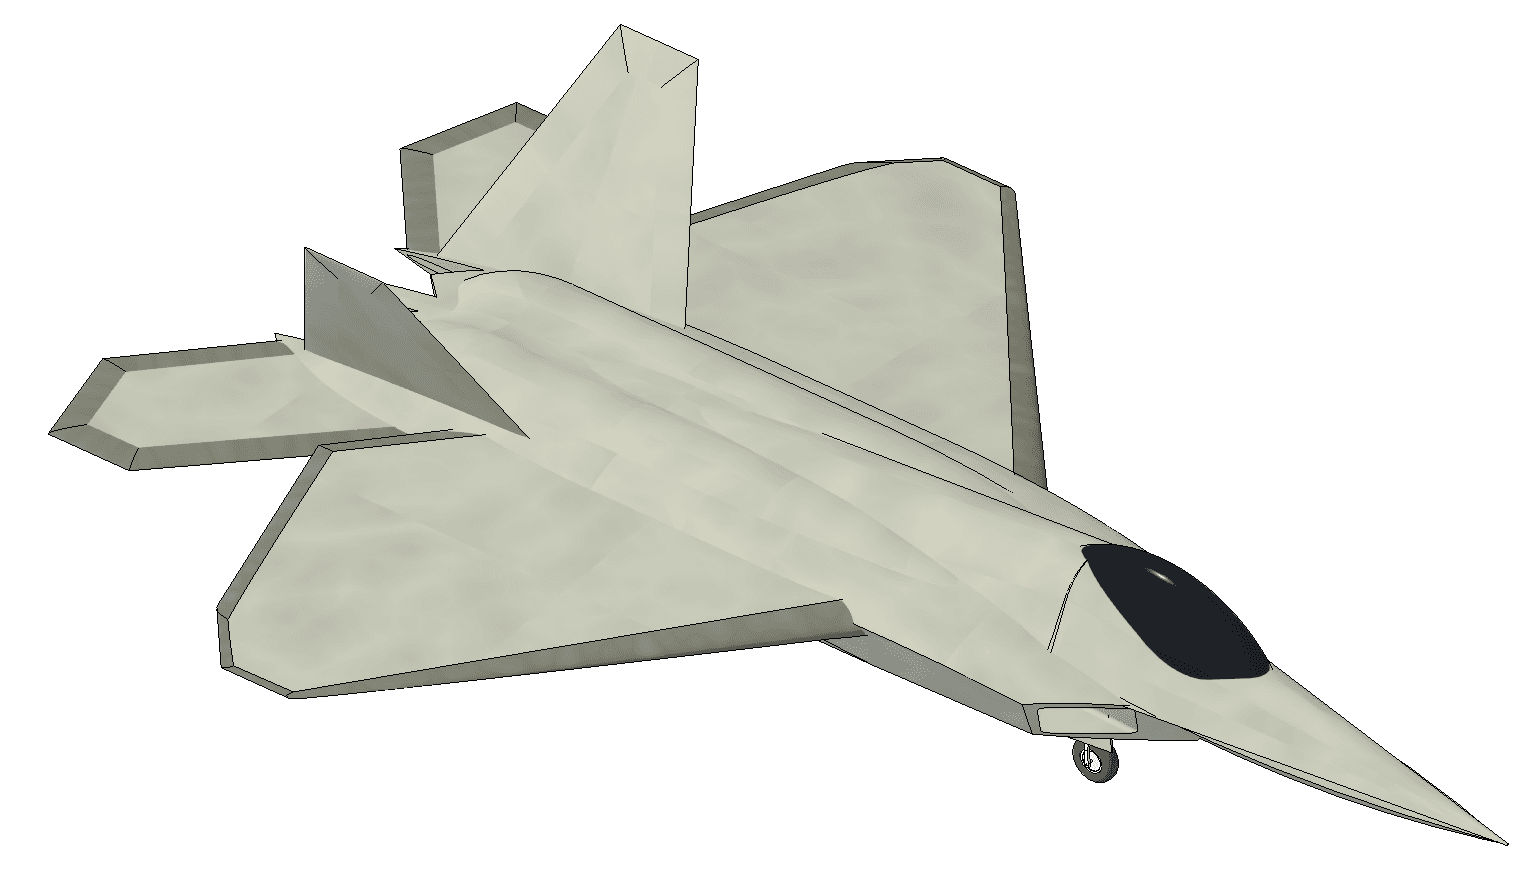
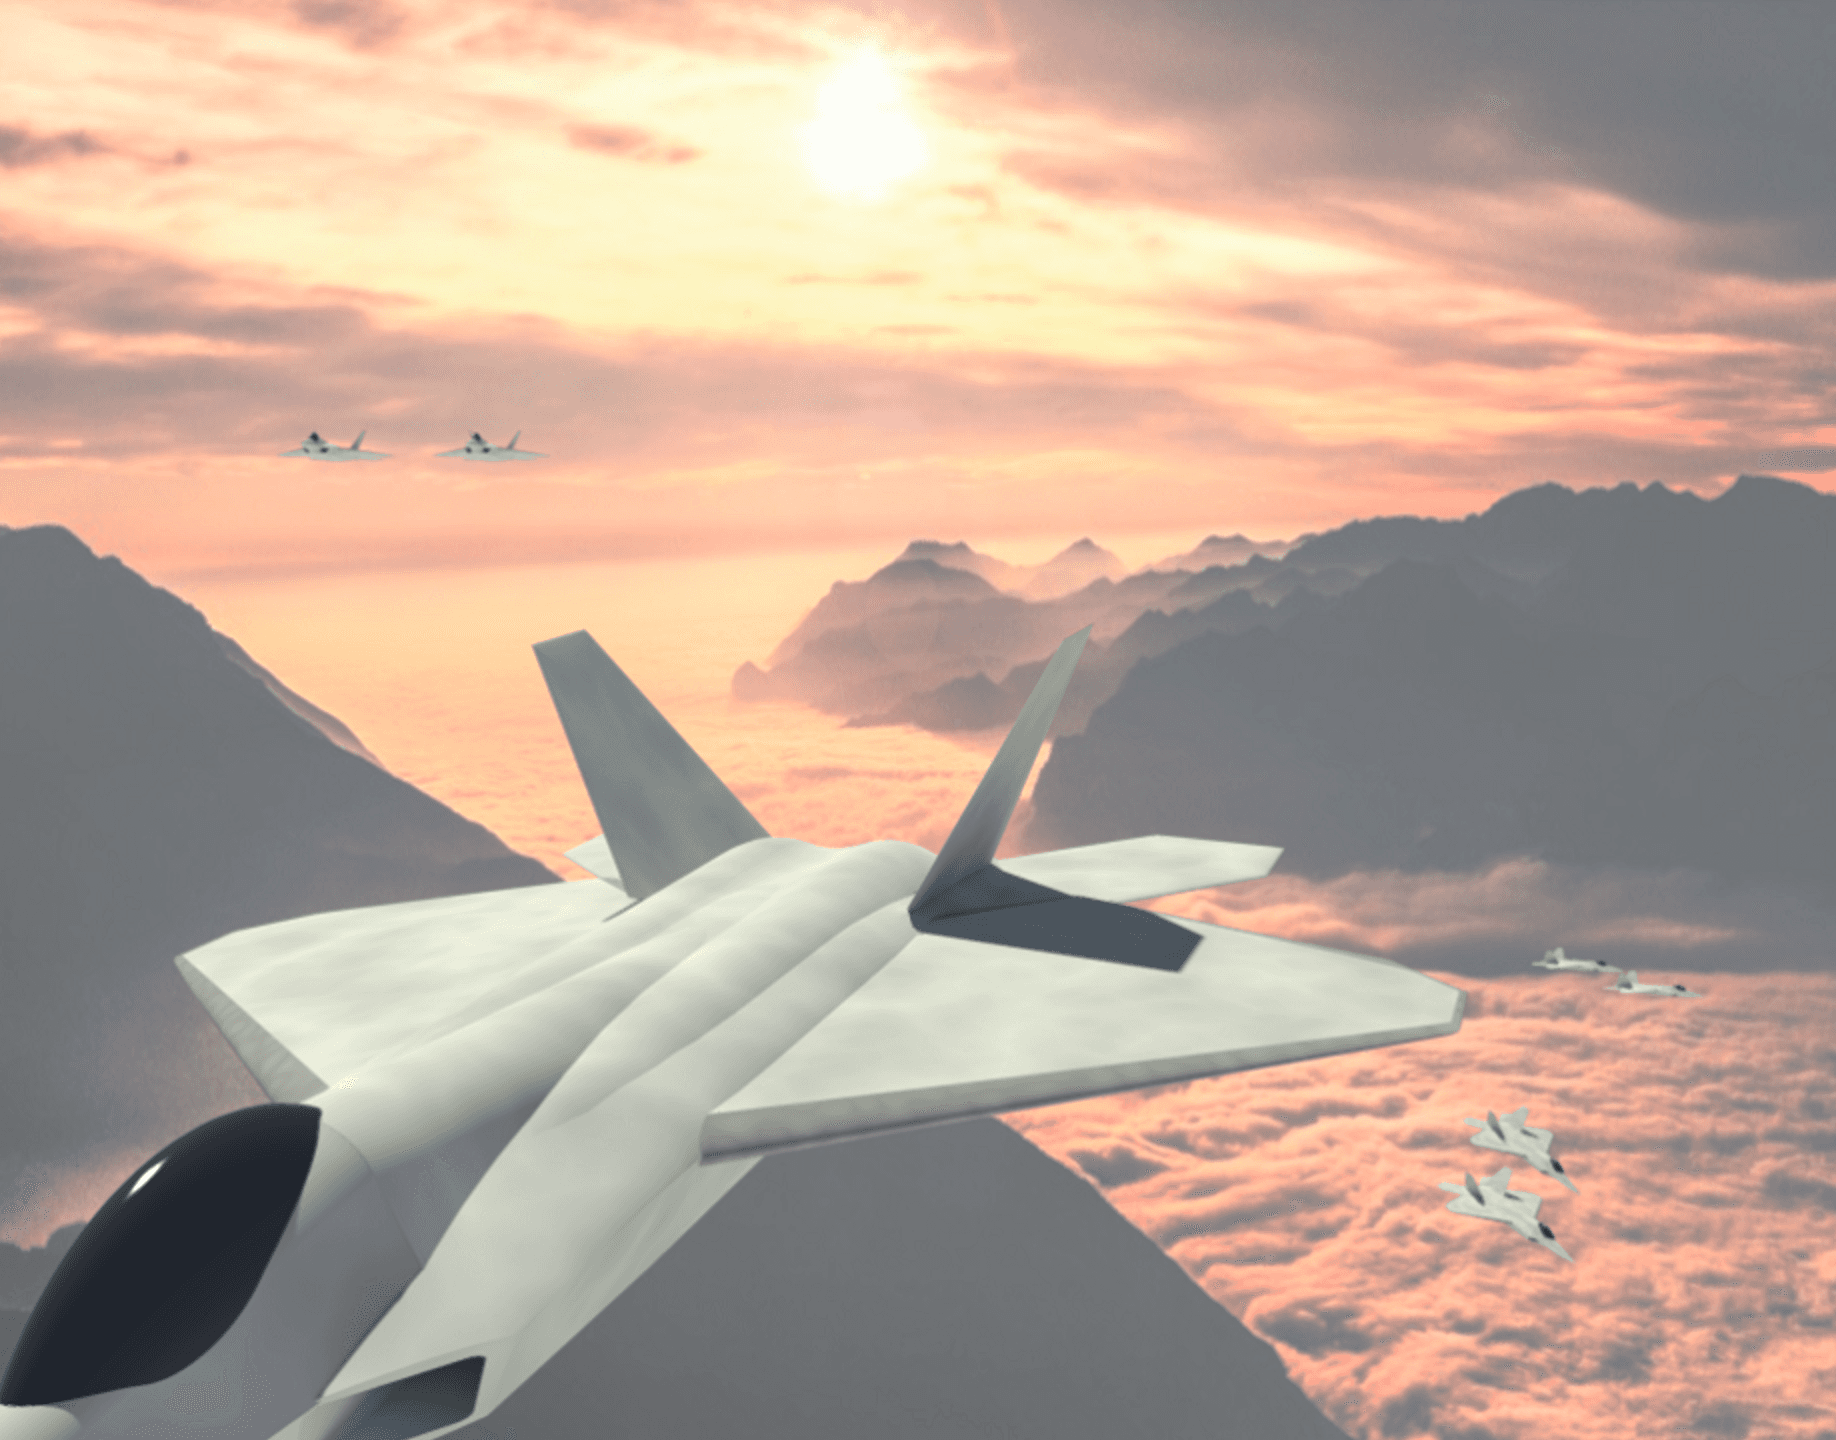
F-22 Fighter Jet
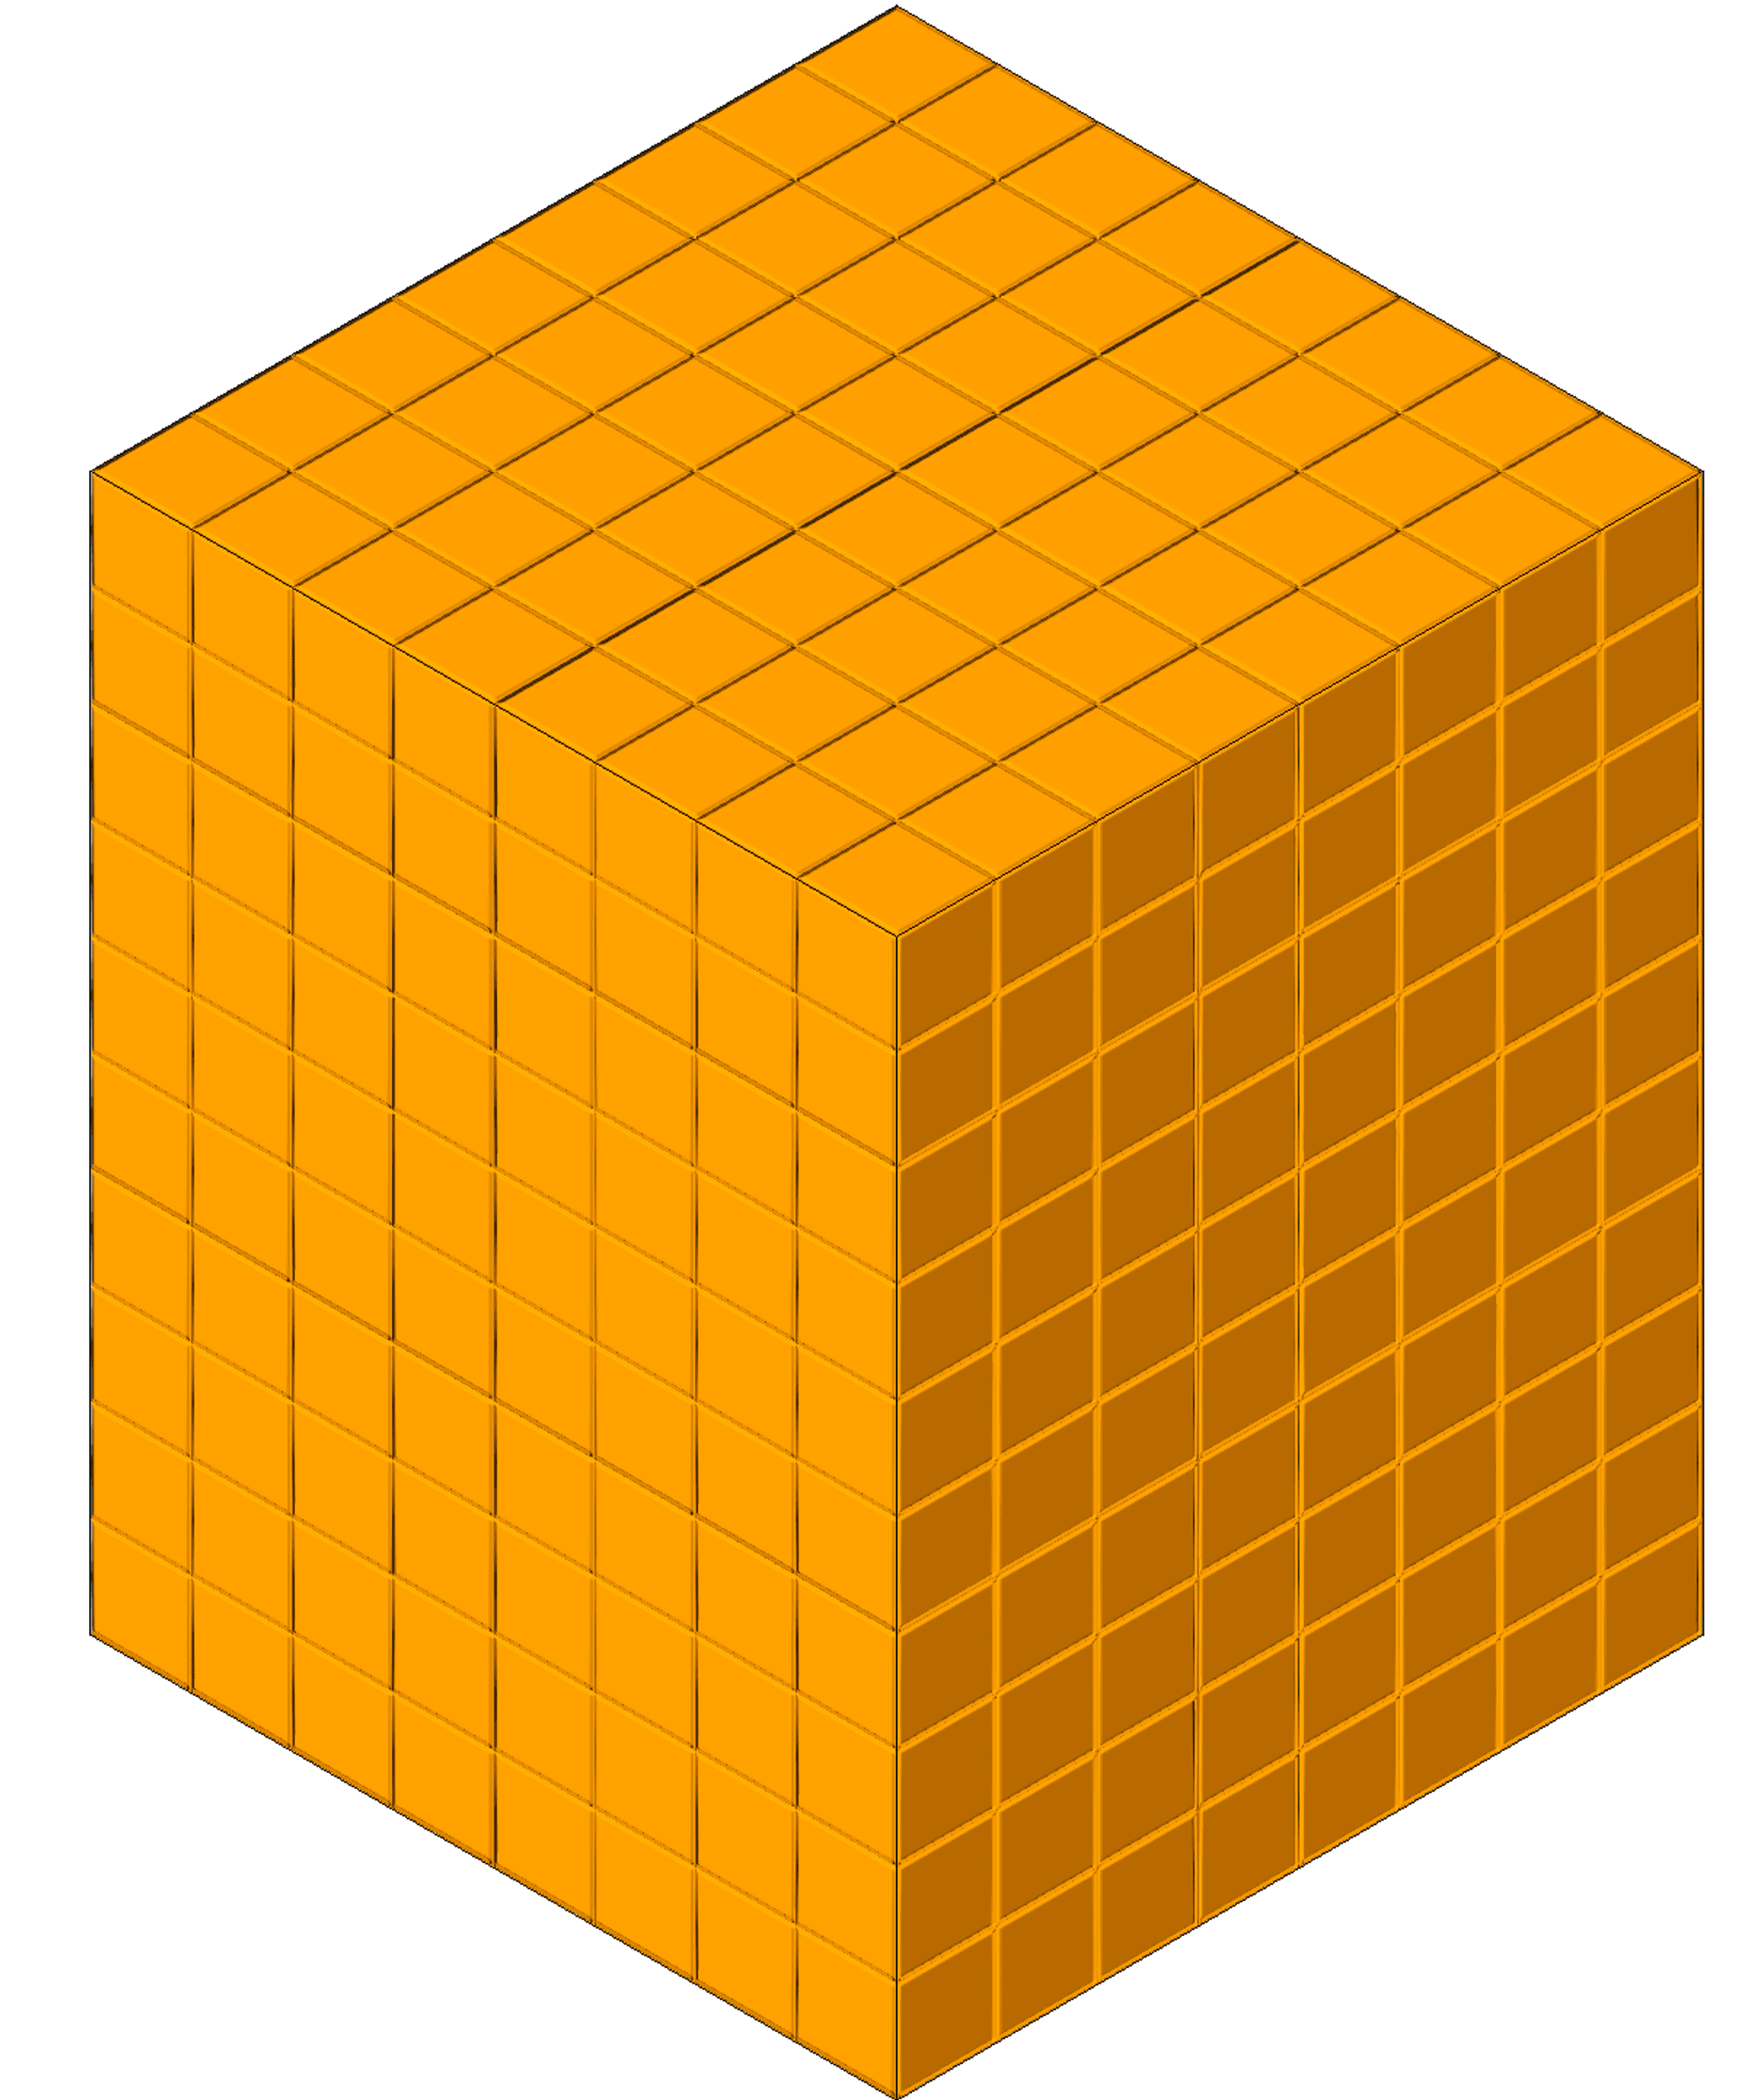
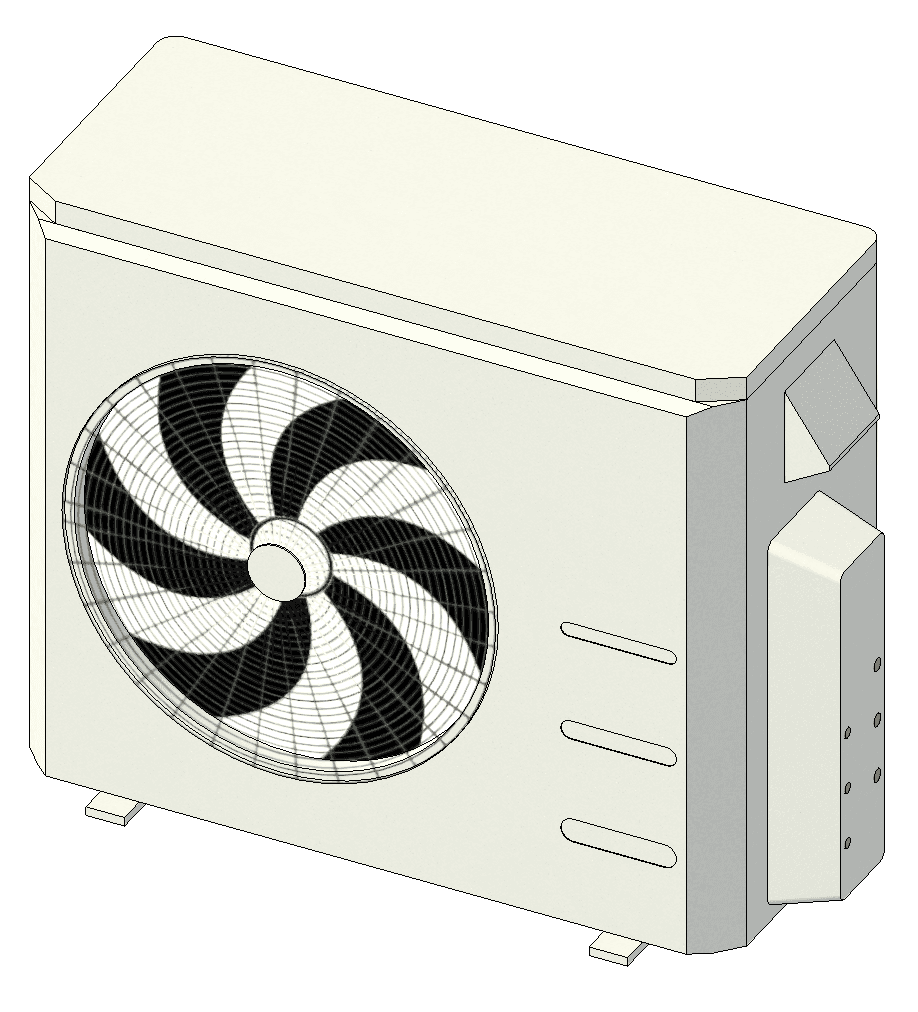
We worked with aviation architects who required this family for spatial planning. None of the OOTB metals were good enough in this case. They didn't convey the mottled effect from the paneling of the plane, and a custom image wasn’t possible due to a lack of clear documentation and resources. We created our own material by using the Noise pattern (from a generic appearance asset) for Generic Image and Bump attributes. The difference in size and tiling creates the impression of paneling and a hint of inconsistency in the metal.

Louvres
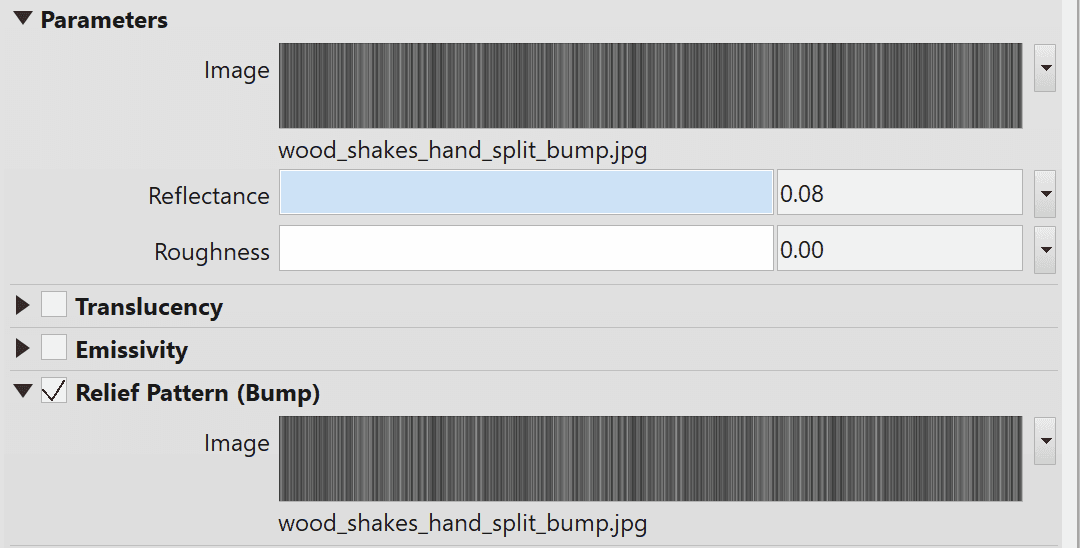
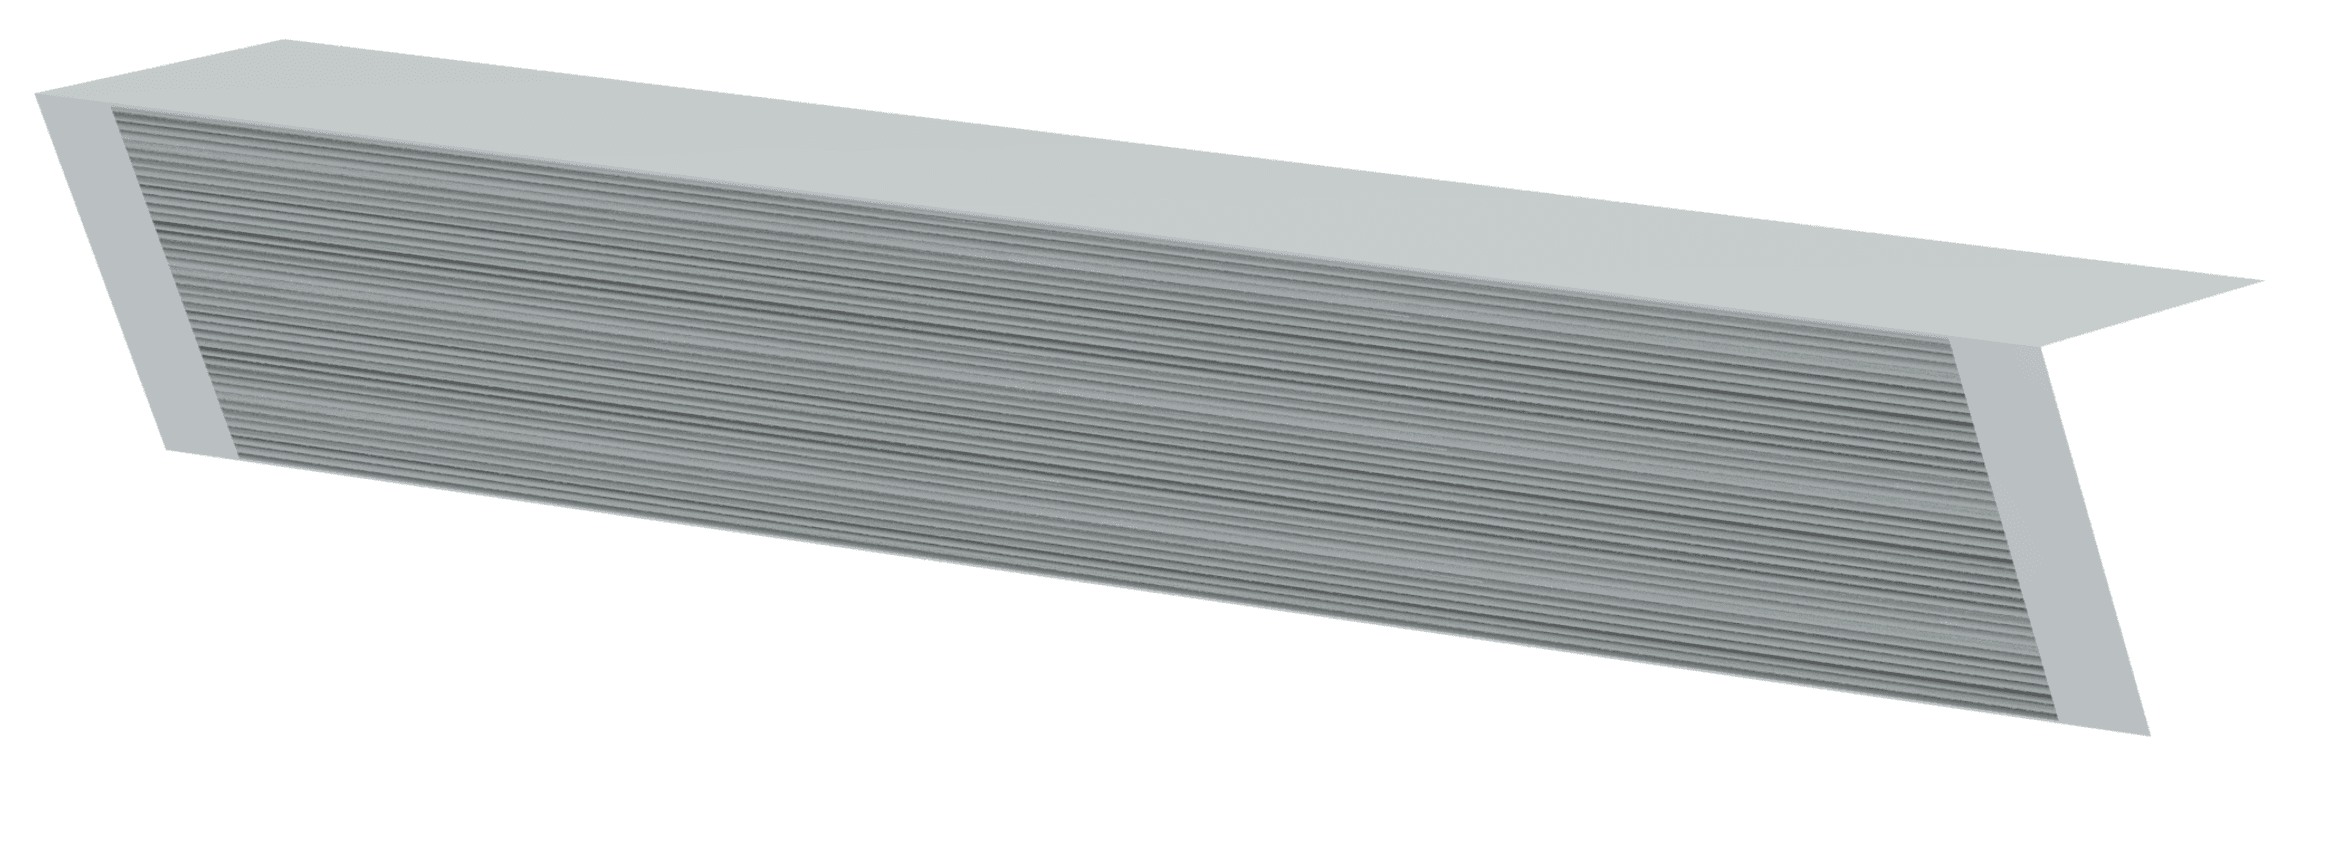
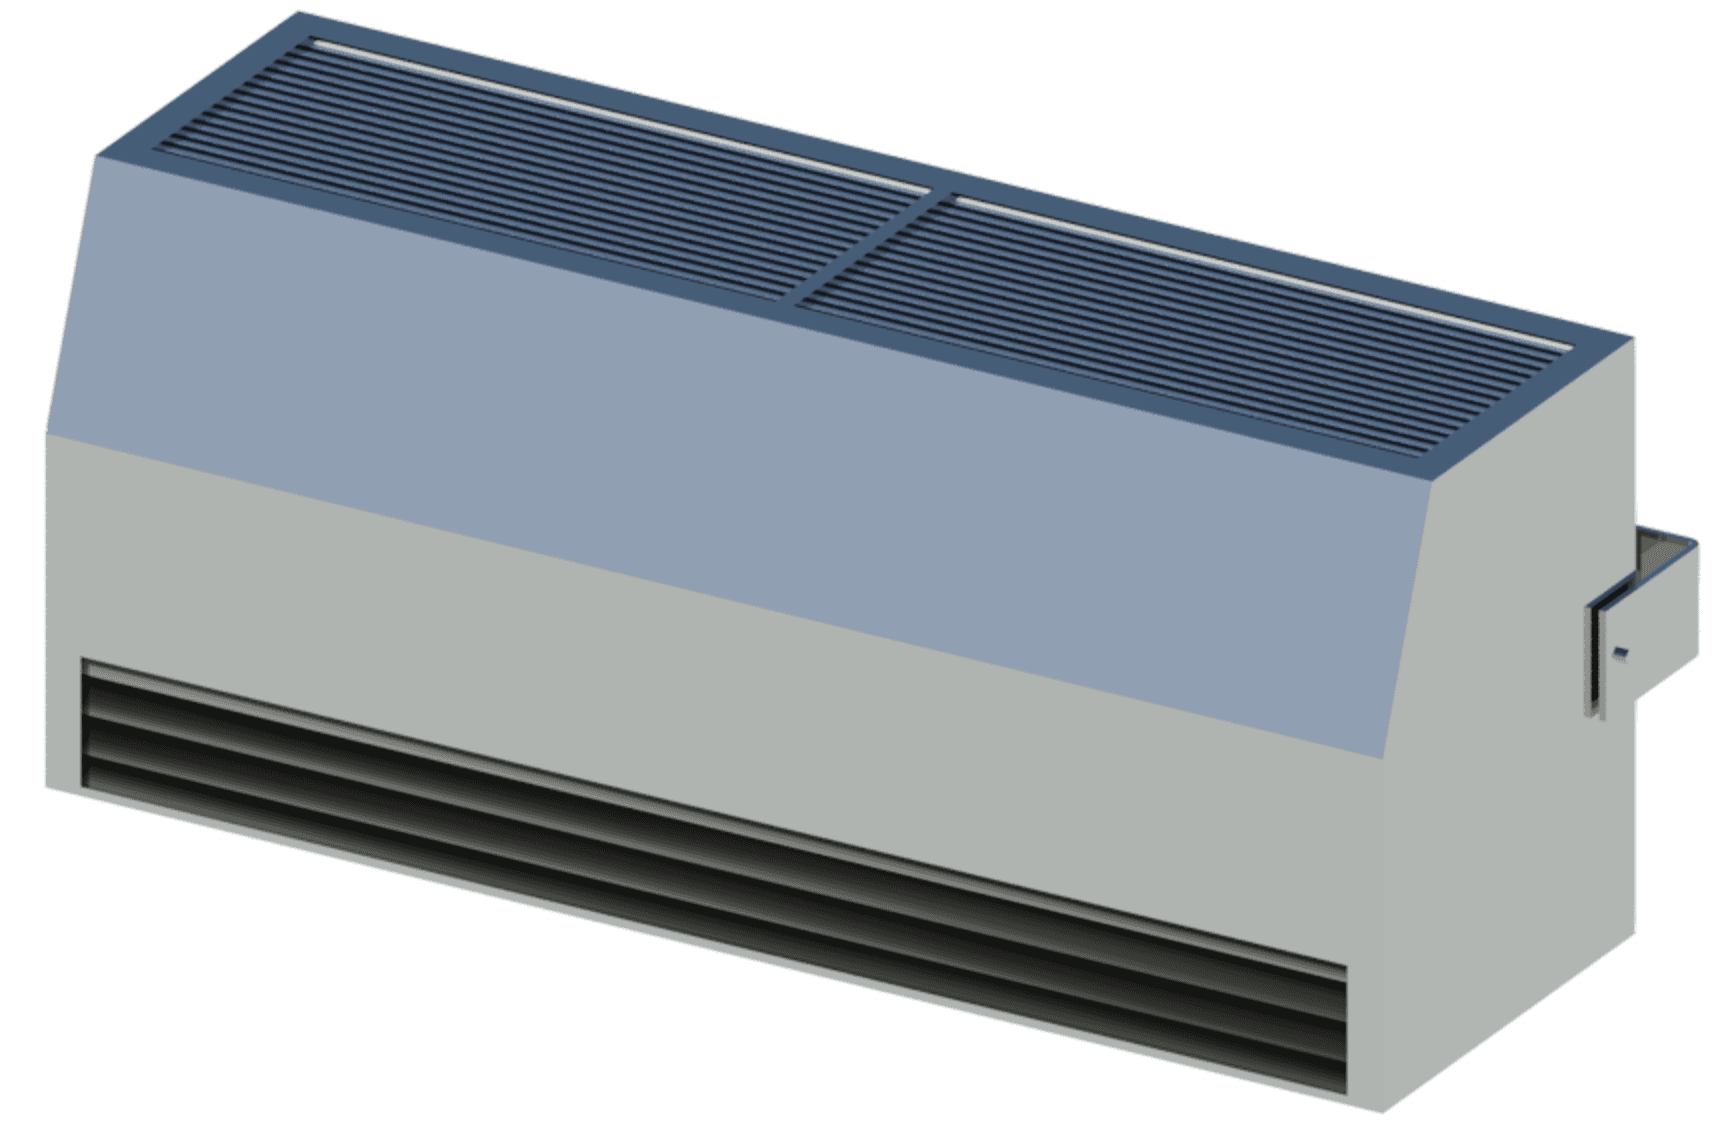
Our free collection on radiant heating featured a KCV cove heater from manufacturer King. It had a louvre detail at the front – this would have been a waste of file size and way too much detail to have modeled in 3D geometry. Instead, we opted for adapting an OOTB texture image - taking the unsuspecting bump file for timber cladding and stretching it, utilizing the gradient and slight variations from the image.

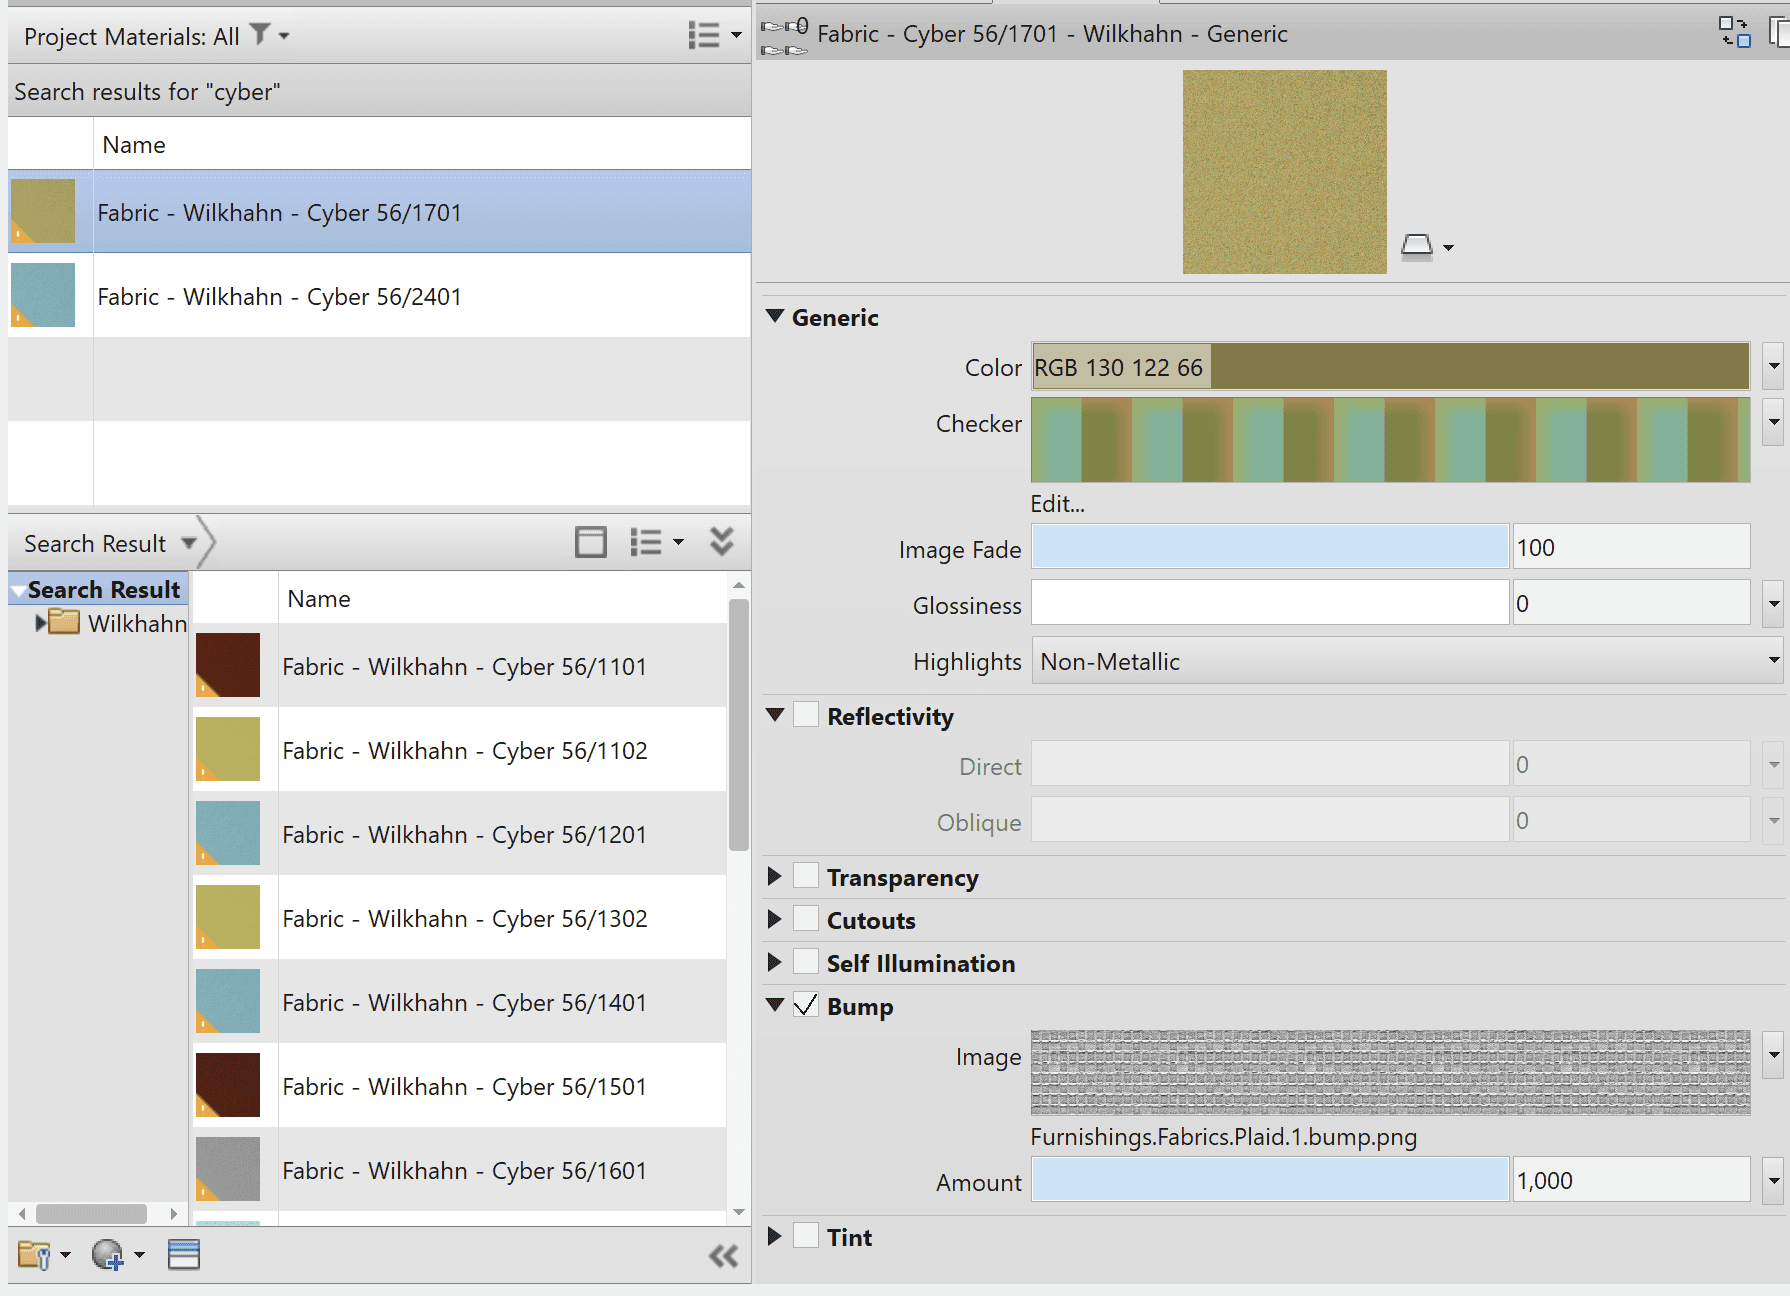
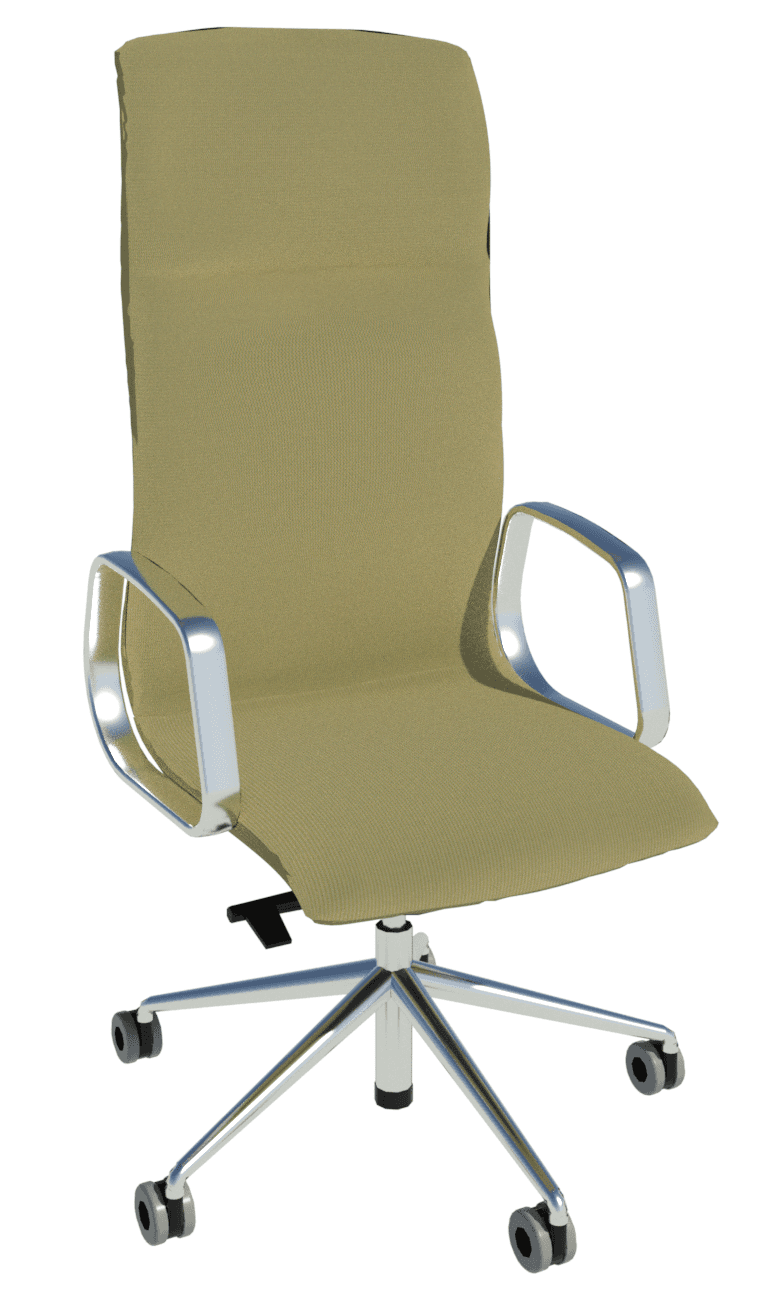
Wilkhan Fabrics
Our most recent, and probably most successful, materials created from OOTB assets were featured in our work for Wilkhahn. All of the fabrics were created from Autodesk’s generic appearance asset functions, primarily NOISE & CHECKER.
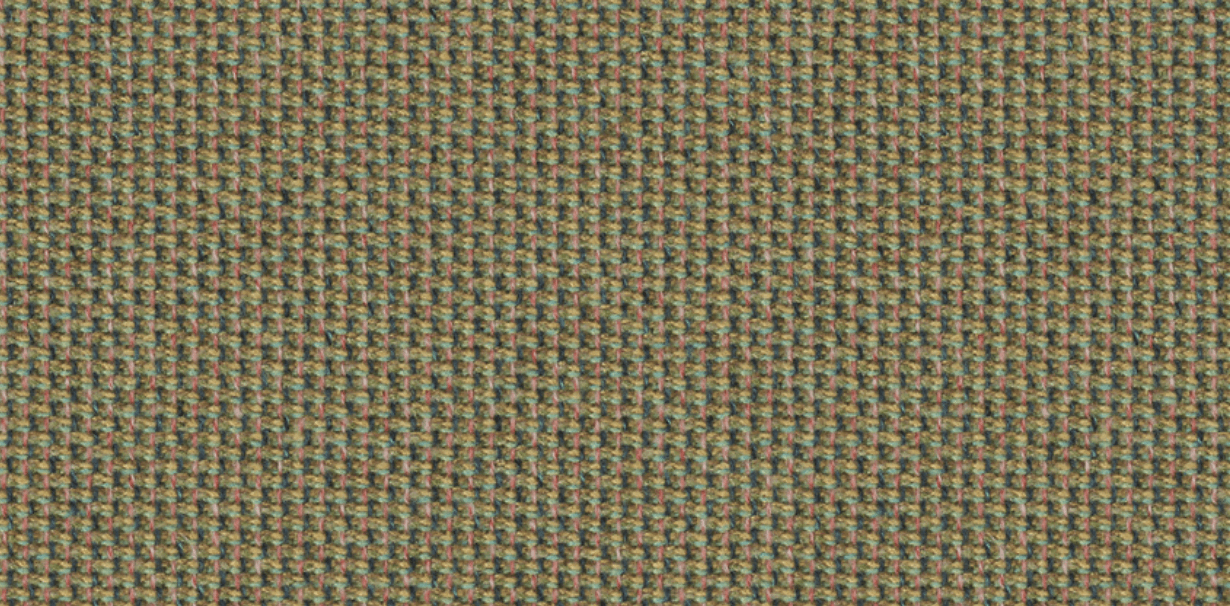
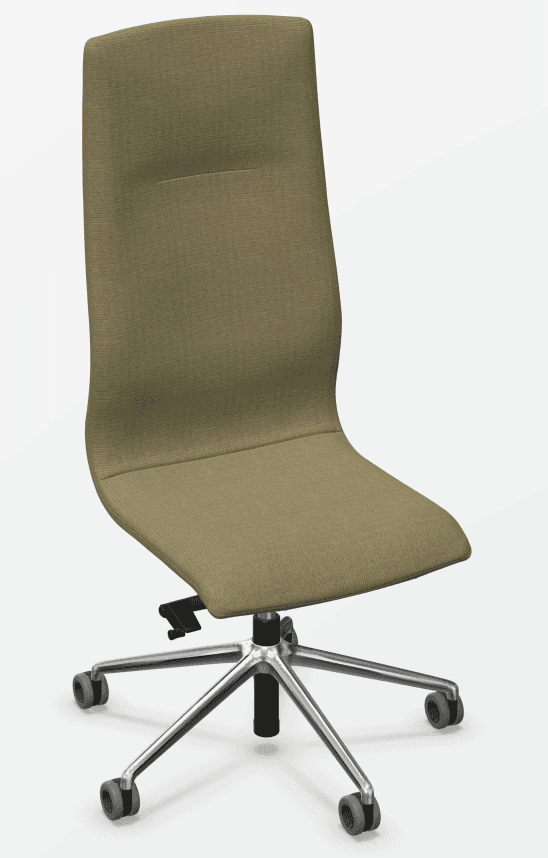
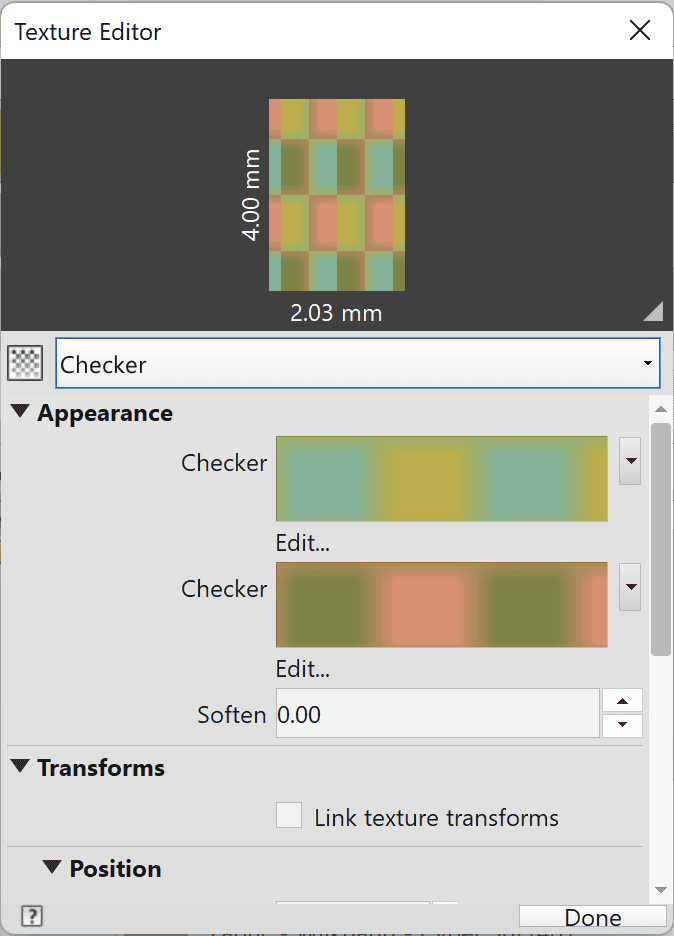
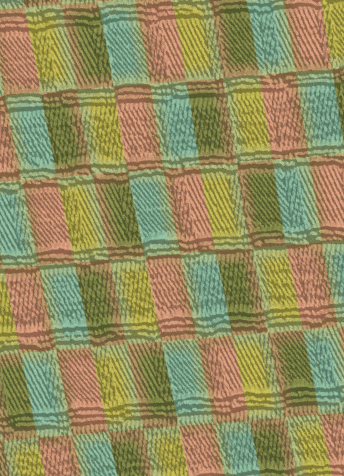
In the example of the Cyber 56/1701, we created a checkered pattern that was actually made of two separate checkers that are offset and overlapped. When combined with an OOTB fabric bump image, this gives the impression of a woven fabric.
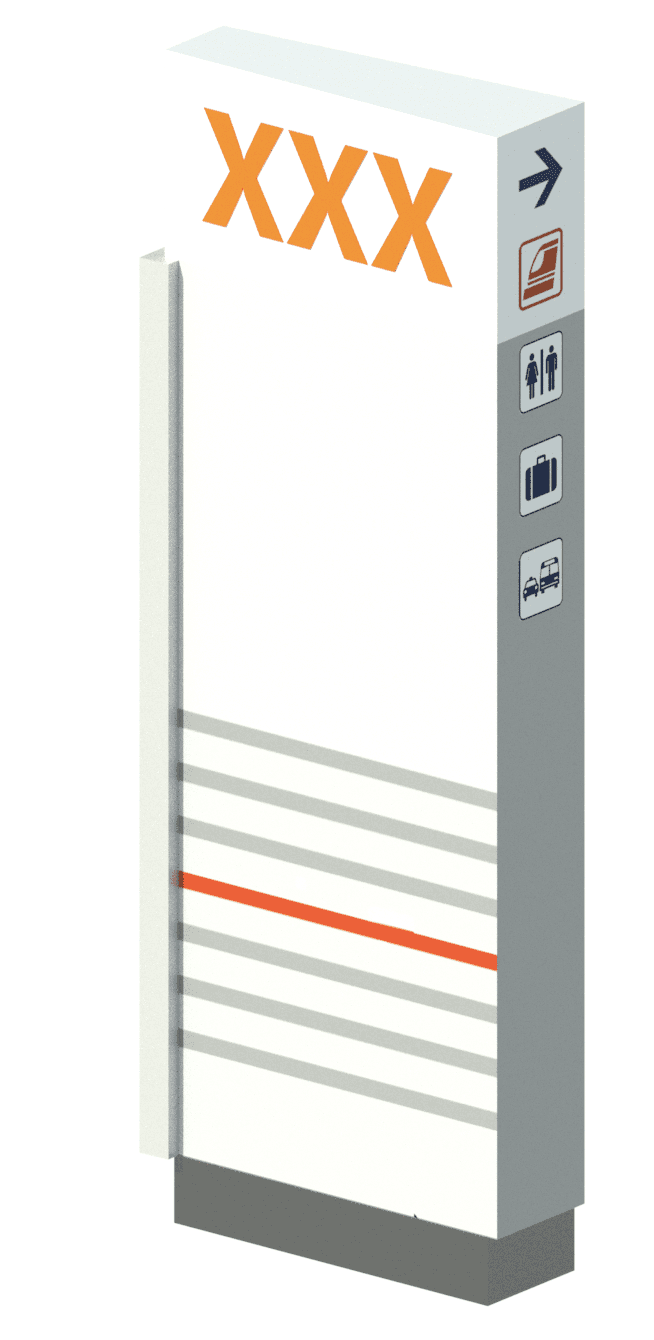
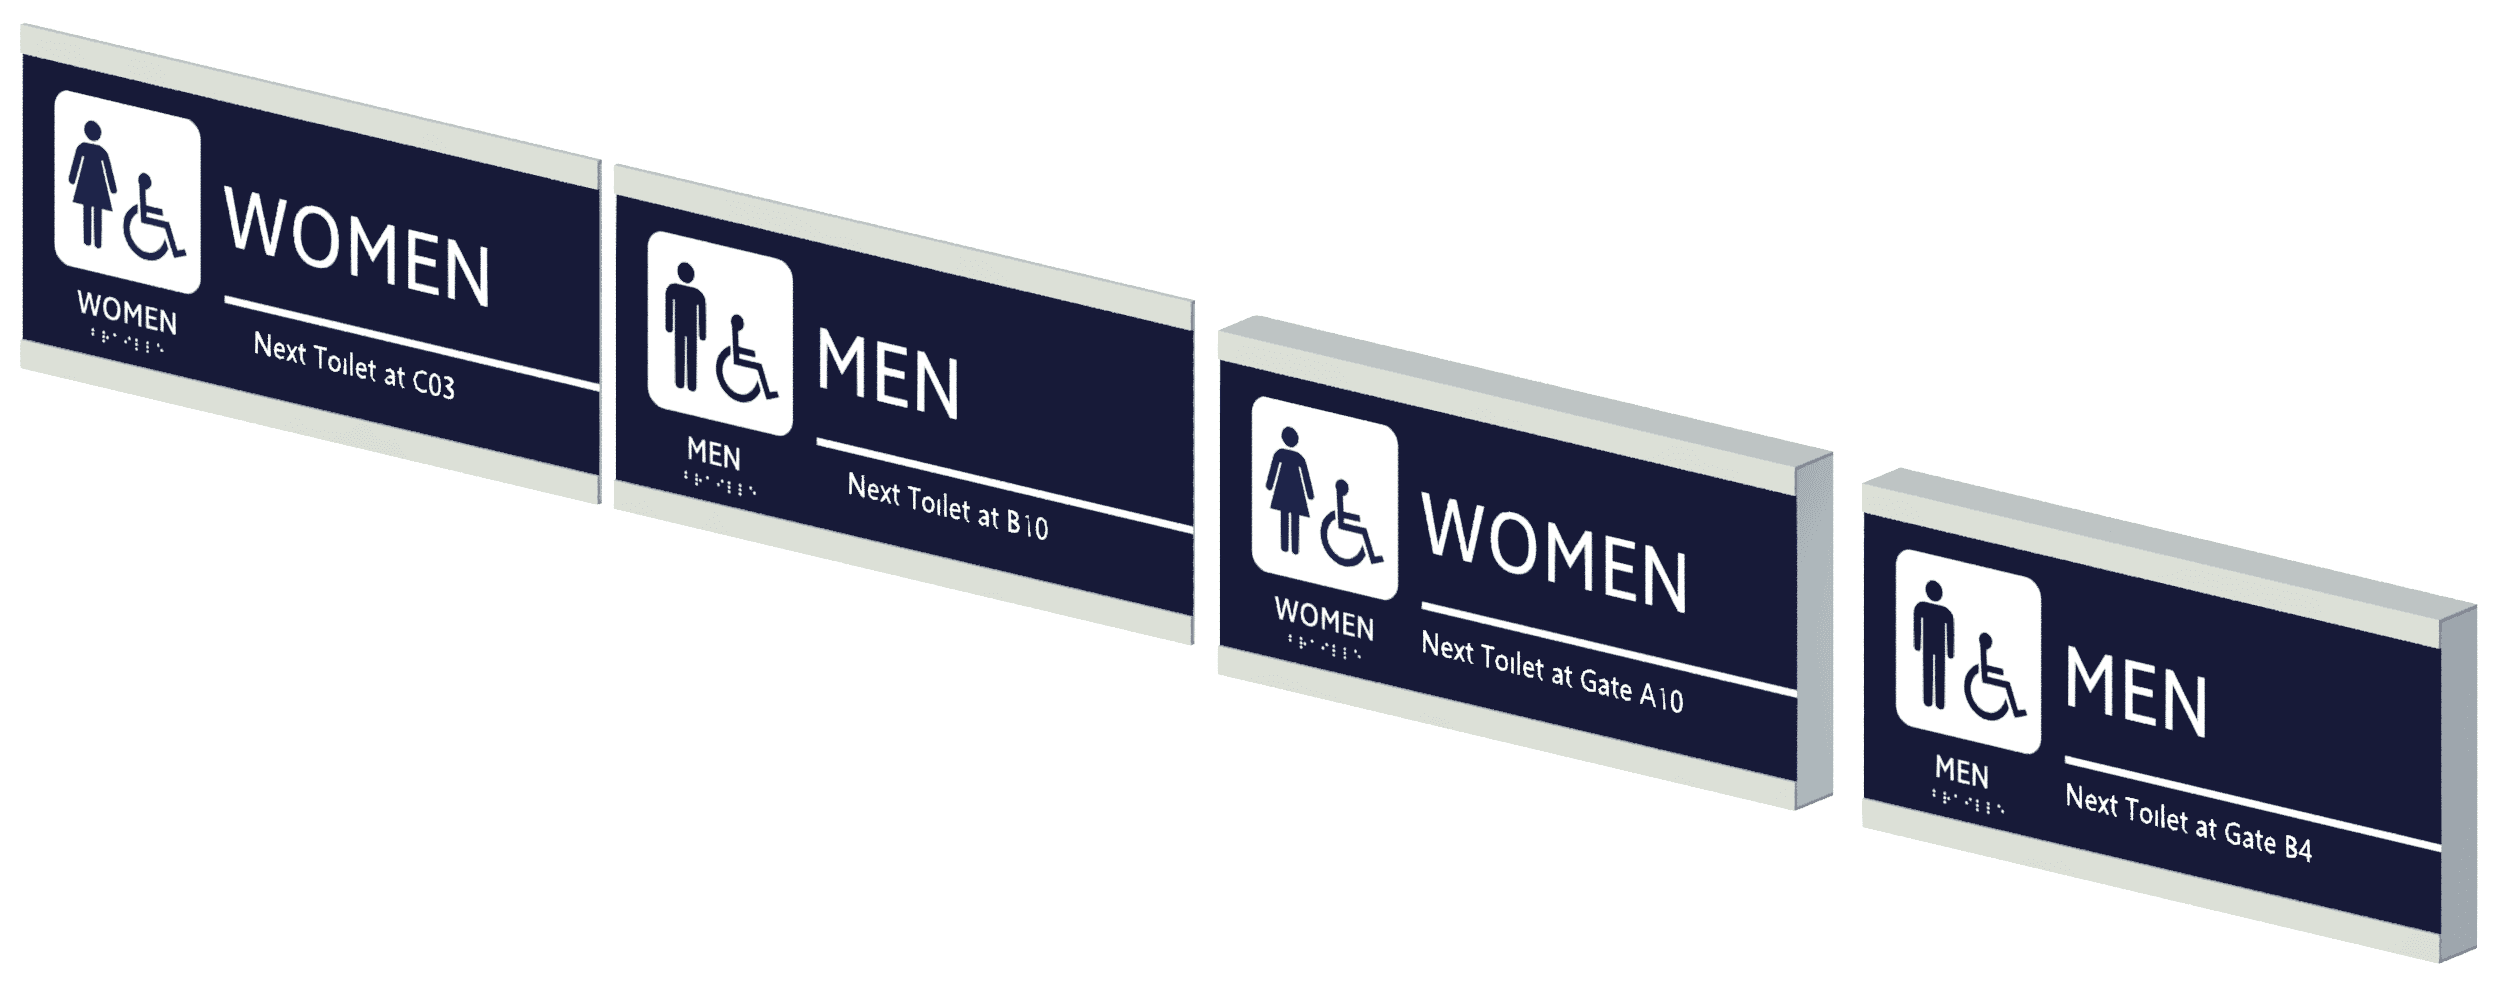
Airport signage
We created a variety of airport signage families for a major architectural firm working on a US airport project. For these families, we had access to detailed manufacturer resources with sample decals, allowing us to go the extra mile and create very realistic custom texture images in combination with parametric 3D text which could be scheduled.


Atos Supercomputer
The BullSequana XH3000 supercomputer from Atos had been requested by Global Technia. We created custom texture images because there is no way to achieve any realism without them. We made separate materials and images for each side of the supercomputer.
Conclusion
In terms of creating custom materials, both options can be justified, so there’s no definitive right or wrong. However, I do believe that a content creator should try their hardest to make the Revit end users’ lives as easy as possible. For this reason, I tend to favor option 1, as it has no impact on the end user and their time.
I hope we’ve helped to improve your understanding of Revit materials with this article. You’ve learned what an Out-of-the-Box material is, how to fix pathing issues, problems in naming materials and, most importantly, you’ve gained an understanding of how to master the different options available to you when creating your own materials.
Materials in Revit are not for the faint of heart. This post will help you understand how they work, common issues to avoid, and different approaches to achieving your desired results.
Revit materials have always proven to be a somewhat tiresome affair. In the past, it would often be the one thing that crashed Revit, leaving you with a “that’ll do” attitude. Even with that issue now fixed, the out-of-the-box material library is still limited by the texture images.
While Revit may be more focused on BIM and the coordination of a project across multiple disciplines, good materials are essential for quality visualization as well as accurate project data for things like energy and sustainability analytics.
Since it doesn’t seem like Autodesk is likely to improve its material library anytime soon, there’s only one thing left to do – drop some knowledge in this blog that can help you to master Revit materials.
About Revit’s Out-of-the-Box (OOTB) Materials
Revit’s OOTB materials have their appearance assets driven by local texture images located on your C drive under C:\Program Files (x86)\Common Files\Autodesk Shared\Materials\Textures\3\Mats.
In the example below, we’re looking at the OOTB Cast Iron material. The roughness and relief patterns are pathed to images from the Mats folder.
One of the problems with OOTB materials is their limited number and, more importantly, the limited number of texture images available, especially for the bump/relief patterns. While Revit’s material appearance asset is flexible with separate color, roughness, relief, cutout and highlight selections, there aren’t many texture images.
When Autodesk added the new norm images, they only created one for fabric-wire fabric. Add to this the existing relief bump images for tweed, burlap, linens and leather, and we are still quite limited in terms of possible fabric materials. For any content creator or manufacturer working with upholstered furniture, such as Wilkhahn who has 15 different material textures, this is an uphill battle.
Tessellation
Another problem facing most Revit materials is tessellation, or rather a lack thereof. Tessellation is the seamless repetition of a pattern covering a surface or plane.
Revit can tile an image horizontally and vertically. Seamless tiling, however, can only be achieved if you’re using OOTB images or have created an image using some kind of tessellation software.
Creating custom images for the material appearance, relief/bump or highlight is simple and can be very accurate, as these images are often supplied by the manufacturer. But after tiling the image, you’re likely to see seams.
Below is an early prototype we created when working on Wilkhahn’s chairs, using their material sample card to create a custom material. While the initial image was great, the actual end result was patchy with visible seams.
Naming
When it comes to manufacturer materials, the material’s name should, at the very least, include the manufacturer's name. How else can you be sure that a family is using the correct material? This might seem obvious, but it’s often missed or treated as an afterthought by content creators.
In the example below, a window from another content creator uses a material named “Aluminium, dark grey”. This is an incredibly vague name that is not future-proof and will not work in a large project.
There must be hundreds of families out there that would use a “dark grey aluminum material” – all with various roughness or relief patterns. If these hundreds of families all used the same rudimentary material name, they would compete with each other and ultimately “there can be only one” in a project.
The same issue applies to the appearance assets that underlie materials in Revit. Even if you have a distinct material name, if its asset is called “Generic”, then this too will compete with any other materials using an asset called “Generic”. The existing “Generic” asset in a project will override any new “Generic” assets loaded in. See below for an example of how this plays out for a plastic material with an appearance asset named “Default (1)”.
When both families are loaded into the same project, only the Default (1) appearance asset from the first Cylinder family will exist.
To avoid such naming issues in the Revit families that we create, we have developed our own naming conventions for materials and material assets. Feel free to use them in your own office or content creation work for easier management.
Material naming convention
Material Category - Manufacturer - Description 1 - Description 2
For example:
Paint - Carrier - Gray - Gloss
Appearance asset naming convention
Material Category - Description 1 - Description 2 - Manufacturer - Asset Type
For example:
Paint - Gray - Gloss - Carrier - Opaque
Here at Kinship, asset naming has a fifth part for the “asset type”. In the image below we see OOTB metals are made from different assets types – Metal, Generic and Opaque.
Each asset type has different features. For instance, the Generic type doesn’t have a roughness setting, but it does have a tint and self-illumination. The OOTB copper materials, for example, are created from appearance assets of different types as shown below:
Including the asset type in our naming convention for appearance assets helps us manage old and new materials, identify which assets could be improved and maintain overall consistency for each manufacturer we work with.
Creating custom materials
Custom materials can be created in two ways. Both approaches have pros and cons.
1) Use Out-of-the-Box texture images.
Pros
They have better tiling functionality and tessellate well.
They transfer well between companies and projects because they use default Autodesk texture images.
Always feasible – sometimes it may be hard to obtain the custom image required for the second approach.
Cons
They can be time-consuming because you need to tweak the settings and test in a rendering each time.
Difficult to achieve 100% accuracy. The OOTB textures and assets are not always accurate, and there is only so much creative tweaking you can do. For instance, Autodesk has a number of wooden images including Maple, Cherry, Mahogany, Pine, Red Beech, Red Oak, Teak, White Ash, White Oak and Walnut. But it’s hard to turn any of those into a new wood such as Acacia or Yew.
TIP - The Generic appearance asset is a powerful tool and worth exploring. The Checker and Noise patterns both have two sublayers (Color 1 & 2) where the user can again select from the range of patterns.
2) Create your own texture images outside of Revit.
Pros
Very realistic.
Can be super quick to create.
Cons
They require management from the end user to locate and path the file location in Revit’s render settings.
They do not tessellate or tile well. As a result, sometimes multiple variations can be needed if the Revit family has many types with different sizes.
TIP - To create bump/relief texture images, just change the contrast and hue settings from the original image.
Kinship’s very own triumvirate on an early morning road trip after an Autodesk University, now with texture. You can almost touch the hangovers!
How to path custom images
You may have a material with a warning sign indicating that the material’s image cannot be found. To fix this, simply go to the Revit options, then into Render settings and add the folder with the image to the directory. Lastly, restart Revit.
Case Studies
F-22 Fighter Jet
We worked with aviation architects who required this family for spatial planning. None of the OOTB metals were good enough in this case. They didn't convey the mottled effect from the paneling of the plane, and a custom image wasn’t possible due to a lack of clear documentation and resources. We created our own material by using the Noise pattern (from a generic appearance asset) for Generic Image and Bump attributes. The difference in size and tiling creates the impression of paneling and a hint of inconsistency in the metal.
Louvres
Our free collection on radiant heating featured a KCV cove heater from manufacturer King. It had a louvre detail at the front – this would have been a waste of file size and way too much detail to have modeled in 3D geometry. Instead, we opted for adapting an OOTB texture image - taking the unsuspecting bump file for timber cladding and stretching it, utilizing the gradient and slight variations from the image.
Wilkhan Fabrics
Our most recent, and probably most successful, materials created from OOTB assets were featured in our work for Wilkhahn. All of the fabrics were created from Autodesk’s generic appearance asset functions, primarily NOISE & CHECKER.
In the example of the Cyber 56/1701, we created a checkered pattern that was actually made of two separate checkers that are offset and overlapped. When combined with an OOTB fabric bump image, this gives the impression of a woven fabric.
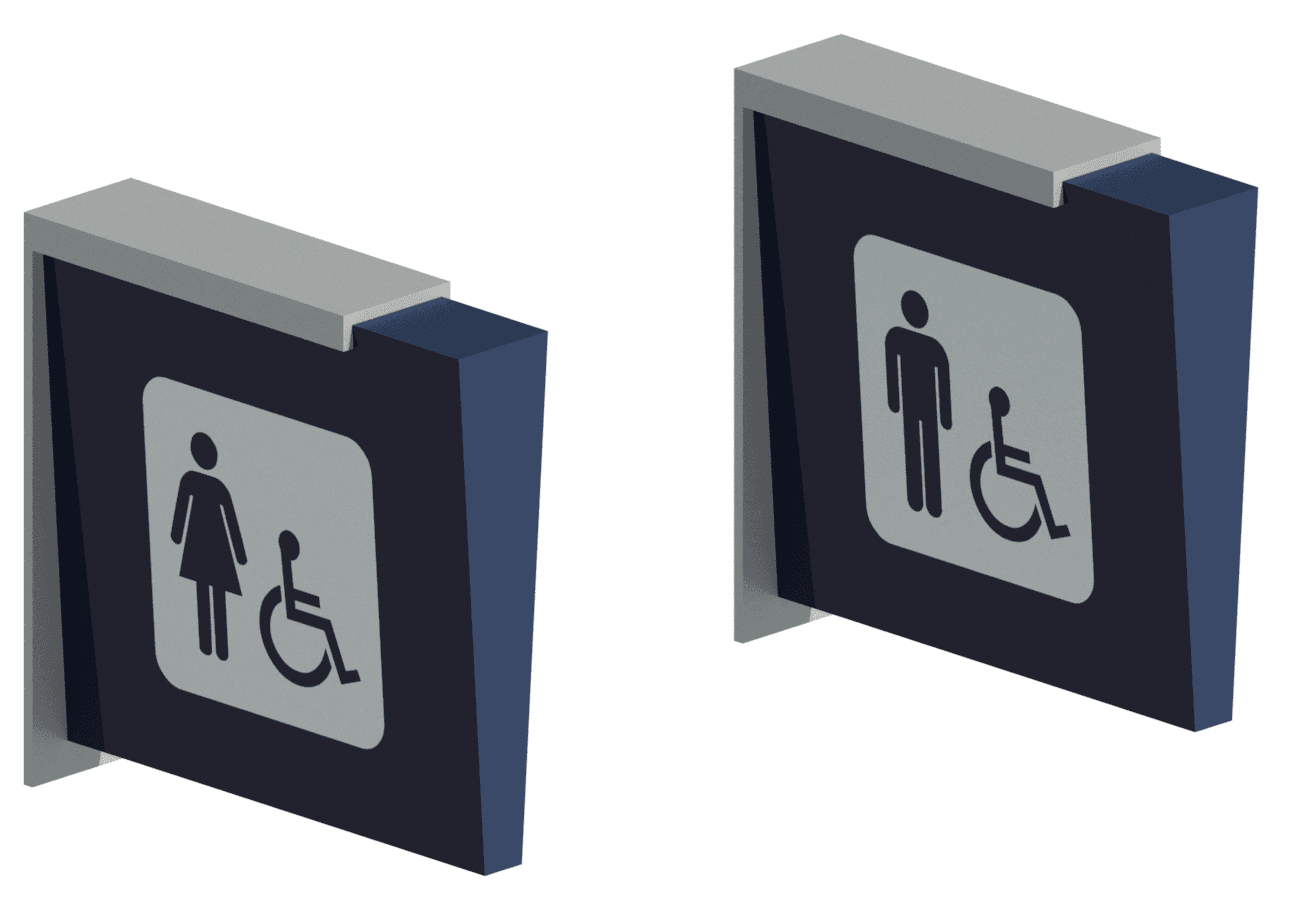
Airport signage
We created a variety of airport signage families for a major architectural firm working on a US airport project. For these families, we had access to detailed manufacturer resources with sample decals, allowing us to go the extra mile and create very realistic custom texture images in combination with parametric 3D text which could be scheduled.
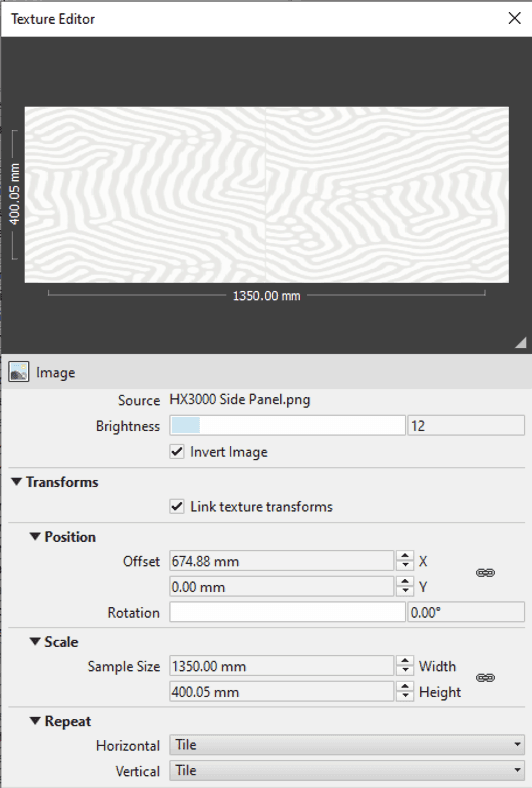
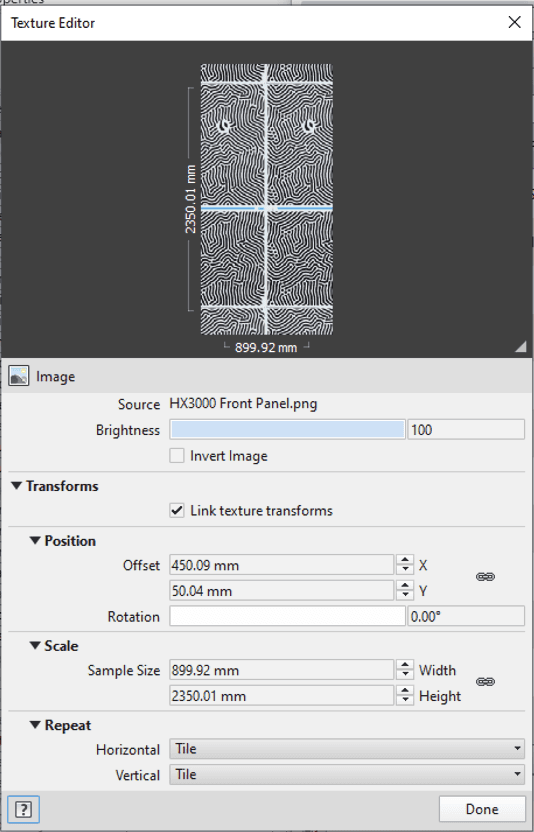
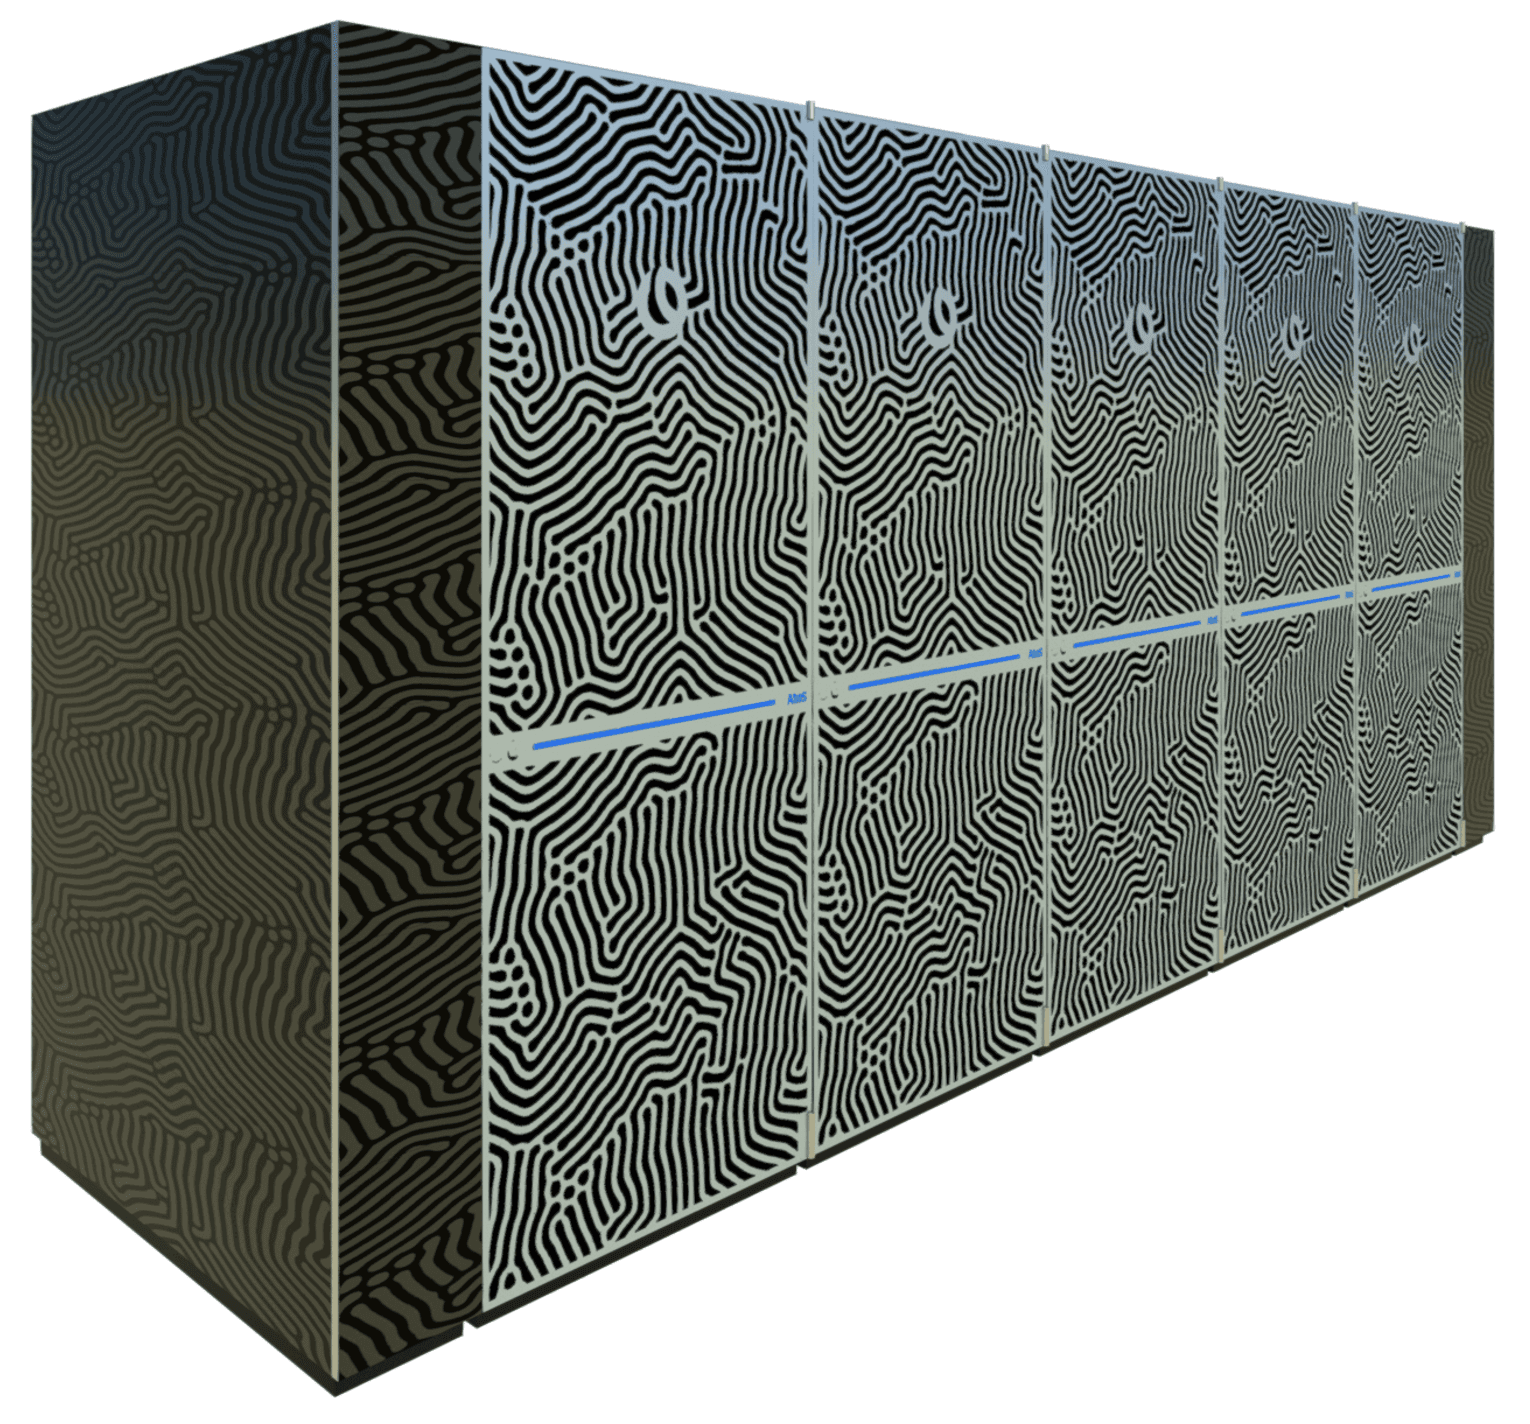
Atos Supercomputer
The BullSequana XH3000 supercomputer from Atos had been requested by Global Technia. We created custom texture images because there is no way to achieve any realism without them. We made separate materials and images for each side of the supercomputer.
Conclusion
In terms of creating custom materials, both options can be justified, so there’s no definitive right or wrong. However, I do believe that a content creator should try their hardest to make the Revit end users’ lives as easy as possible. For this reason, I tend to favor option 1, as it has no impact on the end user and their time.
I hope we’ve helped to improve your understanding of Revit materials with this article. You’ve learned what an Out-of-the-Box material is, how to fix pathing issues, problems in naming materials and, most importantly, you’ve gained an understanding of how to master the different options available to you when creating your own materials.


Kinship
The best way to manage Revit content
Kinship
The best way to manage Revit content
Kinship
The best way to manage Revit content
Similar Articles


Never miss an update with our monthly newsletter
Get the latest company news, product updates, blog posts and free Revit content from Kinship. Delivered directly to your inbox no more than once a month.
By submitting your email, you agree to receive newsletter emails.
Support
Never miss an update with our monthly newsletter
Get the latest company news, product updates, blog posts and free Revit content from Kinship. Delivered directly to your inbox no more than once a month.
By submitting your email, you agree to receive newsletter emails.
Support
Never miss an update with our monthly newsletter
Get the latest company news, product updates, blog posts and free Revit content from Kinship. Delivered directly to your inbox no more than once a month.
By submitting your email, you agree to receive newsletter emails.
Support