Now in Kinship: Materials
Materials are fundamental to every Revit project, but have always been a pain to manage. Kinship changes that with new management tools purpose-built for materials.
Now in Kinship: Materials
Materials are fundamental to every Revit project, but have always been a pain to manage. Kinship changes that with new management tools purpose-built for materials.

Materials fill a critical role in Revit projects. If families define the shape and size of elements in your model, materials define what they are made of, and how they appear.
Materials are key ingredients in drawings, visualization, environmental analysis and much more. And yet managing them in Revit has always been something of a nightmare.
Our new materials release is designed to fix that. Kinship now brings you the most powerful Revit materials management system available.
In this article, we’ll walk through how Kinship helps you build a materials library your team will love to use.
At a Glance
Before we dive into the details, here’s a quick look at what you can do with materials in Kinship.
Search and Load
You can now search and load materials into models and families through the Revit add-in or from the web.
Materials are notoriously difficult to share between Revit models. Kinship makes this process seamless, allowing you to load in just the materials you need and automatically handling any image maps associated with them.
Materials that have been loaded will appear in the materials browser, ready to be applied to families and geometry.
Organize and Browse
The Kinship library now includes a dedicated Materials section, which allows you to organize your materials according to the needs of your projects and team.
Using classes, your team can browse for the materials they need within practical, real-world categories.
We’ve also created tailored listing and item pages that provide richer, more relevant detail, helping you to compare and choose the right materials before loading into Revit.
Key Features
The new Materials section can also be found at the top of the Library page. Materials represent an entirely new kind of content in Kinship, and so we’ve given them special treatment.
Much more than a simple list of materials, Kinship provides multiple ways to search for, browse and manage your material library. Below we outline a few of these key features. For a more detailed walkthrough of all new features, check our documentation.
Material Class
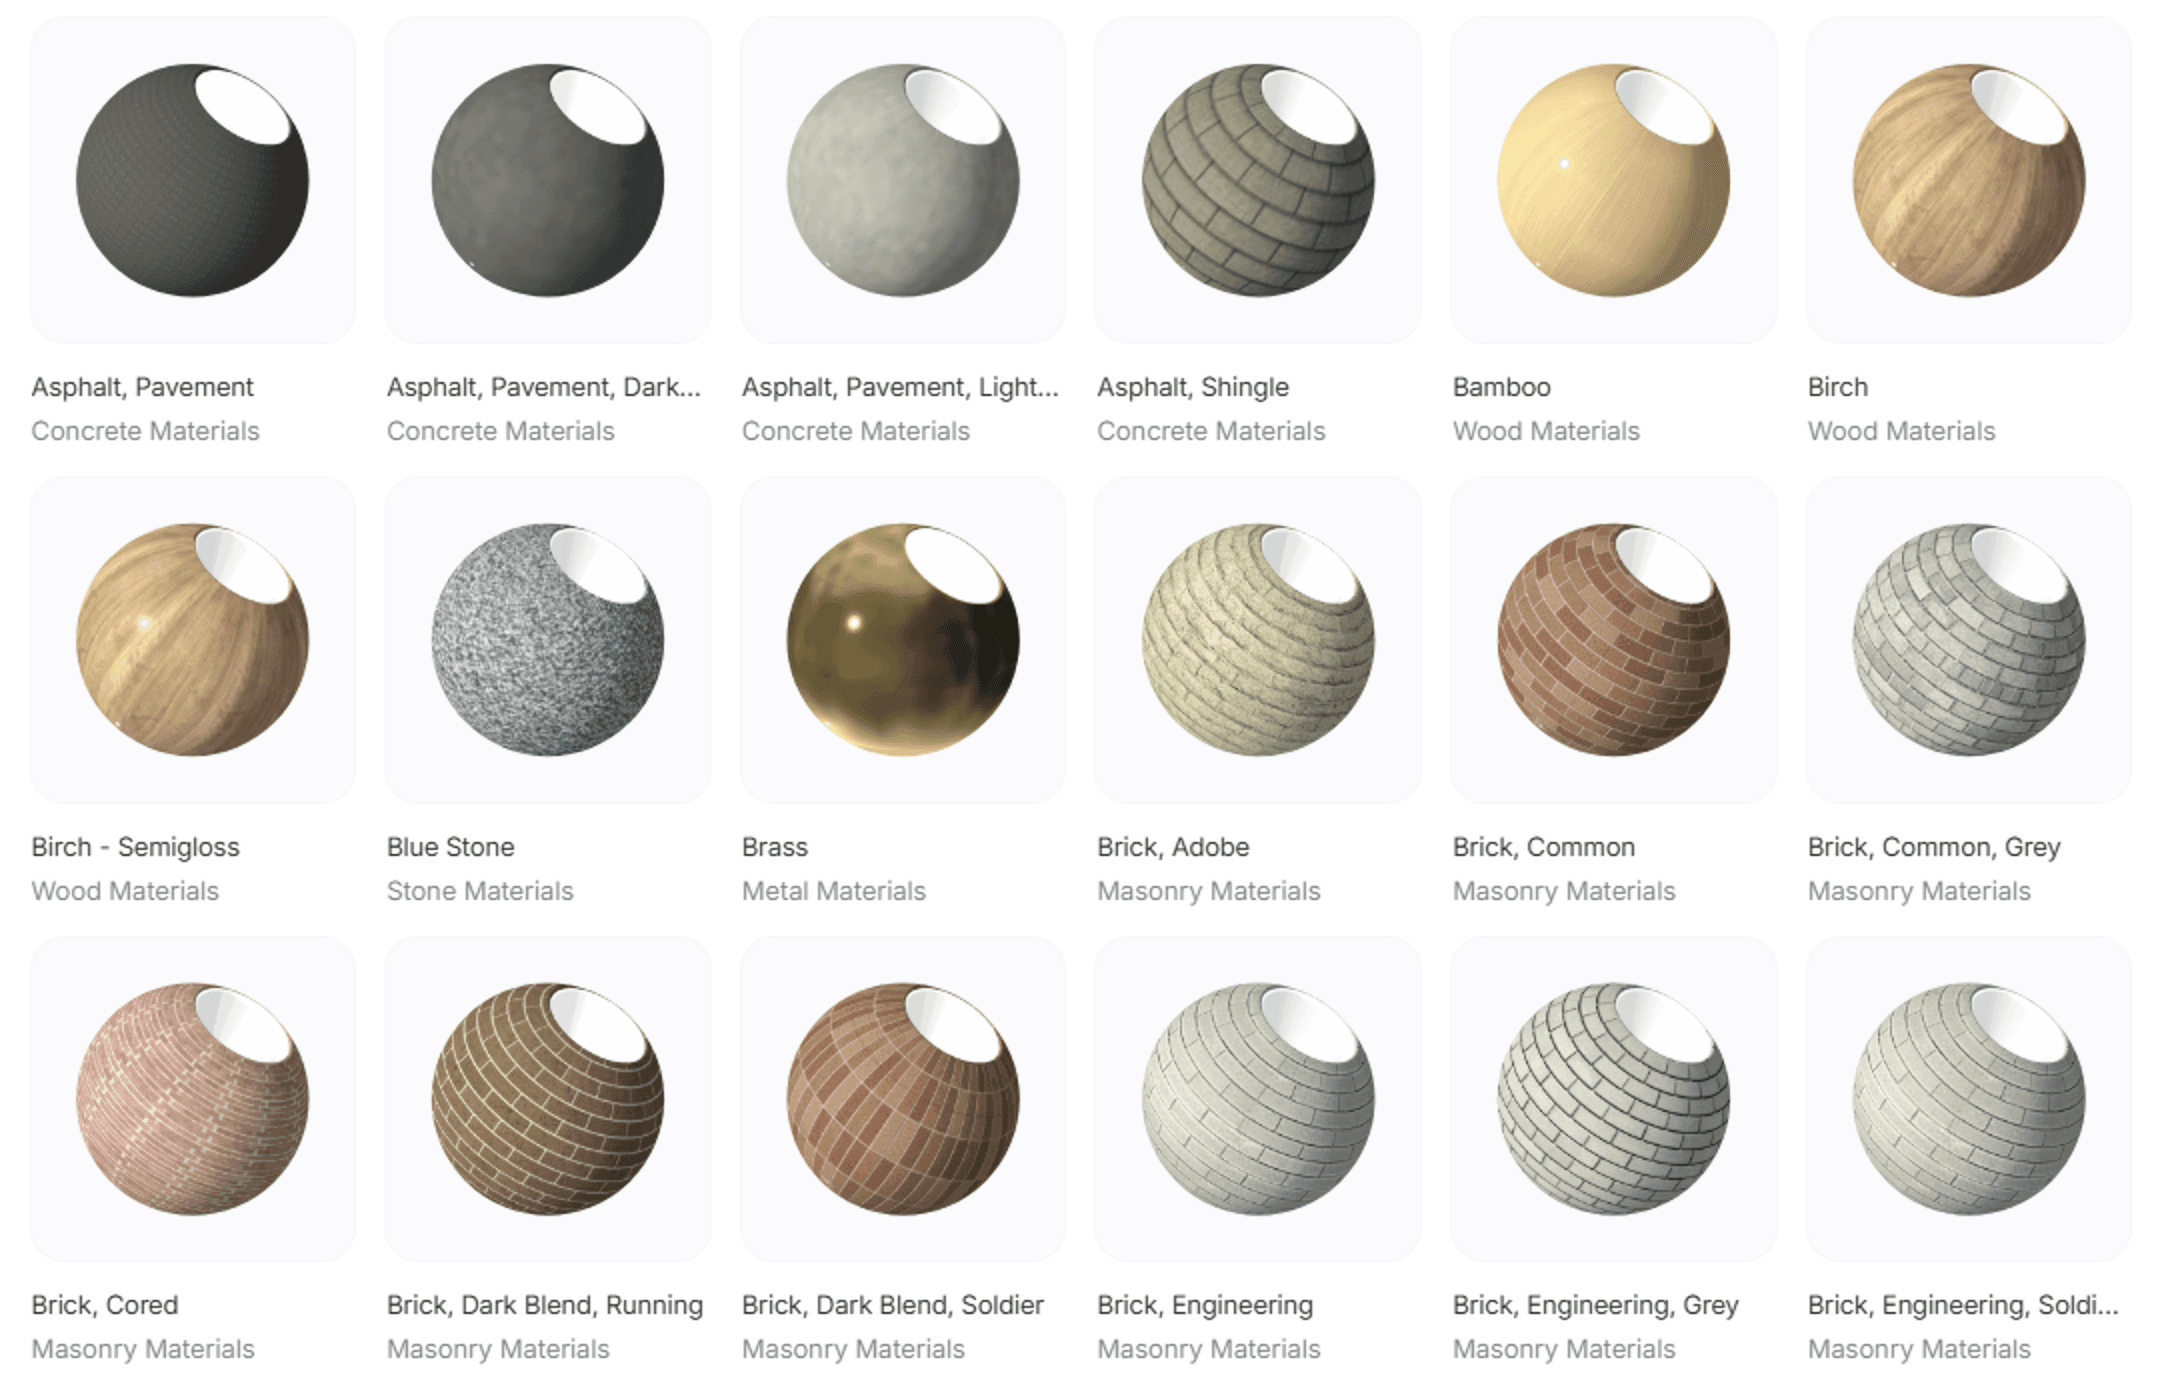
On real-world projects, the list of materials can grow quickly, often making it difficult to find the ones you need.
This is where an underused feature in Revit, the material class, comes in. Classes allow you to group materials into practical categories such as Concrete, Glass and Masonry.

Class is a parameter in the material’s Identity Data tab. Classes can be used to filter down large lists of materials. Revit’s default project templates include 21 common material classes, but it’s also possible to create your own.
In Kinship, material class is the primary way to organize and browse through your materials. Each material displays its class just like families display their category.
When you upload a material to your library, Kinship captures the material’s class from Revit. But we’ve taken this a step further, allowing you to update the class for your materials directly on the web, so you can quickly organize your library into suitable categories.
Appearance Assets
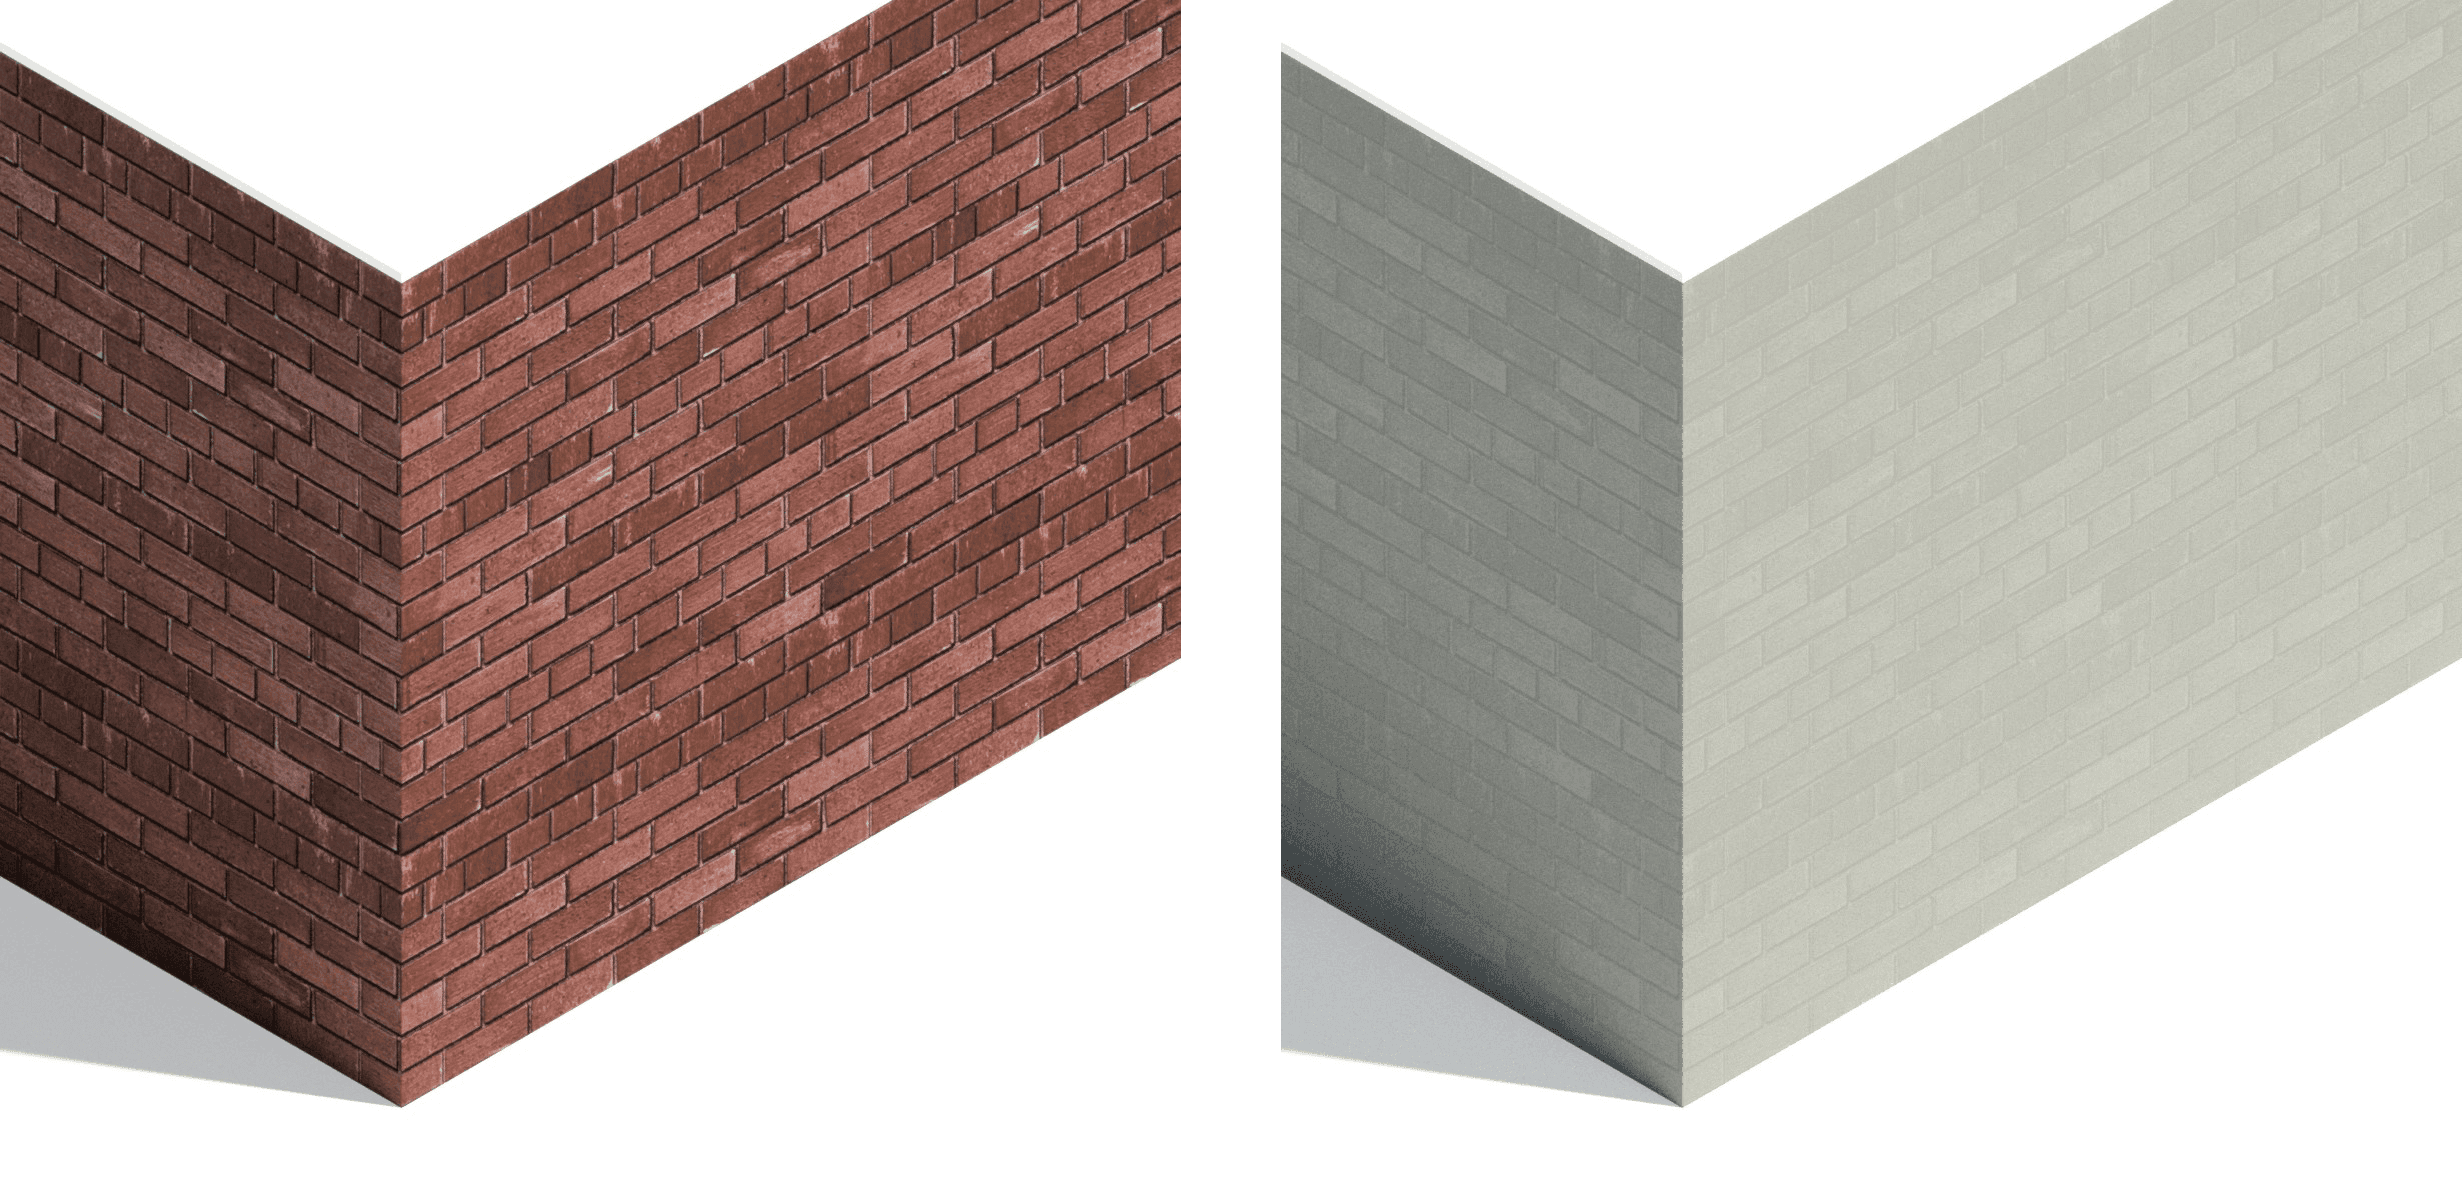
Materials determine how Revit elements look in views (plans, sections, etc) and renderings generated in Revit, as well as when exported to external visualization tools such as Enscape, TwinMotion and D5.
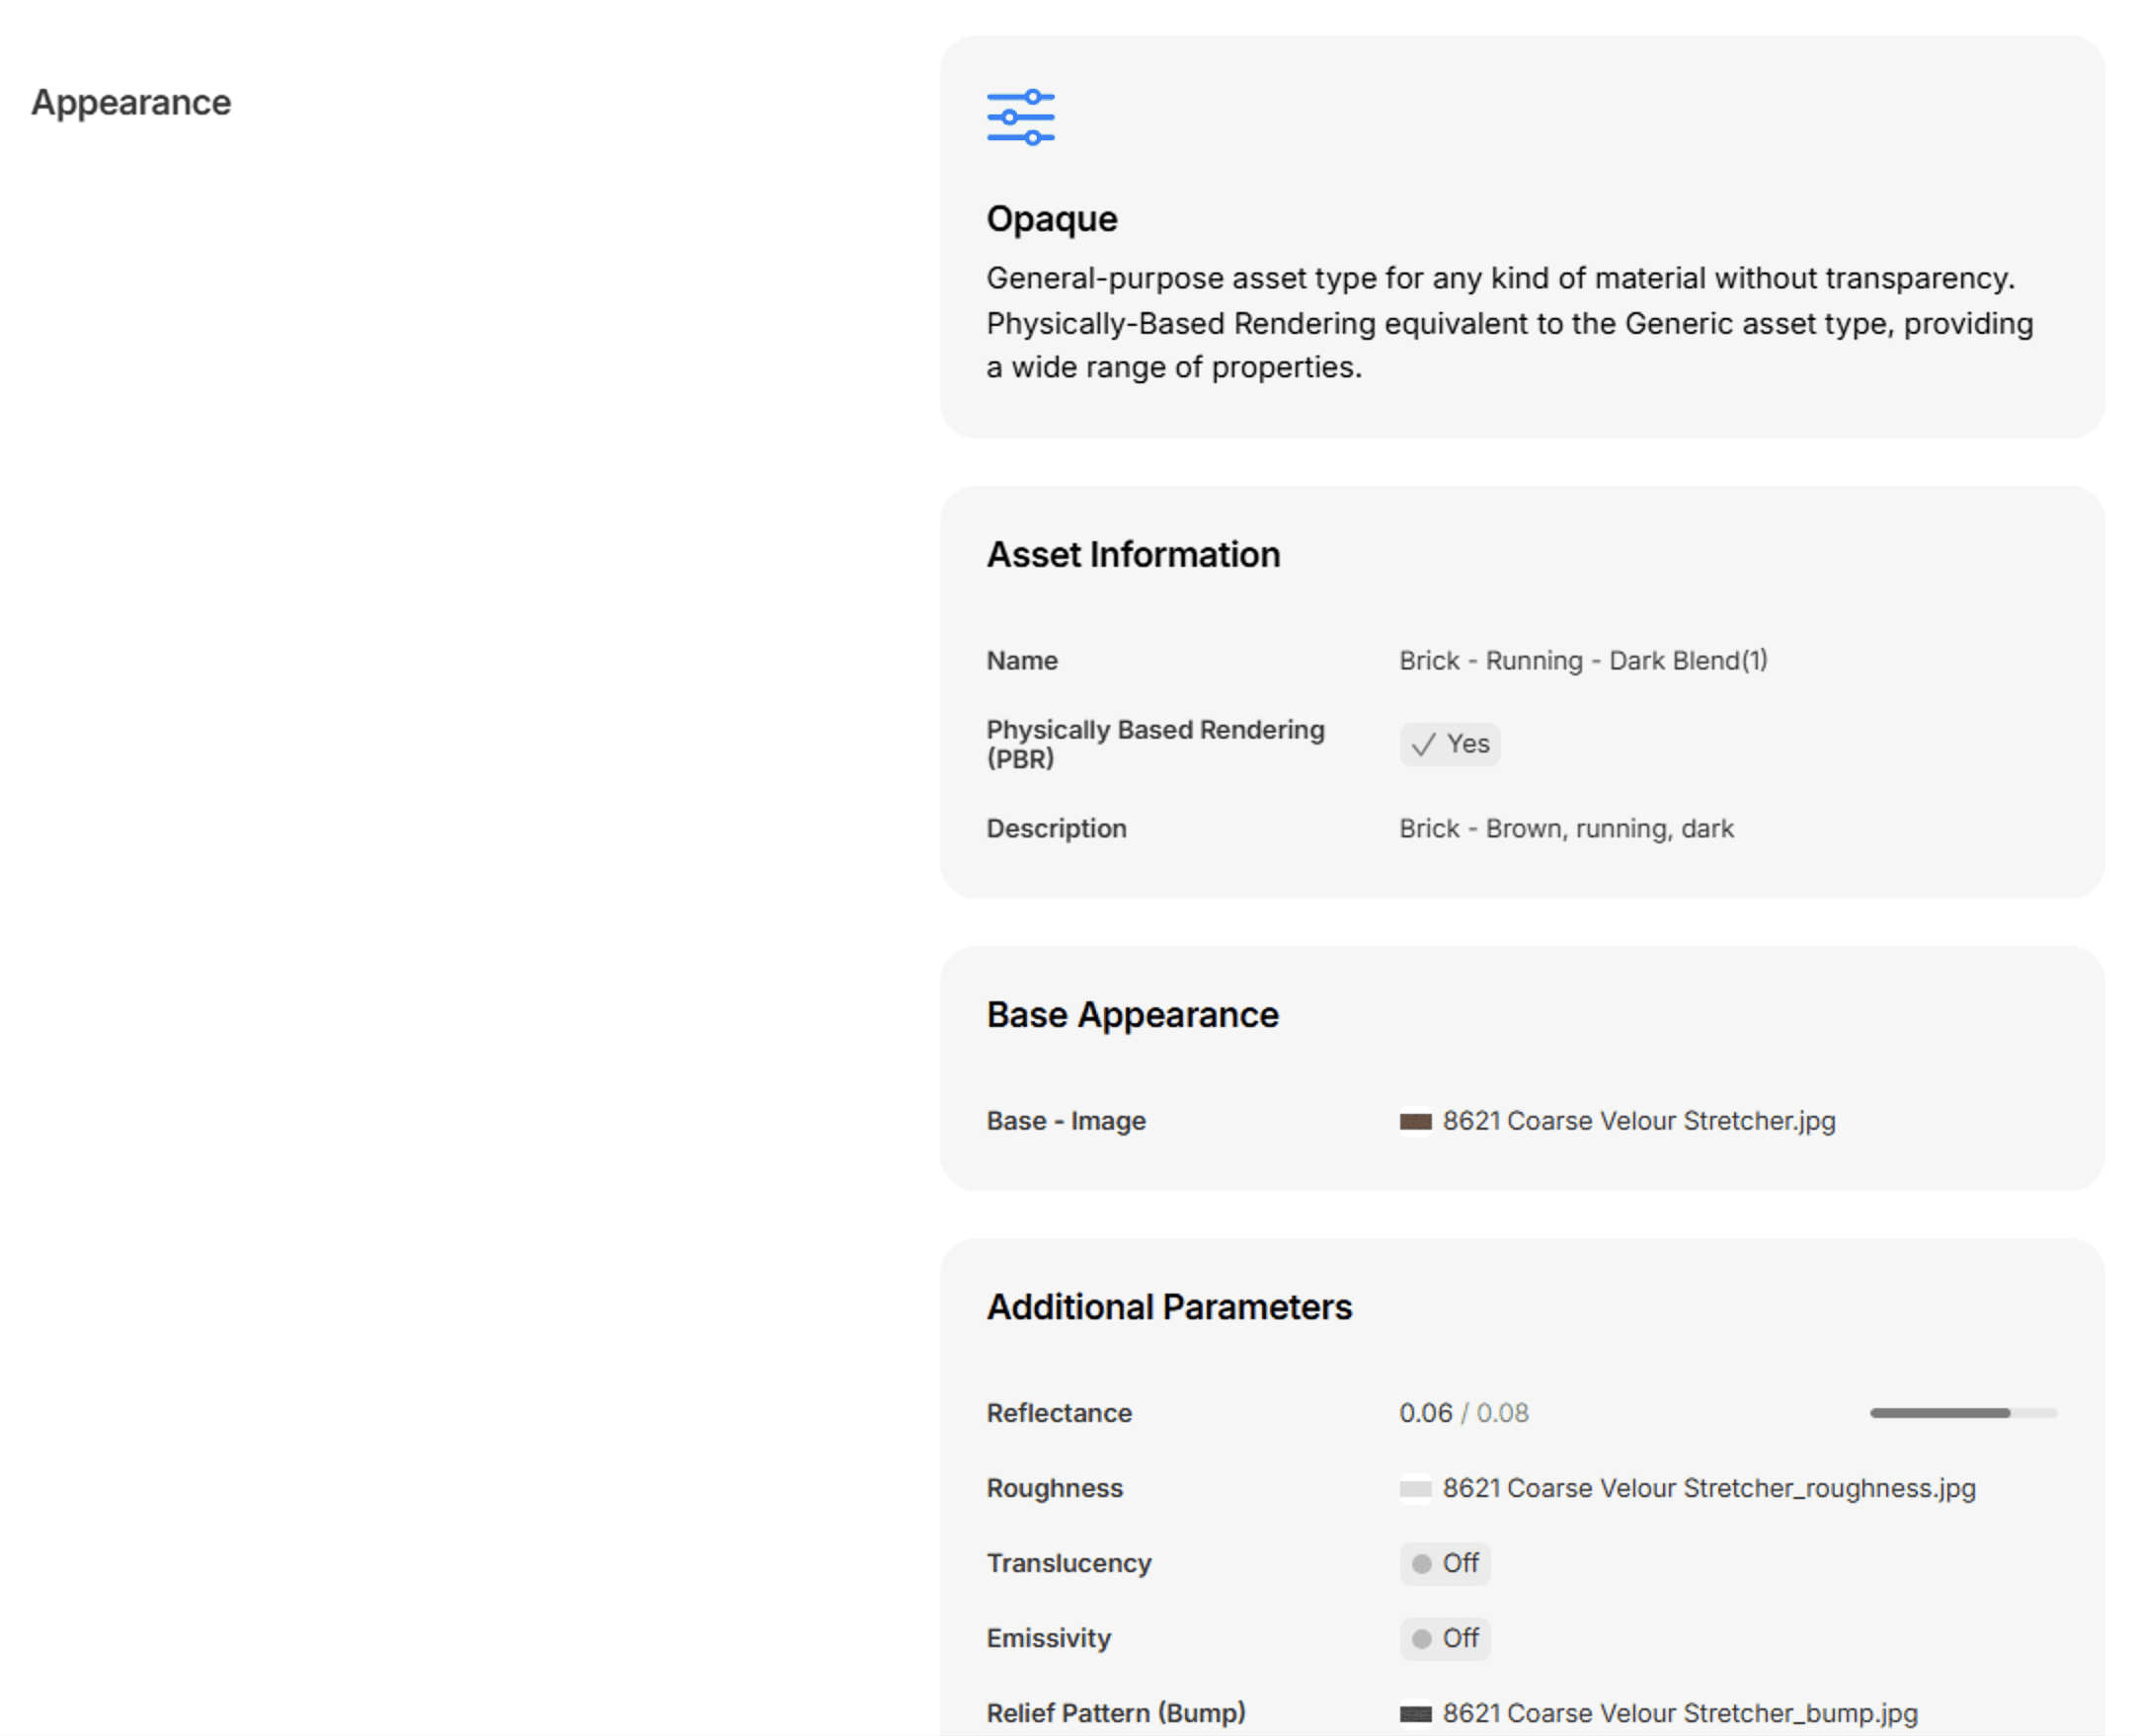
Every material includes an appearance asset, seen in its Appearance tab. The appearance asset is a collection of settings controlling how the material looks in realistic views and renderings.
Revit provides 19 appearance asset types, ranging from flexible general-purpose types like Generic, Opaque and Transparent to specialized types intended for specific materials such as Concrete and Glazing.
The asset type determines which properties you can control, such as base color, bump and relief, transparency, and many others.
In the new Materials section of the Library, advanced users familiar with creating materials can search and browse for materials based on their asset type. Each material’s item page also displays a breakdown of the settings and image maps used in the appearance asset.
For anyone interested in learning more about appearance assets, I recommend taking a look at our previous post on Mastering Revit Materials.
Image Maps
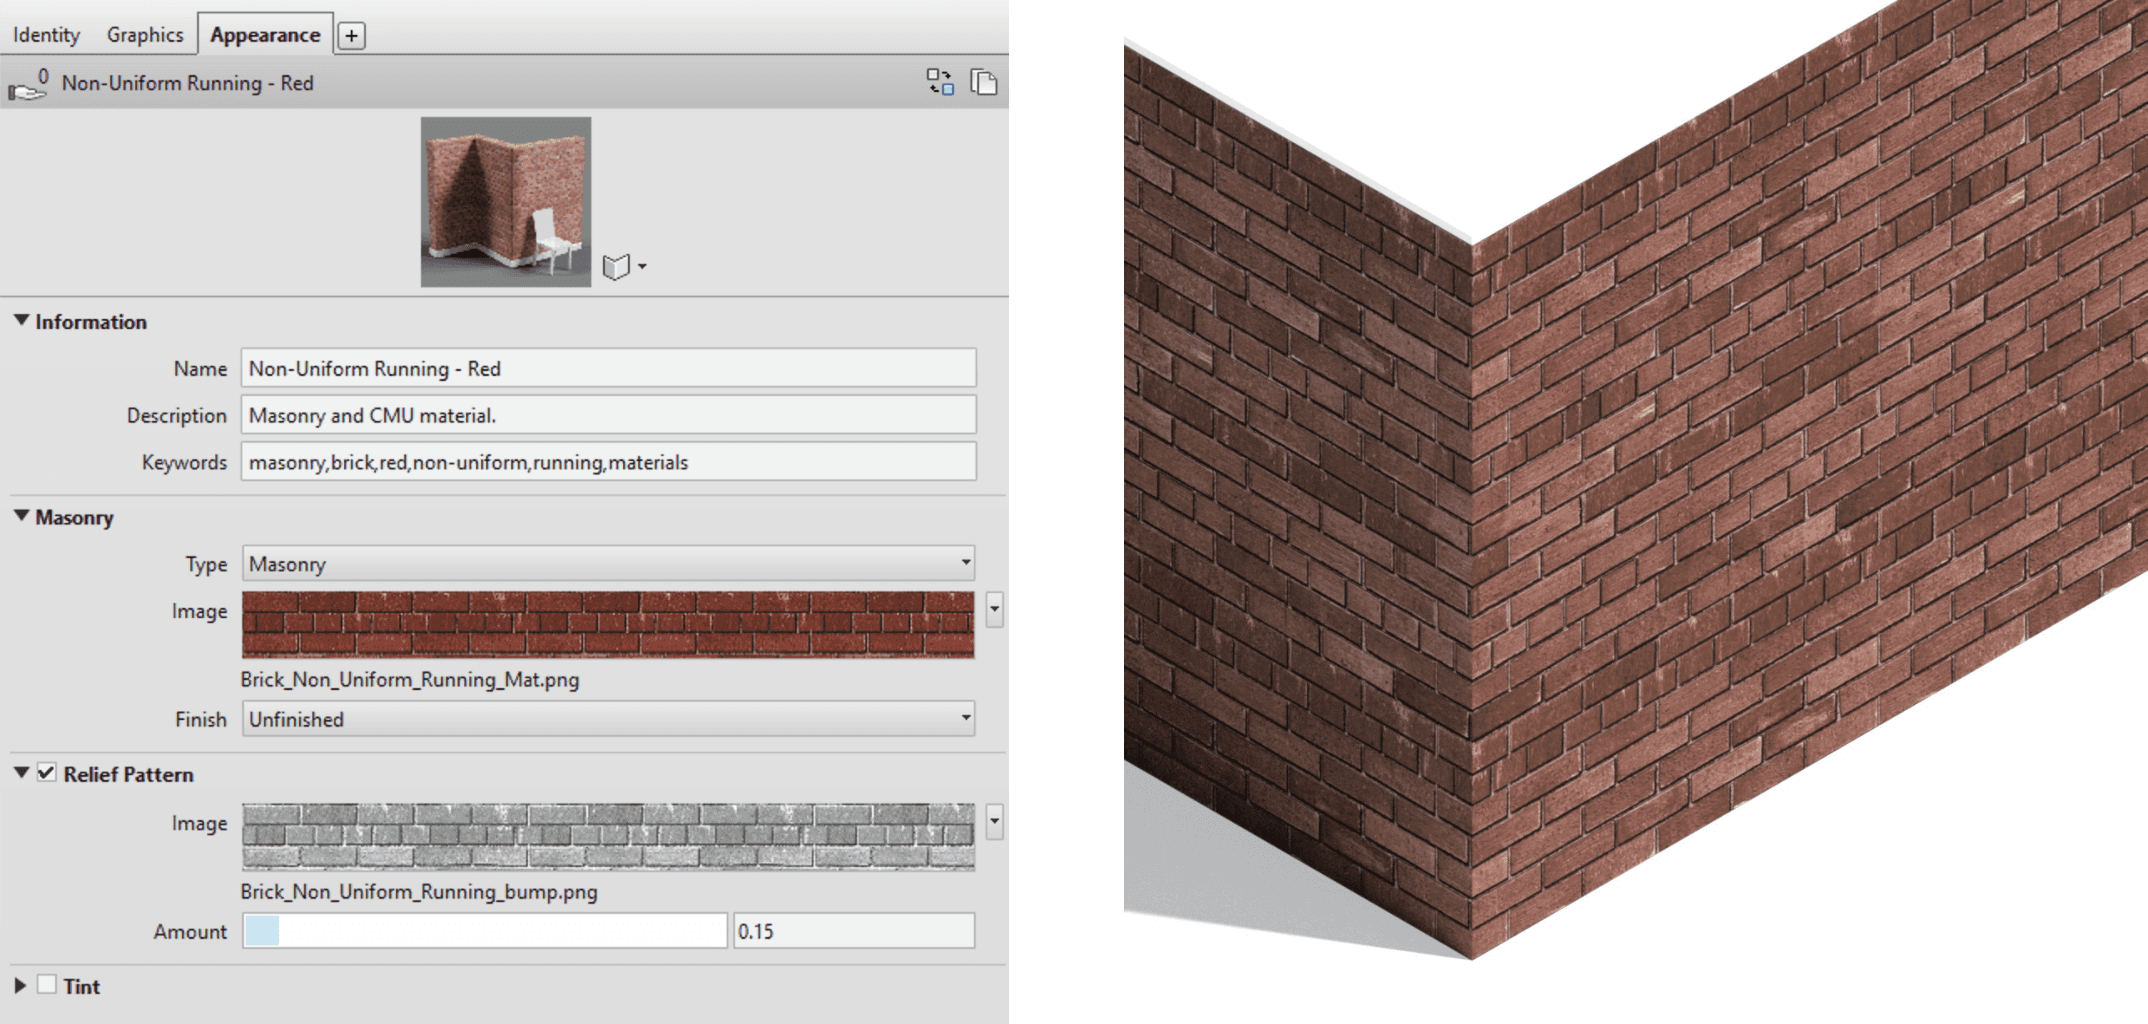
To represent real-world objects, Revit materials often rely on linked image files, or “image maps”. An example of an image map might be a photo of bricks or concrete, which would then be displayed on the surface of a wall to which the material is assigned.
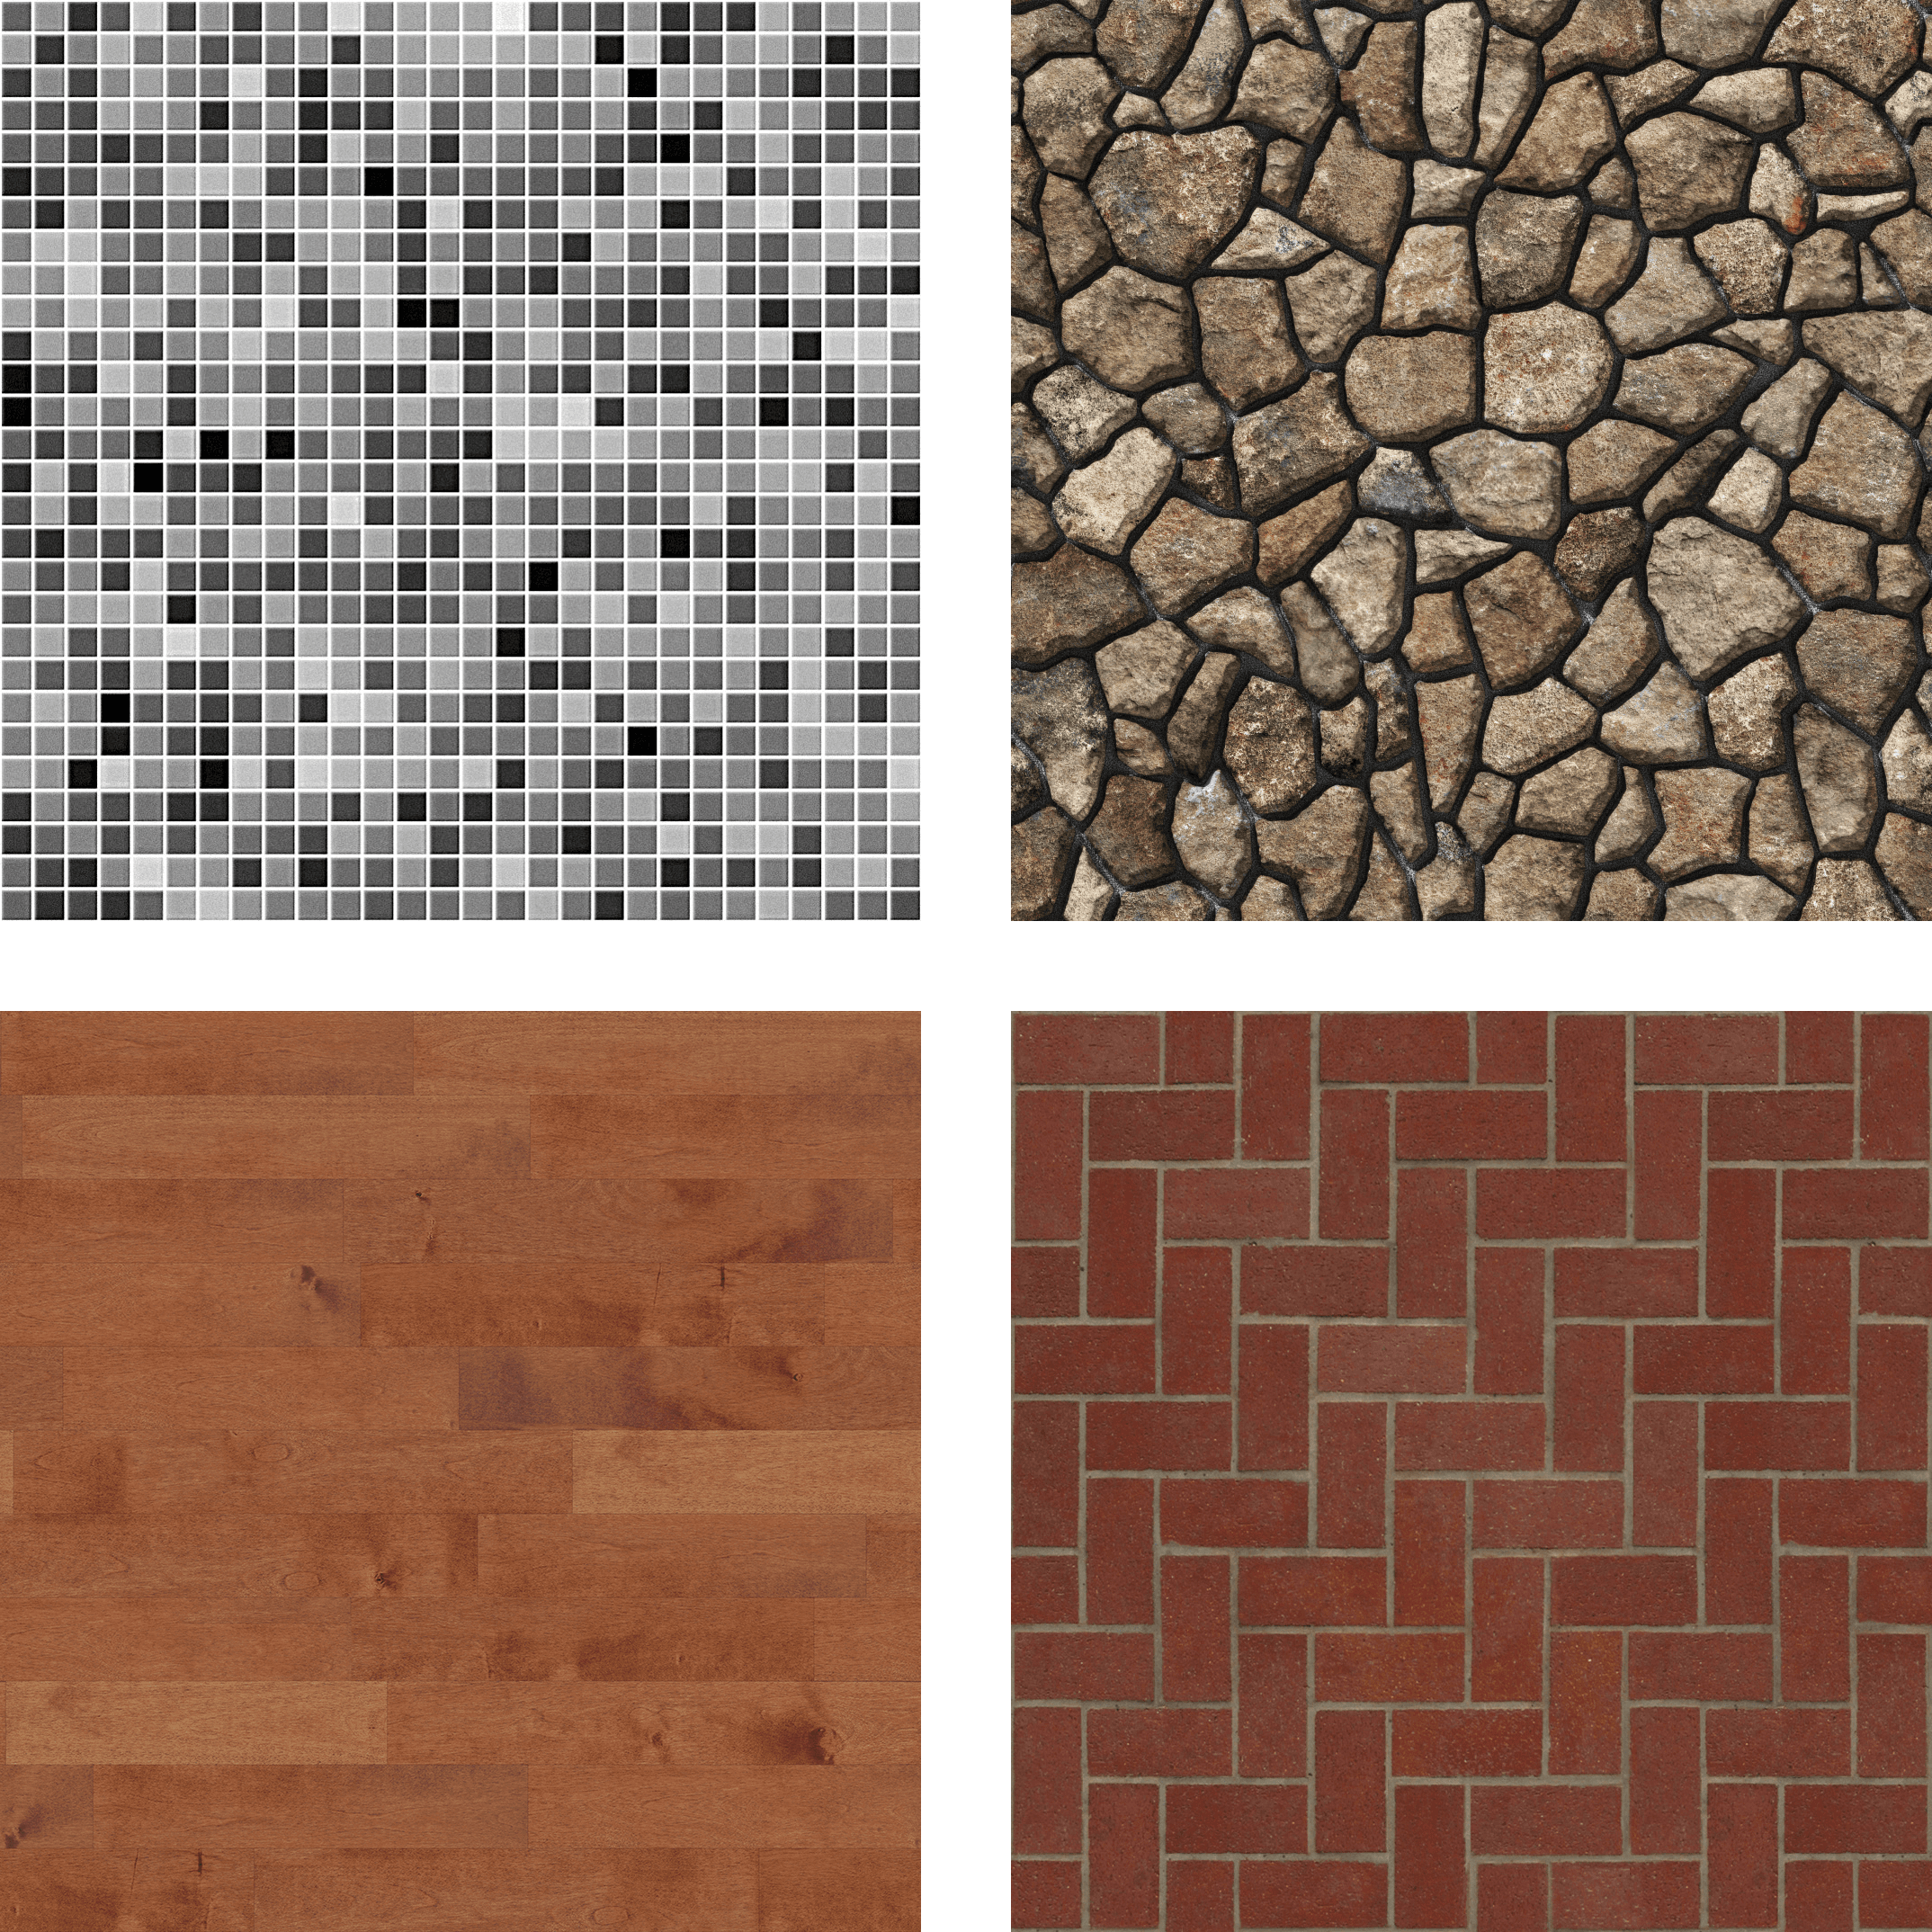
As well as defining the base appearance of the material, image maps can be used for various visual properties such as its bumpiness, relief or roughness.
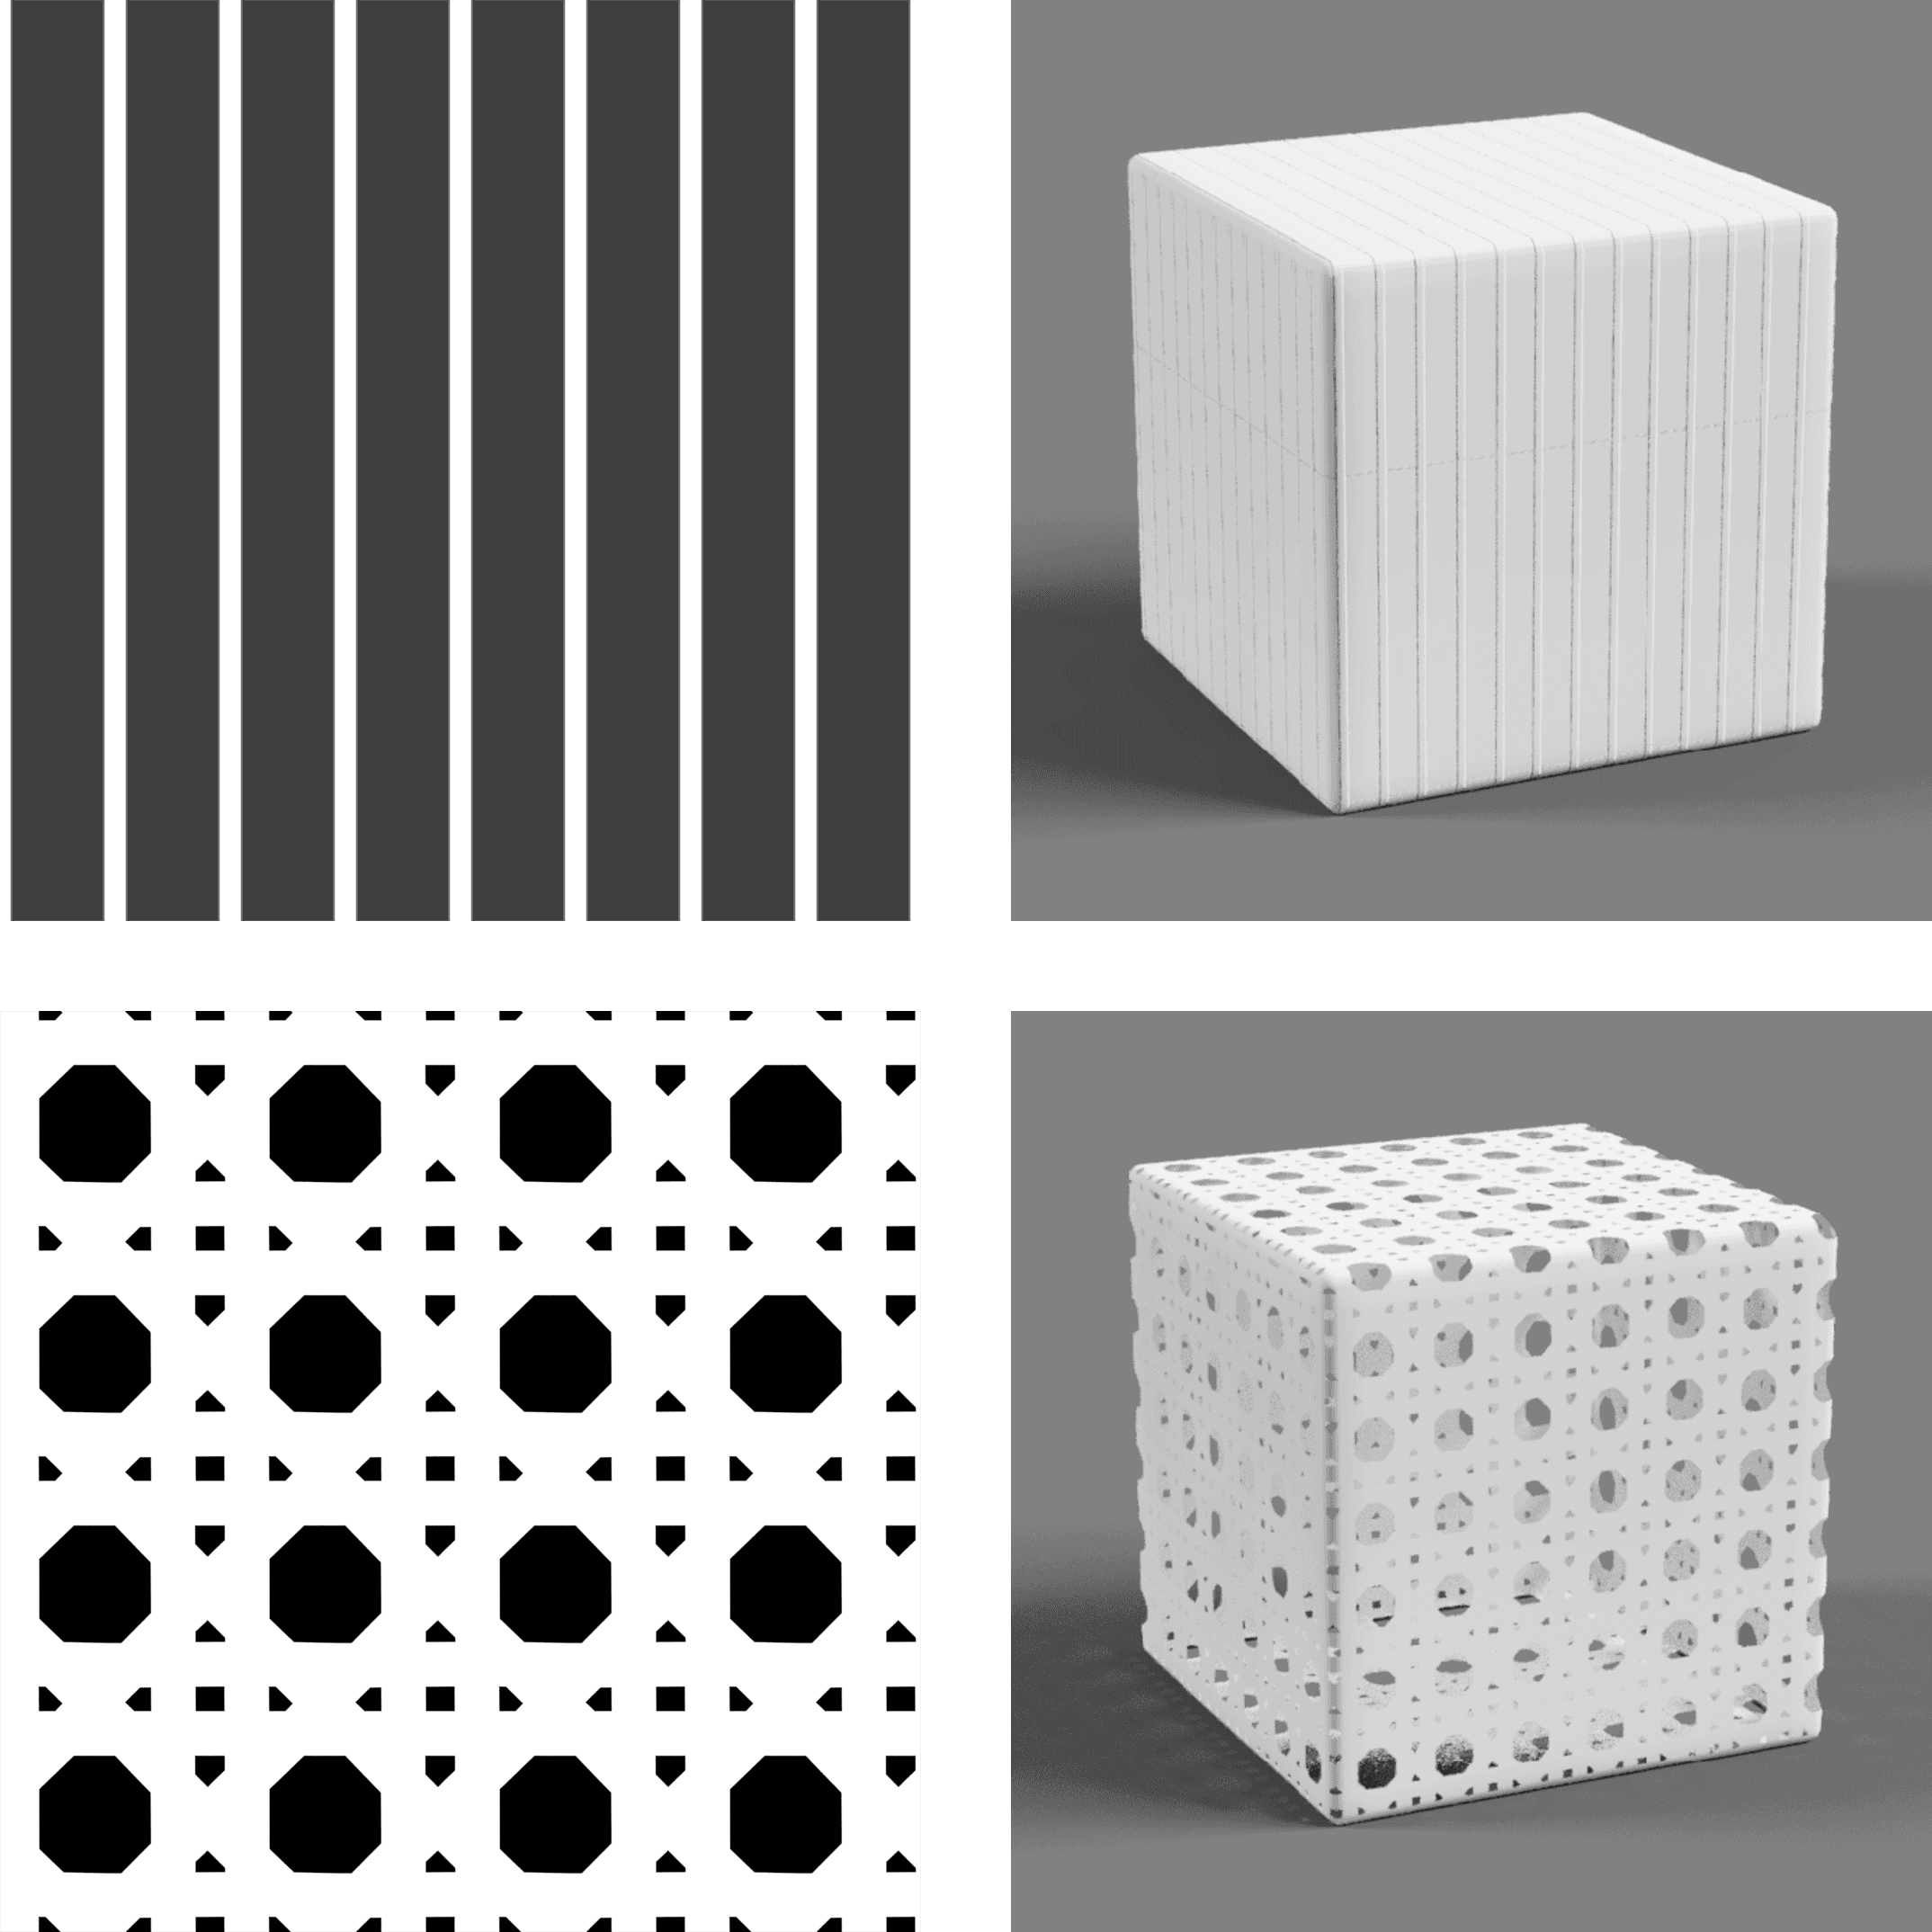
Image maps add a lot to a material’s visualization, but they are a real pain to manage. They are not stored within model or family files, and instead need to be linked from a local or network folder by whoever creates the material. If someone else later opens a model and can’t access the same folder, renderings and realistic views will not appear correctly. This most often happens when the user creating a material links an image file from their local drive - renderings look correct for them but not for anyone else.
Kinship solves this problem by automatically managing the location of image maps used in materials. When you upload materials to your library, Kinship captures their associated image maps and stores them as part of the material in Kinship. When team members later load those materials from Kinship into a model, the image maps will automatically be placed in a consistent, accessible folder location.
But we’ve gone one step further. Kinship will automatically sync image maps for ALL materials used in your tracked projects, whether they come from your Kinship library or anywhere else. Team members can link an image map from any location – local or network – and when the model is synced, all other users with Kinship installed will see the material and its image maps as intended.
What was previously a major headache is now something you’ll never have to think about again.
The Right Information For Your Whole Team
When searching for the right material, different team members and projects will have their own criteria. For some, the visual appearance in renderings is enough. For others, the embedded material performance data might be more important.
We’ve built tailored listing and item pages for materials with the aim of helping everyone on your team get the information they need before loading materials into Revit.
On the page for an individual material, you will see a preview in various visual styles – hidden line and consistent color, which are used for drawings, and realistic, which is used for renderings.
If that isn’t enough, this page also includes a neatly presented view of each of the material’s five property tabs in Revit, including:
Identity
The basic descriptive information about the material, including its class.
The Keynote and Mark (Revit Annotation) parameters are frequently used for tagging materials in drawings and linking to specifications. Kinship allows admins and content managers to edit both parameters (along with the Class parameter) directly from the web.
Graphics
Controls how the material appears in non-rendered views including hidden line, shaded, and consistent colors view modes.
The materials page displays the colors and fill patterns used by the material, helping you to verify the material will look right in drawings.
Appearance
As described already, the appearance asset determines the visual properties used in realistic and rendered views.
You can see the specific image maps, colors and other settings, to understand in detail how the material’s appearance is constructed.
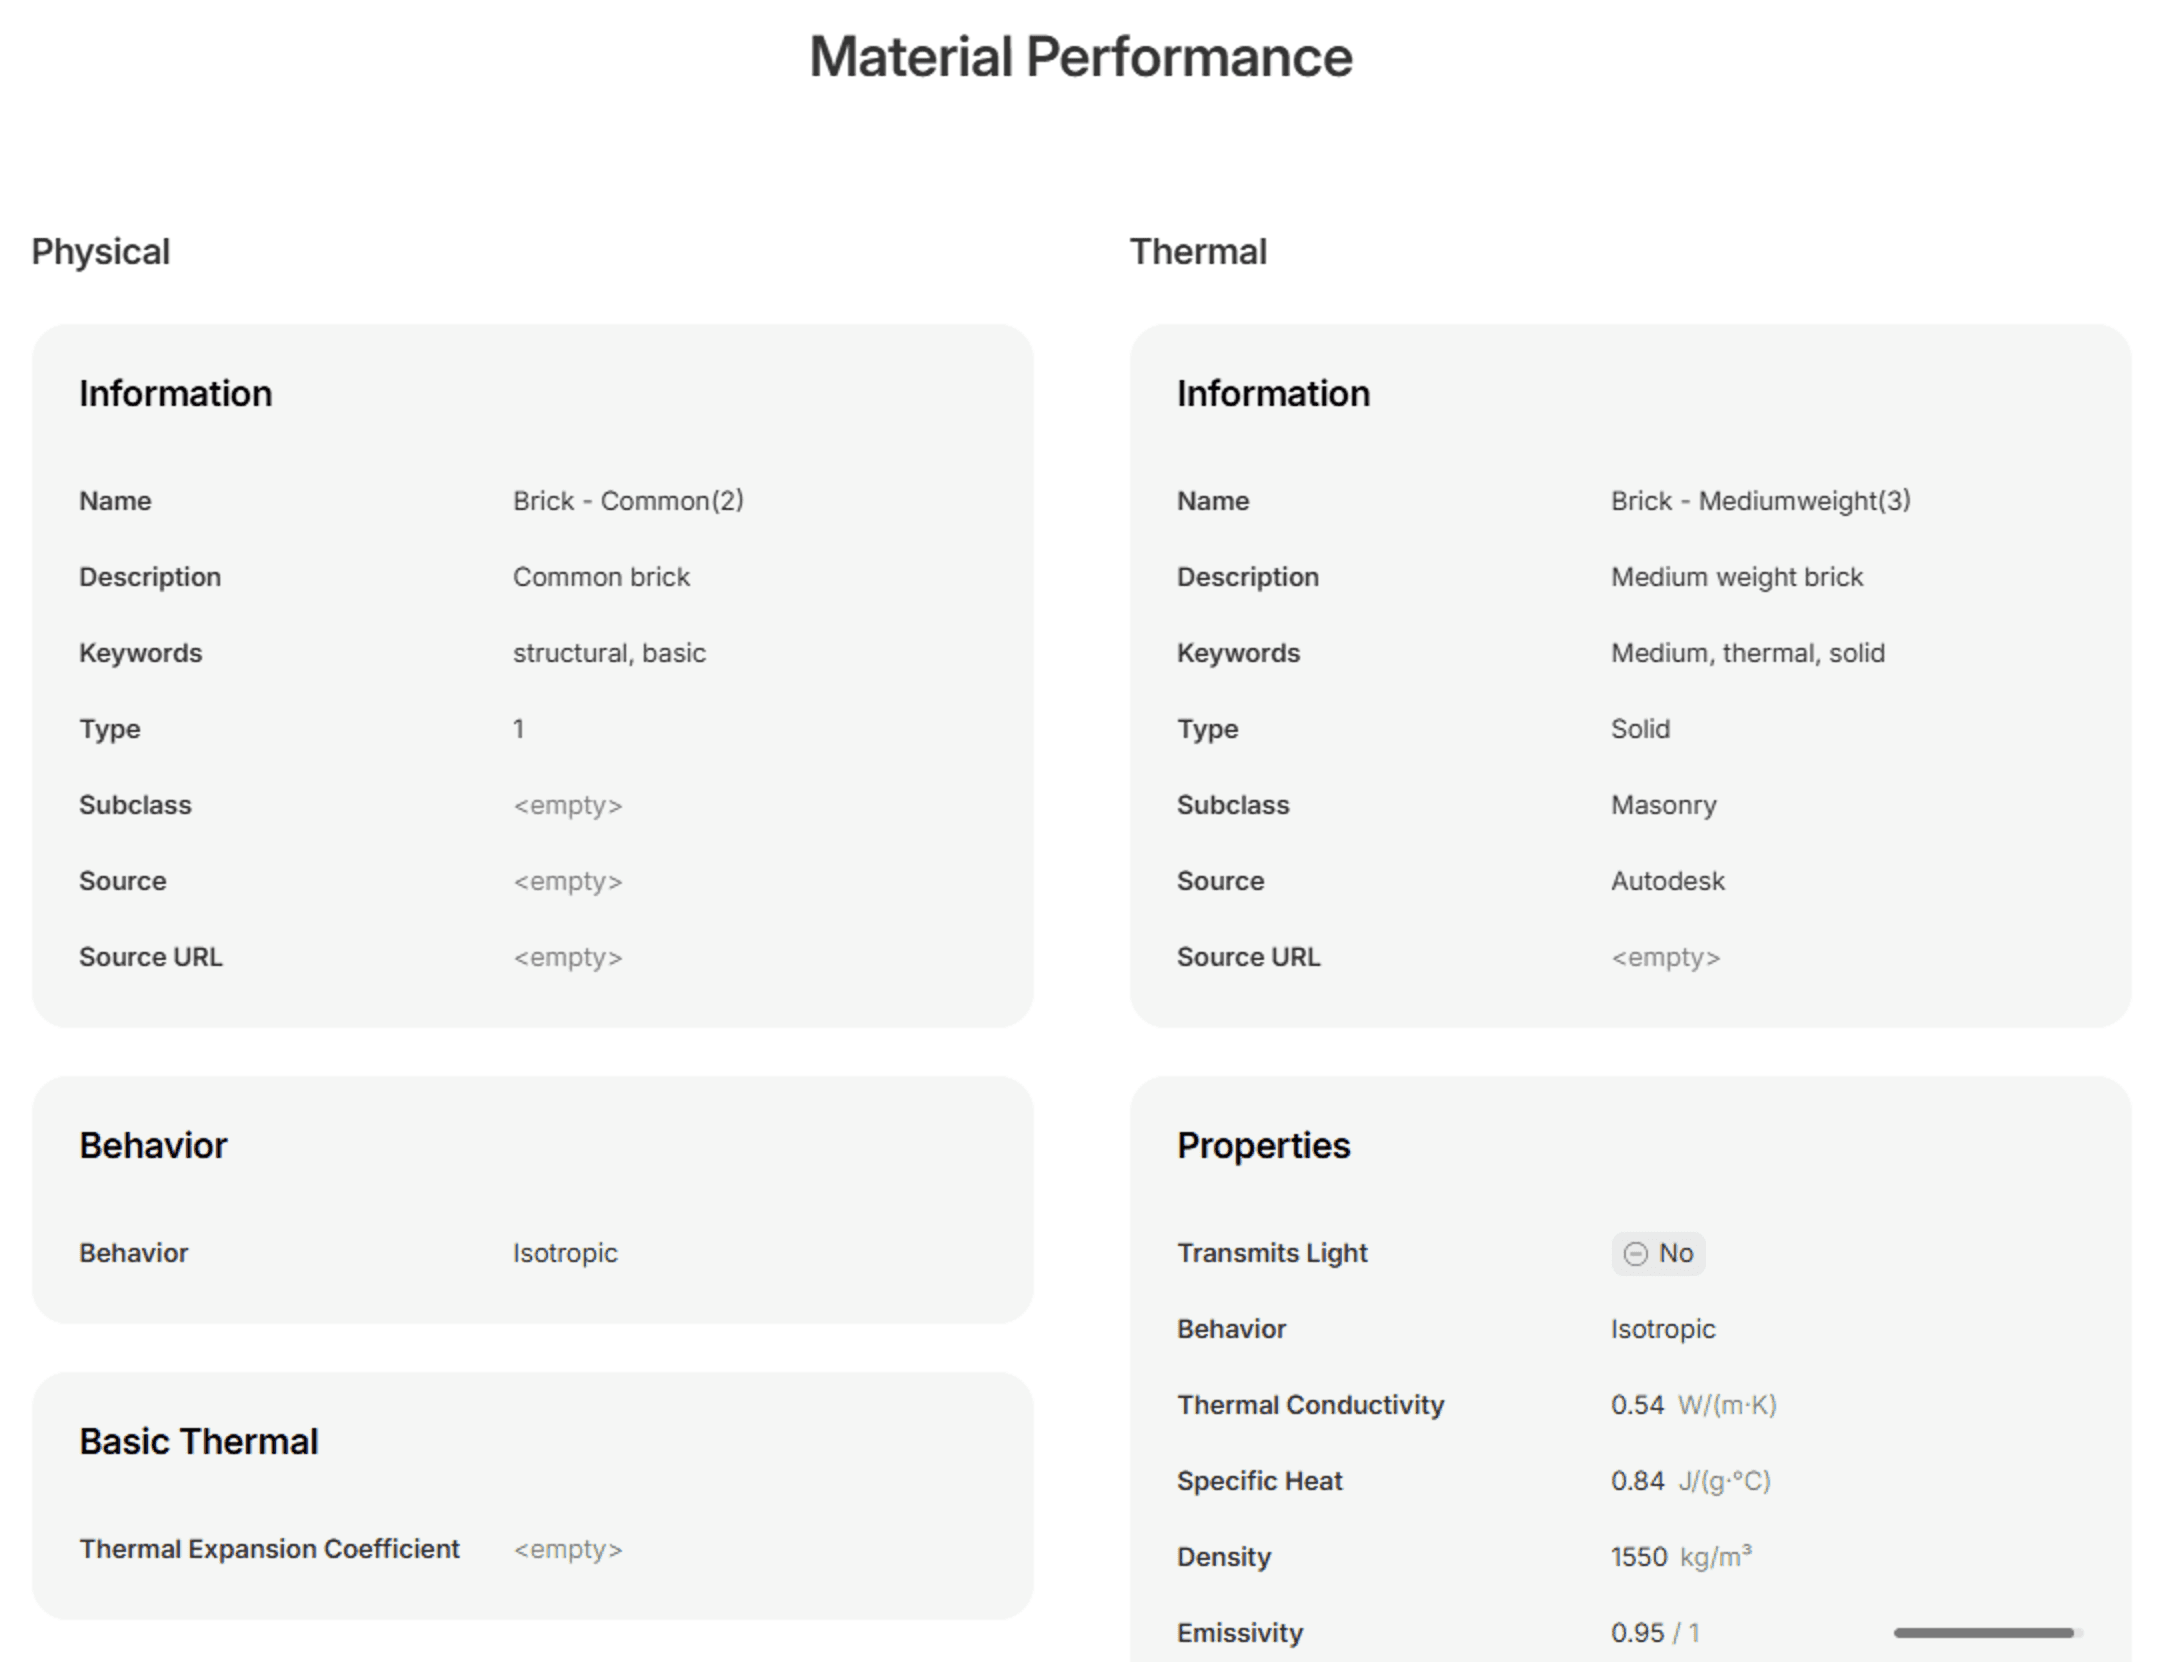
Physical and Thermal
The physical and thermal assets contain properties related to the structural and thermal performance of the material. They can be used to inform analysis and simulation in other tools.
Engineers and building performance specialists can see a read-out of the physical and thermal asset data, allowing for quick reference without opening Revit.
You’ll also see two other new sections available for every material:
Attachments
We’ve made it easier to attach images, documentation and other files to materials for reference by your team. Administrators can now also feature files to display them in a gallery view on the material’s page.

Reference Links
You can now add hyperlinks to materials, pointing your team to external documentation, intranets, manufacturer product data and any other resources.
Utilities (for Administrators)
Kinship has always allowed administrators to extract a range of useful insights about your library and content.
Going forward, we want to make it easier to review your content with ready-made utilities - without relying on custom dashboards or complex sorting and filtering.
At the bottom of the Materials section, you can find a range of utilities allowing you to better manage your library - displaying recently added, updated and deleted materials, and materials that are either widely used or underused in projects.
Using the Recently Added utility in combination with our new Edit Info tool, you can review materials brought in from tracked models and confirm their names and metadata are accurate.

Materials in Models
Materials are also now tracked in models (if enabled in your team settings by an administrator). Visit the Content page for a model or project to see materials alongside other content types. In this new release, you can see which materials are being used in your models and add any exemplary materials directly to your library.
Wrapping Up
We’re excited for you to try this new release and see how much easier Kinship makes working with materials.
With powerful search, flexible organization, rich material data and seamless handling of image maps, your team can focus on design rather than wrestling’s with Revit’s limitations.
Whether you use materials to create technical drawings, generate renderings or to drive analysis and simulation, Kinship has you covered.
Materials fill a critical role in Revit projects. If families define the shape and size of elements in your model, materials define what they are made of, and how they appear.
Materials are key ingredients in drawings, visualization, environmental analysis and much more. And yet managing them in Revit has always been something of a nightmare.
Our new materials release is designed to fix that. Kinship now brings you the most powerful Revit materials management system available.
In this article, we’ll walk through how Kinship helps you build a materials library your team will love to use.
At a Glance
Before we dive into the details, here’s a quick look at what you can do with materials in Kinship.
Search and Load
You can now search and load materials into models and families through the Revit add-in or from the web.
Materials are notoriously difficult to share between Revit models. Kinship makes this process seamless, allowing you to load in just the materials you need and automatically handling any image maps associated with them.
Materials that have been loaded will appear in the materials browser, ready to be applied to families and geometry.
Organize and Browse
The Kinship library now includes a dedicated Materials section, which allows you to organize your materials according to the needs of your projects and team.
Using classes, your team can browse for the materials they need within practical, real-world categories.
We’ve also created tailored listing and item pages that provide richer, more relevant detail, helping you to compare and choose the right materials before loading into Revit.
Key Features
The new Materials section can also be found at the top of the Library page. Materials represent an entirely new kind of content in Kinship, and so we’ve given them special treatment.
Much more than a simple list of materials, Kinship provides multiple ways to search for, browse and manage your material library. Below we outline a few of these key features. For a more detailed walkthrough of all new features, check our documentation.
Material Class
On real-world projects, the list of materials can grow quickly, often making it difficult to find the ones you need.
This is where an underused feature in Revit, the material class, comes in. Classes allow you to group materials into practical categories such as Concrete, Glass and Masonry.
Class is a parameter in the material’s Identity Data tab. Classes can be used to filter down large lists of materials. Revit’s default project templates include 21 common material classes, but it’s also possible to create your own.
In Kinship, material class is the primary way to organize and browse through your materials. Each material displays its class just like families display their category.
When you upload a material to your library, Kinship captures the material’s class from Revit. But we’ve taken this a step further, allowing you to update the class for your materials directly on the web, so you can quickly organize your library into suitable categories.
Appearance Assets
Materials determine how Revit elements look in views (plans, sections, etc) and renderings generated in Revit, as well as when exported to external visualization tools such as Enscape, TwinMotion and D5.
Every material includes an appearance asset, seen in its Appearance tab. The appearance asset is a collection of settings controlling how the material looks in realistic views and renderings.
Revit provides 19 appearance asset types, ranging from flexible general-purpose types like Generic, Opaque and Transparent to specialized types intended for specific materials such as Concrete and Glazing.
The asset type determines which properties you can control, such as base color, bump and relief, transparency, and many others.
In the new Materials section of the Library, advanced users familiar with creating materials can search and browse for materials based on their asset type. Each material’s item page also displays a breakdown of the settings and image maps used in the appearance asset.
For anyone interested in learning more about appearance assets, I recommend taking a look at our previous post on Mastering Revit Materials.
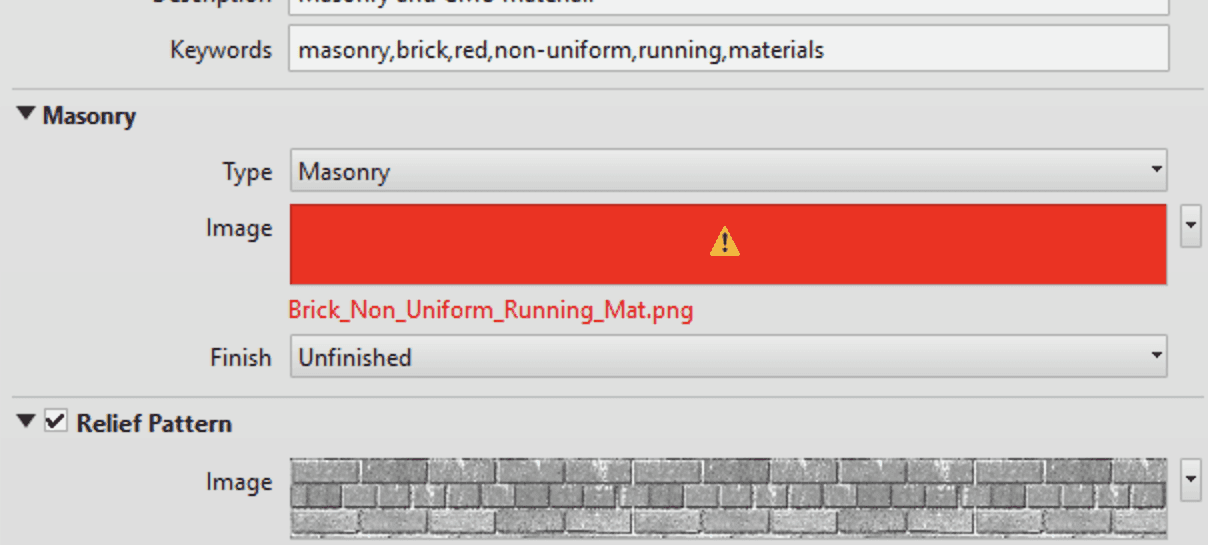
Image Maps
To represent real-world objects, Revit materials often rely on linked image files, or “image maps”. An example of an image map might be a photo of bricks or concrete, which would then be displayed on the surface of a wall to which the material is assigned.
As well as defining the base appearance of the material, image maps can be used for various visual properties such as its bumpiness, relief or roughness.
Image maps add a lot to a material’s visualization, but they are a real pain to manage. They are not stored within model or family files, and instead need to be linked from a local or network folder by whoever creates the material. If someone else later opens a model and can’t access the same folder, renderings and realistic views will not appear correctly. This most often happens when the user creating a material links an image file from their local drive - renderings look correct for them but not for anyone else.
Kinship solves this problem by automatically managing the location of image maps used in materials. When you upload materials to your library, Kinship captures their associated image maps and stores them as part of the material in Kinship. When team members later load those materials from Kinship into a model, the image maps will automatically be placed in a consistent, accessible folder location.
But we’ve gone one step further. Kinship will automatically sync image maps for ALL materials used in your tracked projects, whether they come from your Kinship library or anywhere else. Team members can link an image map from any location – local or network – and when the model is synced, all other users with Kinship installed will see the material and its image maps as intended.
What was previously a major headache is now something you’ll never have to think about again.
The Right Information For Your Whole Team
When searching for the right material, different team members and projects will have their own criteria. For some, the visual appearance in renderings is enough. For others, the embedded material performance data might be more important.
We’ve built tailored listing and item pages for materials with the aim of helping everyone on your team get the information they need before loading materials into Revit.
On the page for an individual material, you will see a preview in various visual styles – hidden line and consistent color, which are used for drawings, and realistic, which is used for renderings.
If that isn’t enough, this page also includes a neatly presented view of each of the material’s five property tabs in Revit, including:
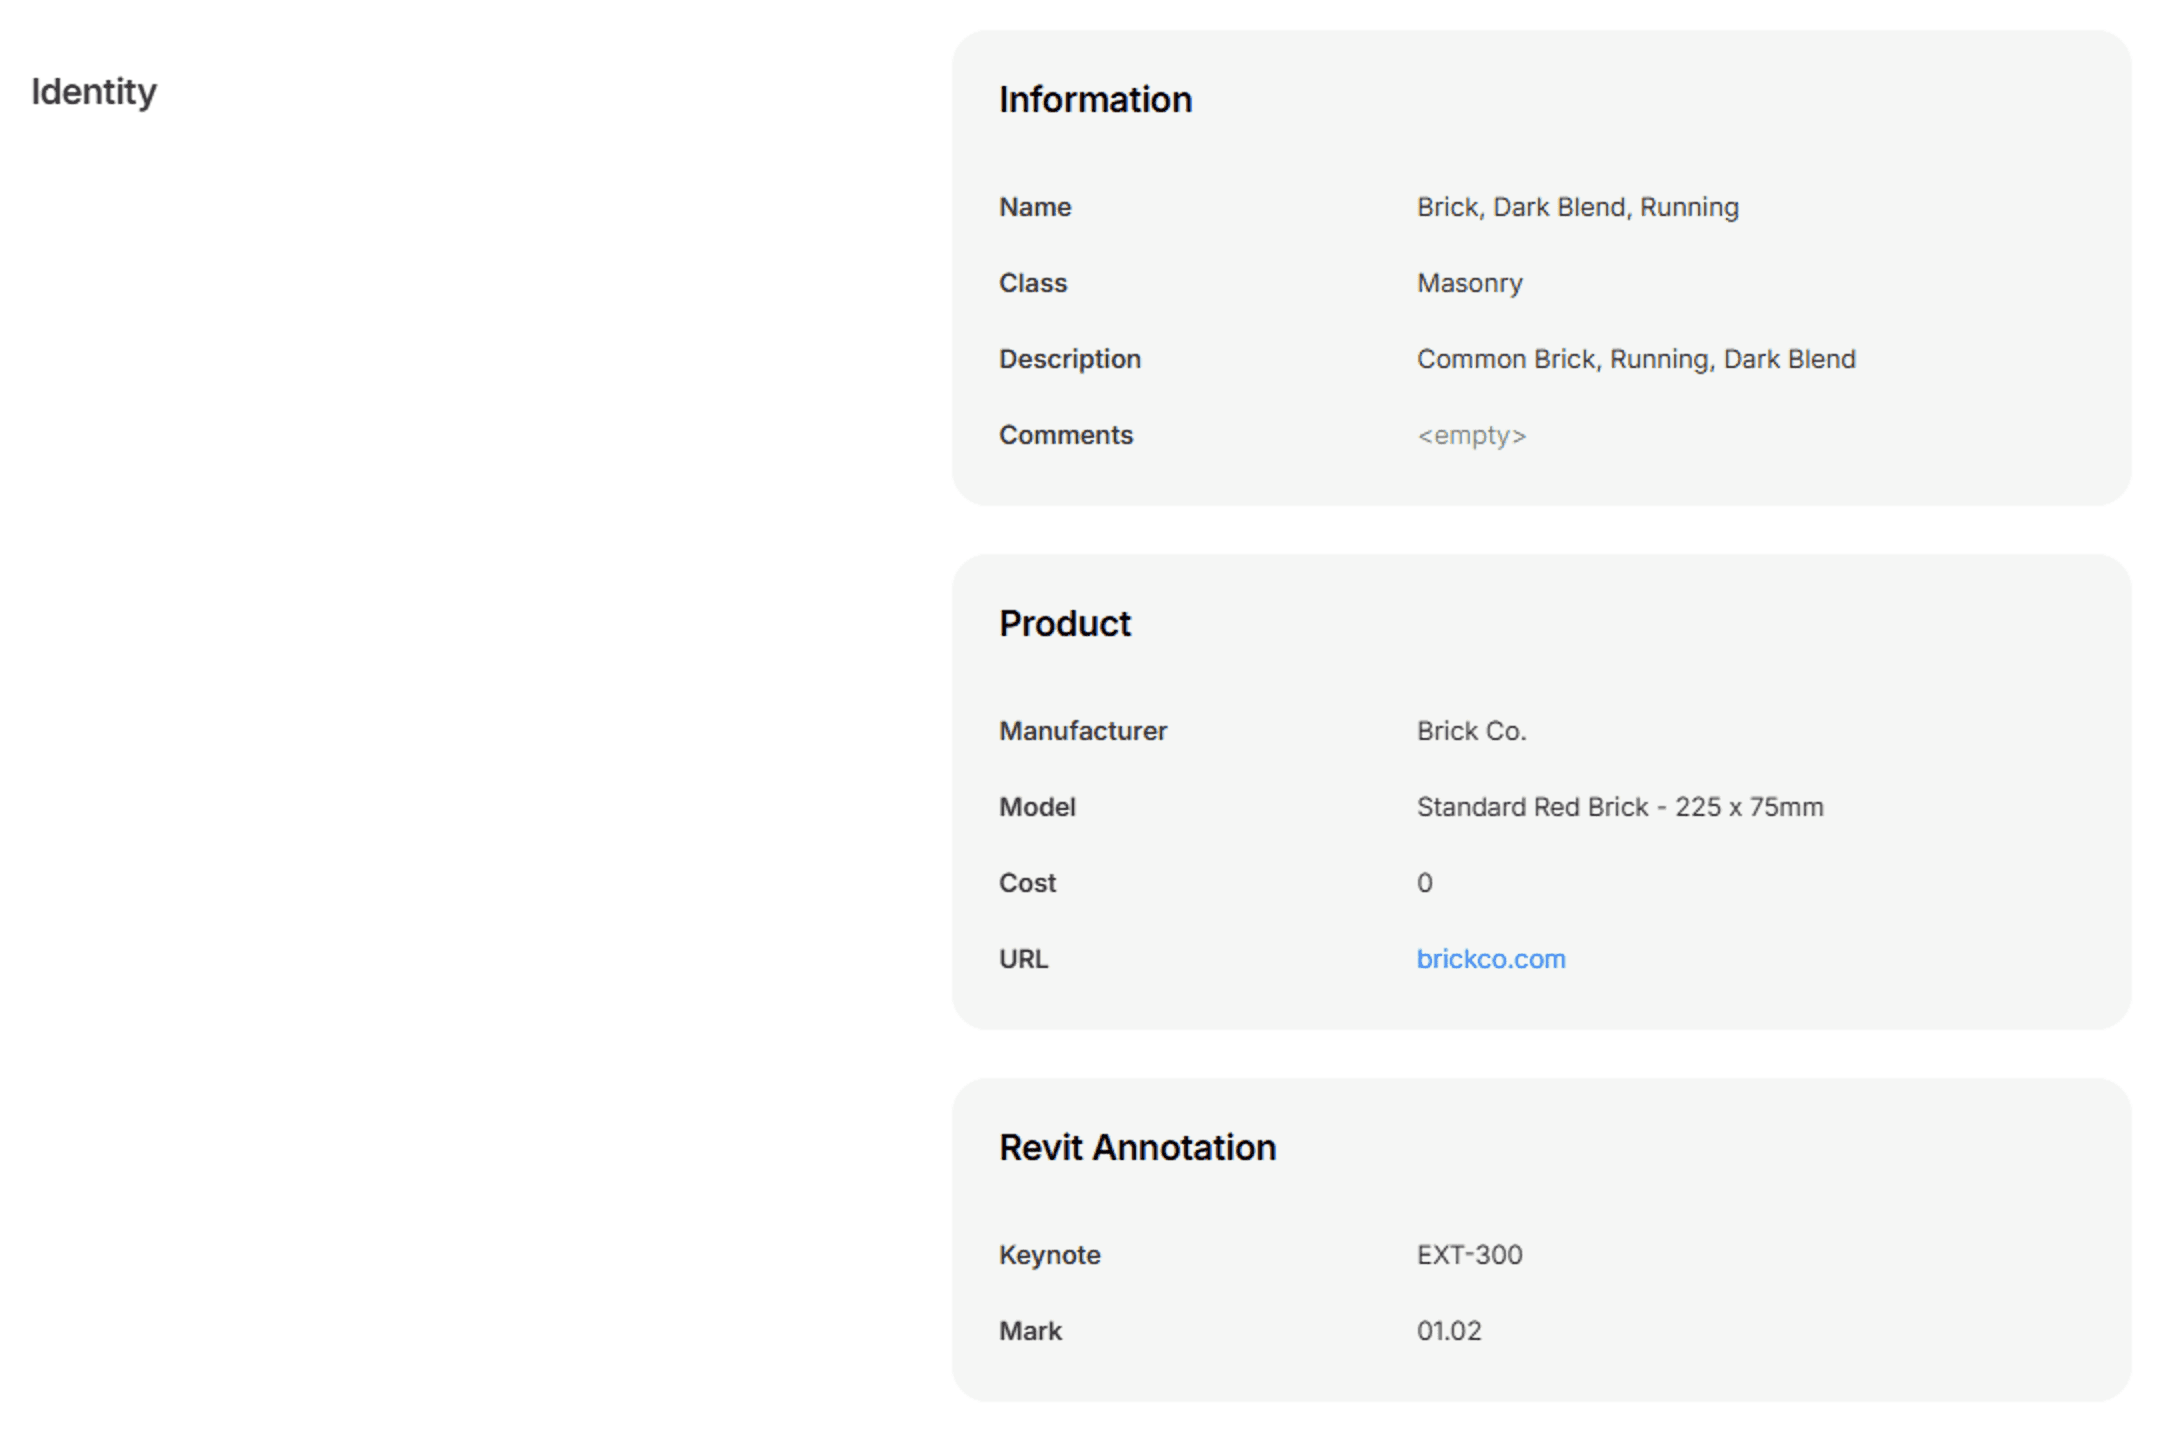
Identity
The basic descriptive information about the material, including its class.
The Keynote and Mark (Revit Annotation) parameters are frequently used for tagging materials in drawings and linking to specifications. Kinship allows admins and content managers to edit both parameters (along with the Class parameter) directly from the web.
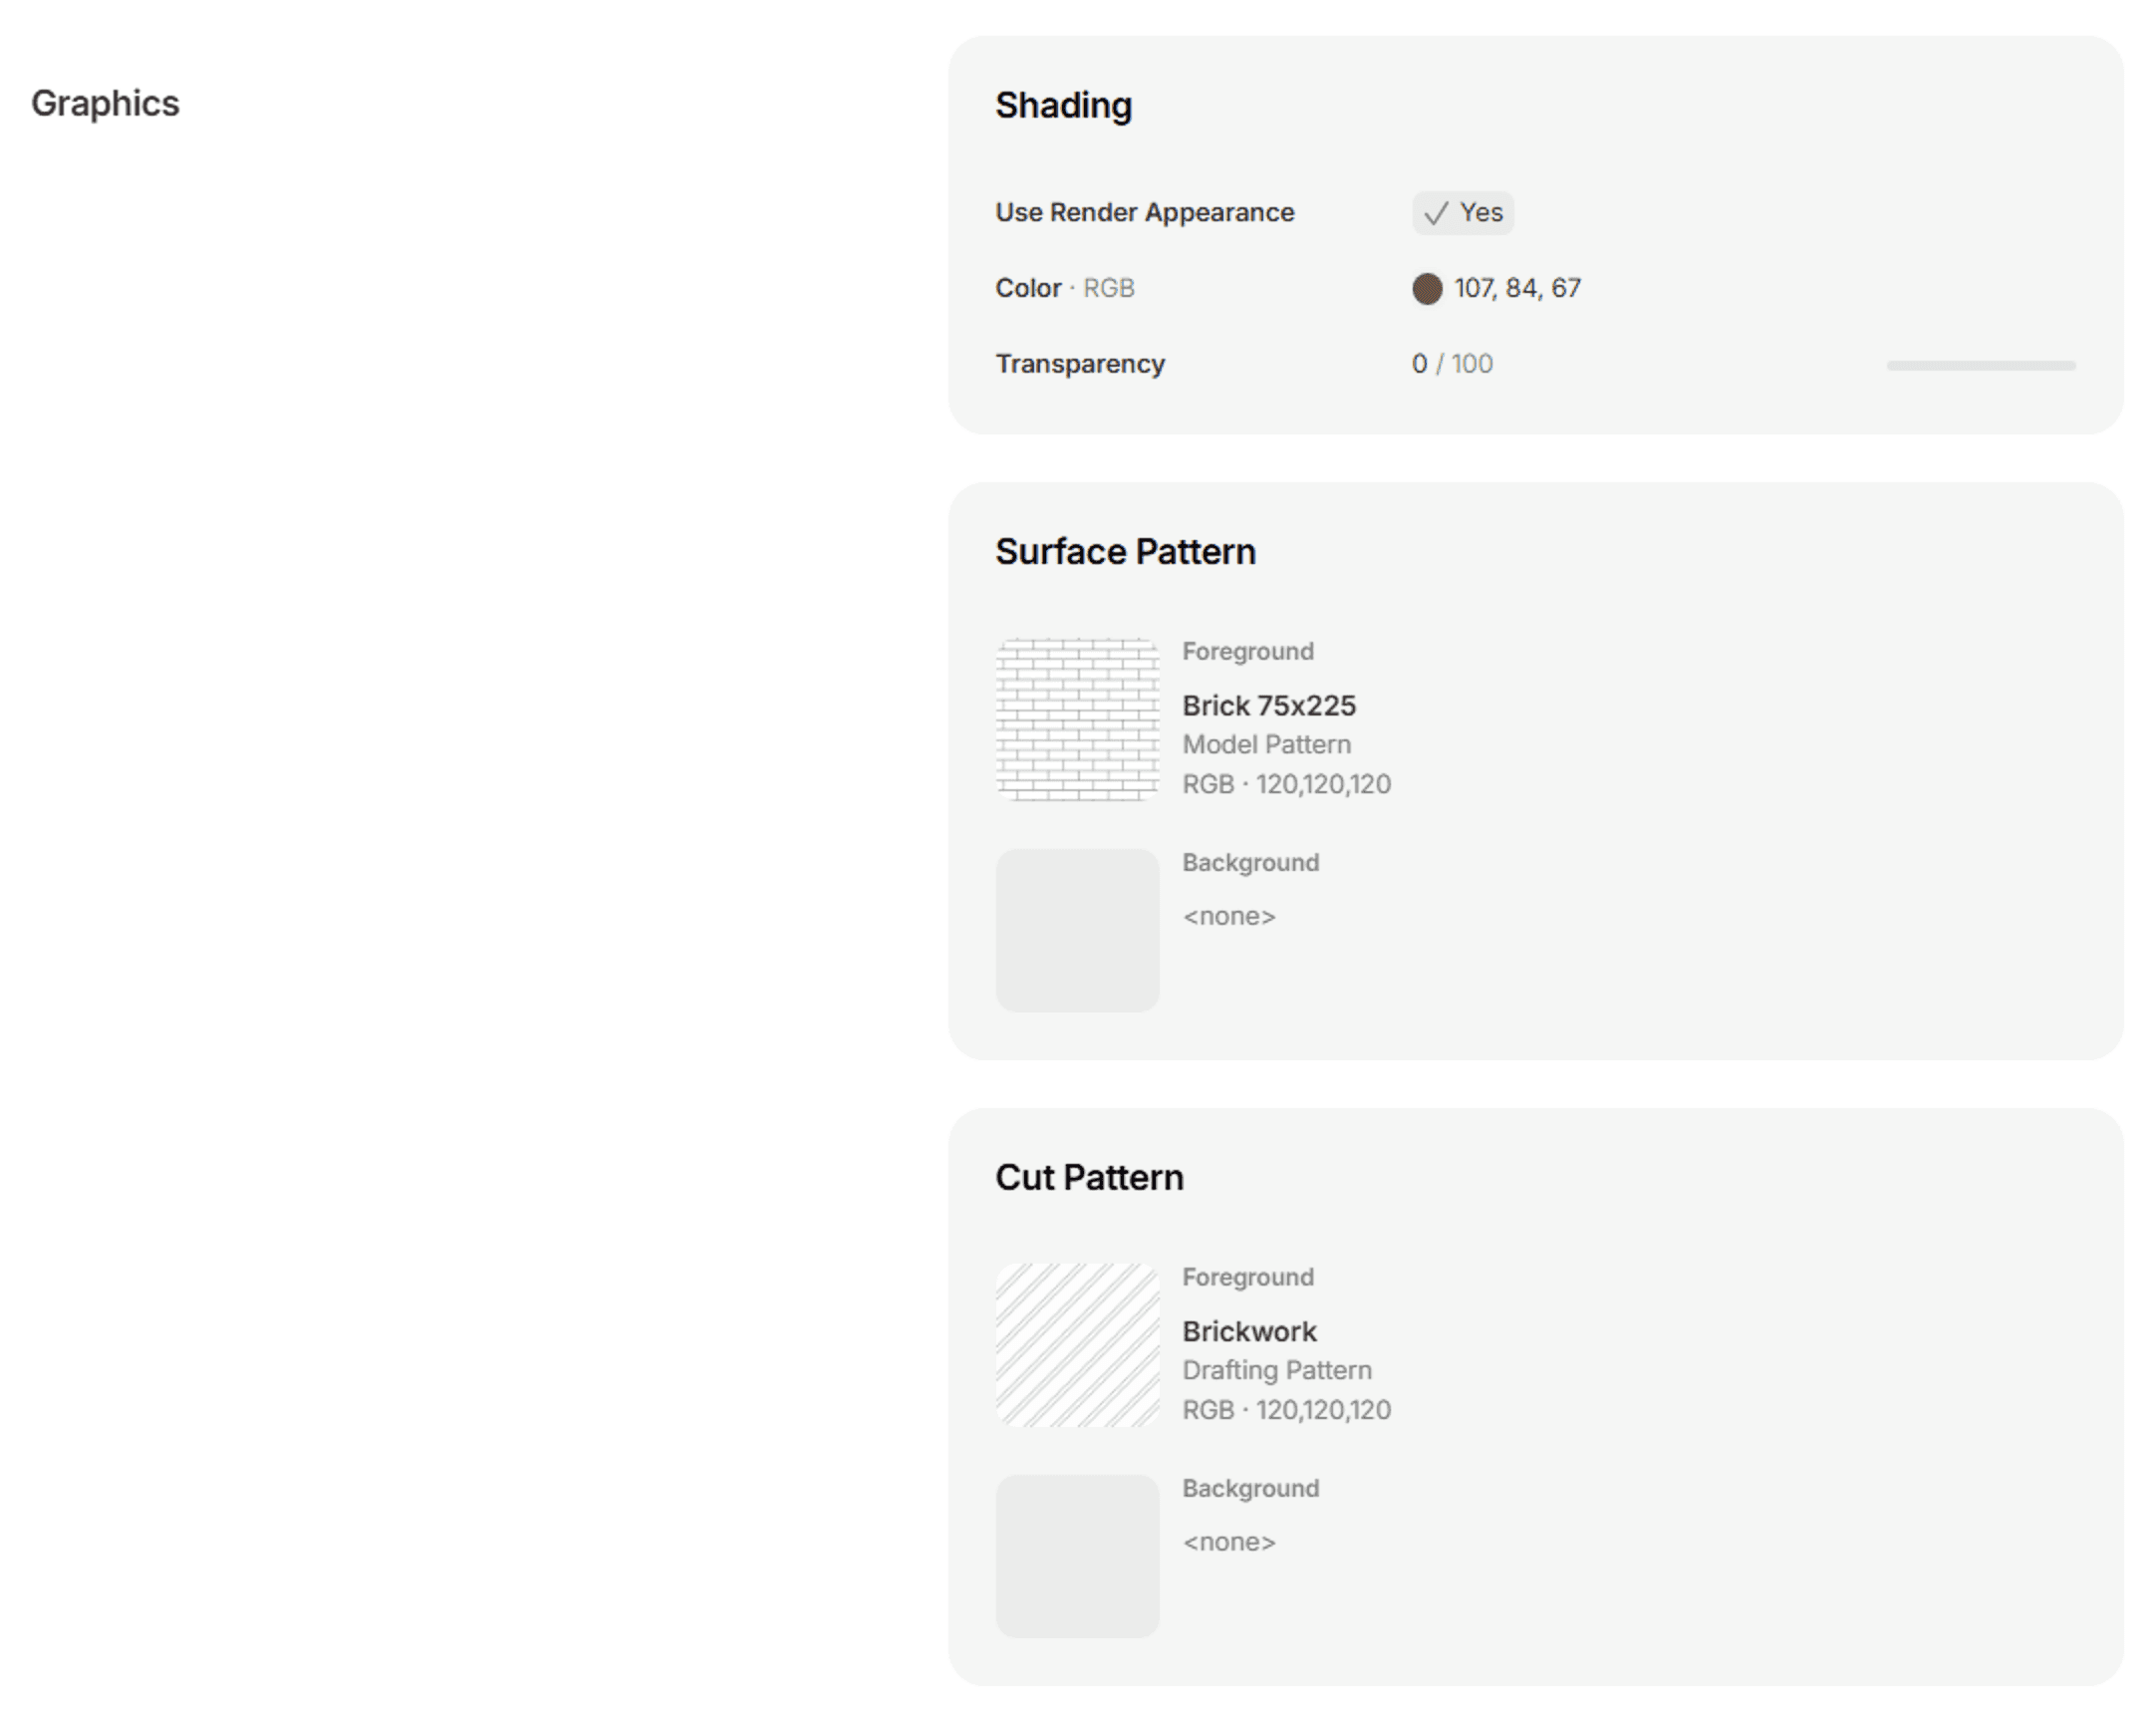
Graphics
Controls how the material appears in non-rendered views including hidden line, shaded, and consistent colors view modes.
The materials page displays the colors and fill patterns used by the material, helping you to verify the material will look right in drawings.
Appearance
As described already, the appearance asset determines the visual properties used in realistic and rendered views.
You can see the specific image maps, colors and other settings, to understand in detail how the material’s appearance is constructed.
Physical and Thermal
The physical and thermal assets contain properties related to the structural and thermal performance of the material. They can be used to inform analysis and simulation in other tools.
Engineers and building performance specialists can see a read-out of the physical and thermal asset data, allowing for quick reference without opening Revit.
You’ll also see two other new sections available for every material:
Attachments
We’ve made it easier to attach images, documentation and other files to materials for reference by your team. Administrators can now also feature files to display them in a gallery view on the material’s page.
Reference Links
You can now add hyperlinks to materials, pointing your team to external documentation, intranets, manufacturer product data and any other resources.
Utilities (for Administrators)
Kinship has always allowed administrators to extract a range of useful insights about your library and content.
Going forward, we want to make it easier to review your content with ready-made utilities - without relying on custom dashboards or complex sorting and filtering.
At the bottom of the Materials section, you can find a range of utilities allowing you to better manage your library - displaying recently added, updated and deleted materials, and materials that are either widely used or underused in projects.
Using the Recently Added utility in combination with our new Edit Info tool, you can review materials brought in from tracked models and confirm their names and metadata are accurate.
Materials in Models
Materials are also now tracked in models (if enabled in your team settings by an administrator). Visit the Content page for a model or project to see materials alongside other content types. In this new release, you can see which materials are being used in your models and add any exemplary materials directly to your library.
Wrapping Up
We’re excited for you to try this new release and see how much easier Kinship makes working with materials.
With powerful search, flexible organization, rich material data and seamless handling of image maps, your team can focus on design rather than wrestling’s with Revit’s limitations.
Whether you use materials to create technical drawings, generate renderings or to drive analysis and simulation, Kinship has you covered.


Kinship
The best way to manage Revit content
Kinship
The best way to manage Revit content
Kinship
The best way to manage Revit content
Similar Articles


Never miss an update with our monthly newsletter
Get the latest company news, product updates, blog posts and free Revit content from Kinship. Delivered directly to your inbox no more than once a month.
By submitting your email, you agree to receive newsletter emails.
Support
Never miss an update with our monthly newsletter
Get the latest company news, product updates, blog posts and free Revit content from Kinship. Delivered directly to your inbox no more than once a month.
By submitting your email, you agree to receive newsletter emails.
Support
Never miss an update with our monthly newsletter
Get the latest company news, product updates, blog posts and free Revit content from Kinship. Delivered directly to your inbox no more than once a month.
By submitting your email, you agree to receive newsletter emails.
Support